Ritual of the Mahjarrat
- This article is about the quest. For the actual ritual, see The Ritual of Rejuvenation.


| |
| Release date | 14 September 2011 (Update) |
|---|---|
| Members only? | Yes |
| Quest series | Mahjarrat quest series |
| Official difficulty | Grandmaster |
| Official length | Extremely Long |
| Developer | Paul Gower, Chris L, Stephen R |
Ritual of the Mahjarrat (sometimes referred to as simply ROTM) is the fourth Grandmaster quest, released on 14 September 2011. It is the sequel to three quests; A Tail of Two Cats, While Guthix Sleeps and also continues the Mysteries of the Mahjarrat storyline where The Temple at Senntisten left off. During the quest, syzygy occurs and the Mahjarrat begin their ritual for the eighteenth time, meanwhile, the three Dragonkin released from their prison after the events of While Guthix Sleeps cause havoc across Gielinor. It has been confirmed that, while this is the finale to the Mysteries of the Mahjarrat, Rise of Lucien and Arrav quest sub-series, the Dragonkin, Zaros and Azzanadra storylines will continue.
Official description
| “ | They signal their arrival with a devastating shriek, and leave nothing but ash, flame and destruction in their wake. All tremble in fear as they approach, and the ground rumbles in sympathy.
Word of an attack on the isle of Mos Le'Harmless has reached the ears of Sir Tiffy Cashien. Should you choose to accept his request, you will be sent to aid Sir Tendeth who has come across a great threat to the world; one far greater than the pirates he was originally sent to investigate. Do you have the stomach to investigate this new threat, and see it through to the end? Or will you leave the world to its doom while you cower in fear? |
” |
Walkthrough
| Start point: | |
| Members only: | Yes |
| Official difficulty: | |
| Description: | None |
| Length: | Very long (4 - 6 hours) |
| Requirements: |
Note: It is possible to begin the quest without the required skill levels. |
| Items required: |
Recommended:
|
| Enemies to defeat: | • Armoured zombie (level 85) • General Khazard (level 250) |
NOTE: It is wise to read ahead before you start a new chapter, so you know what's coming.
A New Mission

- Items to bring: None.
- Recommended items: none
- *Despite the requirements being non-boostable, the quest can be started and continued (if one doesn't have the required skill levels) up until a part where they are required.
Speak to Sir Tiffy Cashien in Falador Park. Select the "Ritual of the Mahjarrat" option and ask if there are any new missions or anything you can help with. Sir Tiffy will comment that you have good timing and tell you that he has an operative on Mos Le'Harmless, who is gathering information on attacks on human settlements, and who has been asking for assistance. He tells you to go to The Other Inn and ask for Sir Tendeth, who is undercover and dressed like a pirate. Finish talking to Sir Tiffy, and when you say you'll "get right on it", you'll be given an offer to be teleported to Mos Le'Harmless. If you don't accept the offer to be teleported now you cannot request it from Sir Tiffy later.
On Mos Le'Harmless
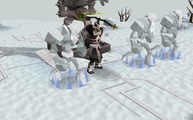
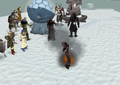
Go to Mos Le'Harmless and find Sir Tendeth. He will be in the larger of the two pubs, dressed like a pirate wielding a dagger. You'll ask if the pirates are planning to attack cities, and Tendeth will assure you that pirates are only a threat to other ships. He will tell you that what he has been investigating is a threat to everything, up to and including fortified cities. You will be warned that Mos Le'Harmless jungle is about to become harder to get around and will remain that way until the conclusion of this part of the quest. If you say you wish to continue, a screech will be heard as well as ominous music.

The screen will start shaking and a cutscene will show flashes of fire outside the inn. When it clears, some of the pirates outside will be lying injured on the ground. Speak to Sir Tendeth again and he will tell you to look outside to see if anyone saw anything, while he calms his nerves.
Reports from the pirates as to what happened will vary. The injured pirate to the south will tell you that something threw a fireball at him, but he didn't see what did it. The injured pirate to the north will have no information. Other pirates will say they saw things like giant fire-breathing albatrosses, bony dragons that stood like men and could speak, enormous vultures and giant bats.
Into the Jungle
- Items needed: None.
- Recommended items: Food, weapons and armour for defending against level 70 Jungle horrors that attack with melee, an Anti-dragon shield or other protection against Dragonfire, and a Falador teleport. (A bank is available.) The citharede robe set will allow you to quickly restore your prayer at the local musician, reducing the need for food and eliminating the need for prayer potions.
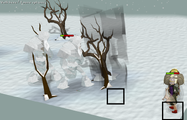
After speaking with various pirates, the information you acquire will suggest that the attackers flew into the jungle. You'll need to take weapons and armour with you into the jungle, as it is a multi-combat area populated by aggressive Jungle horrors. Sir Tendeth suggests you take a look out of the gate to see what is happening out there. He will join you as you leave, but a fireball will hit and kill him before you can go anywhere.
You'll duck for cover on the west side of a tropical tree. You'll then decide to run, using the trees as cover, to head east to where the fireball came from. Follow the charred ground and burnt vegetation as a guide. If you remain in the open for too long you will be hit by a fireball and returned to inside the town gates with some heavy damage taken. Make sure to rest on the west side of trees. Some trees have jungle plants next to them that block movement. It is not possible to hide behind the Jungle Grass. Be careful to avoid trying to move to the west side of a tree if such a plant is there as you will stop in the open and likely be hit by a fireball. The fireballs are dragonfire so wielding an Anti-dragon fire shield will lower the damage to around 150 life points. (Being under the effects of an Antifire or Super Antifire potion lowers it further, to around 100 or less.) It is recommended to turn off auto-retaliate, as it can pull you out of cover, potentially causing death. You will not respawn on Mos Le'Harmless if you die.

It's possible to hide behind the lower trees, you don't need to use big palm trees only.
If you attempt to use 'rum' to reach Trouble Brewing, you will be prevented from doing so, and will receive the message: An unknown power seems to prevent you from drinking this item, as tasty as it seems.
It is possible to hide behind the deposit box and go from there to the tree directly east of the corner of the stockade which will trigger the cutscene.
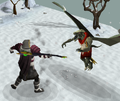
Once you reach the far edge of Trouble Brewing, in the eastern trees just north-east of the building, you will activate a cutscene. Sithaph, Strisath and Sakirth will be discussing how destruction eases "the rage" and say that it is still building, and that someone must be using "it". They decide to attack a larger settlement and that they must continue their search for the "False User". They then fly off, and you say you must report back to Sir Tiffy.
The Temple Knights' Archives
- Items needed: Catspeak amulet (e).
- Recommended items: None.
(If you have a Cramulet you CANNOT get a catspeak from the Sphinx unless you drop your cramulet and speak to the Sphinx with a pet cat/hellcat currently following you or she will ignore you. You have to dismantle your cramulet then go to Burthorpe and talk to Hild to get it enchanted at the cost of 5 death runes.)
Return to Falador Park and speak to Sir Tiffy. Tell him what you saw. He will take you to the Temple Knight archives where you will meet Lady Table. Lady Table will produce a dossier on the Dragonkin. She says it's mostly compiled of 'sightings' reports, similar to those on the 'Reprehensible Snowgre'. A note from Robert the Strong will be found in the dossier, saying that the "stonetoucher" must take the collar from his reincarnation and use it to get to Kethsi and as a puzzle key once they get there.
Tell Lady Table and Sir Tiffy that Robert reincarnated as a cat named Bob, and that you've researched this for an earlier adventure. Also tell them that you think you're the stonetoucher, because of what happened during your previous mission for them. Lady Table tells you to go find Bob and get his collar. Exit the archive via the door to the east; Sir Tiffy will teleport you back to Falador. Next, use the tracking systems on your catspeak amulet (e) to locate Bob and acquire his collar. To use the amulet, right-click on it and select Open, when you open it use the arrow point that is pointing straight up as the point you use as the triangle is equal on all sides, then click on the whiskers to move the arrow around until the amulet's eyes light up, then head in that direction. Bob's location is different for everyone because he moves around runescape. Once you find Bob, ask for his collar.
The Ruins of Kethsi
- Items needed: Bob's collar, Spade (can be acquired in the area, toolbelt spade does not work), pickaxe (can be acquired in the area), at least eight empty spaces
- Recommended items: Food, in case of falling obstacles (Summer Pies are recommended, as they boost Agility as well as restoring lifepoints)
- Note: mining boost does not work, a minimum level of 76 mining is required
You must now use the fairy ring travel system to get to the destroyed realm of Kethsi. The code you must dial (found on the reverse side of Bob's collar) is D-I-R followed by A-K-S. Once at Kethsi, you will begin exploring with the aim of finding out the motives behind the Dragonkin attack. In order to do this, you must collect the four Tetrahedrons found scattered around the isle of Kethsi, which together form the crest of the overwhelmingly powerful Dragonkin.
Once you arrive at Kethsi, head north and begin by searching the rubble in the centre of the island which should then give you the item, Tetrahedron 4. Next, go south east and up on to the ramp nearby onto the second floor of the destroyed building. Now go north and use Bob's collar on the wall design. You will need to position Bob's collar correctly into the pattern of the wall design order to open a concealed compartment. This is done by positioning the collar vertically, with the "Bob" side face up, in between the centre-right and far right piece. Once the collar is in this position, you must move it up until it slots into place.
You will then receive five items. Two notes (Note to Robert the Strong and Note to You), Tetrahedron 1, A statue arm and Robert's necklace. The necklace plays no role in the quest and may be banked the next time you are at one.
Go south-west and jump across the ledge. Use the statue arm you acquired from the hidden compartment on the statue, found across the Agility shortcut on the same floor as the wall design. A plank will then appear. Cross this plank and then go down the ladder in front of you. Head east and up the wall jump shortcut, which you can run up. Once up, climb the wall to the west, followed by taking the swing-pole to the north. Walk-across the beam in front of you, jump over the south gap, and go down the southern ladder twice. Now, squeeze through the pipe to the east of you. Grab the nearby pickaxe and then mine the rocks. Climb-up the wall close by and run across the two walls to the west. Climb across the handholds then go down the ladder. Go east, search the rubble to find Tetrahedron 3 and a Strange device. After getting Tetrahedron 3 , go back up the ladder twice and then jump to the floor to the south. Slide-down the roof to the south and then go south to walk across the plank. Now search the nearby rubble to find the final piece of the Tetrahedron puzzle, Tetrahedron 2 .
Opening the Underground Room

After you've found all 4 tetrahedrons, go back across the plank and go down the stairs. Once down, use all your tetrahedrons on the "indentations" to receive a code of 4 letters. Check your quest journal for your code. You will have to roam the plane of Kethsi and use the strange device to check your current coordinates.
Coordinates start in the bottom left corner at AAAA. The first and third letters are the larger horizontal and vertical coordinates respectively, found in the grid below, and the second and fourth letters are the specific coordinates inside that cell. So North from FEBG is FEBH then FECA, for example. West from FBCA is FACA then EHCA and so on.

Once you have found your spot, dig there with a spade, and you'll find a Kethsian key. Go back to the dungeon of Kethsi. Go through the southern door and search the southeast bookcase for a scroll. Read the scroll to learn a new spell. Search the bookcase west of it and read the journal.
Making Plans in Falador
Return to Falador and report to Sir Tiffy (make sure the journal is in your inventory). He will read it and the information will worry him a lot. He suggests you visit Idria, Thaerisk and Akrisae in Falador Castle. Do so and speak to any of the three. Tell them what you have discovered from Dathana's message: the Dragonkin grow more powerful as the power of the Stone of Jas is used. And now that Lucien is using the Stone a lot, the Dragonkin may become powerful to a degree that they may destroy all of Gielinor. Idria will be very concerned and, as always, Akrisae will be sceptical. Suddenly, Ali the Wise will show up and contribute additional information. His research and knowledge of astronomy have pointed out that the Mahjarrat Ritual of Rejuvenation is about to commence. This seems like another problem to Akrisae, but Ali is able to make a plan out of it. Since Lucien will definitely be using the Stone at the Ritual, and several other Mahjarrat have the desire to dispatch him, you may ally yourselves with said Mahjarrat to counter the combined power of the Stone, the Staff of Armadyl and Lucien and defeat him. Akrisae will need convincing that having the aid of the Mahjarrat is necessary, for he believes all of them are as evil as Lucien. Sarcastically ask him if he wants everyone on the planet to die ("So, instead, you'd risk all our lives?"), to which he will respond more calmly. He suggests there must be another possibility, convince him there isn't ("I can't think of another way."). He will still think of them as evil and deceitful, thus you must agree with him to keep a distance ("Yes, we'll have to be careful."). Finally, tell him that you will do the work ("I will risk my own life to negotiate.") Note: incorrect answers set you back one in the dialogue rather than the beginning.
The group decides to try to get some of the Mahjarrat themselves to help in thwarting Lucien, and you volunteer to investigate the ritual site first. Akrisae gives you 4 teleorbs, to try to teleport the Stone of Jas away during the ritual. Ali gives you Arrav's heart, which you must use during the ritual to try to break Zemouregal's control of Arrav, whom Ali thinks Zemouregal will be using, during the ritual. Finally, Ali thinks that Azzanadra may be their closest ally, so you must visit him first.
Help from Azzanadra
Head to the Senntisten Temple and talk to Azzanadra. Ask him about the quest and he will be surprised that you know of him attending the Ritual and assumes that Ali must have told you for a good reason. You will tell him of the proposed alliance, of Lucien and the Stone. He will reveal that his spies have informed him of Lucien's possession of the Staff, but that he himself is not familiar with the Stone. You will briefly explain it to him and he will set you on another task. Azzanadra has stored some of Zaros's power in four beacons, which he asks you to place at the Ritual Site, with the northern and southern and western and eastern ones facing each other, to be able to use the power within to defeat Lucien. You will get the beacons and say goodbye.
Preparing the Ritual Site

- Items needed: Ring of visibility, Rope, and all the items from previous step.
- Recommended items: Super energy potions, food to heal from waterfiend attacks inside Ghorrock or alternative is pray range/mage, a weapon to speed up killing the guard, protection from dragonfire, and a Spade.
Head to Ghorrock, the site on which the Ritual of Rejuvenation will take place. It is highly recommended to bring an Anti-Dragon Shield and optionally, some Antifire potions too. For full protection from the dragons, use both potion and shield and pray Protect from Melee or Deflect Melee.
Although it is fairly isolated, there are several ways to travel to the fortress:
- Use the Arctic Bear familiar to teleport to the Snowy (Trollweiss) Hunter Area, and then walk west and take the canoe. From where the canoe lands, walk past the cave where Jhallan was frozen, then carry on up the hill to the Ghorrock fortress. This is a quick and safe route and lands you right where your grave would appear should you die.
- Teleport to the Trollweiss Hunter Area using the fairy ring system (code DKS), then walk north and then west to the canoe, which will take you to Ghorrock Fortress.
- Use the Enchanted Lyre to teleport to Rellekka, then run north-east to the Trollweiss Hunter Area then walk north and then west to the canoe, which will take you to Ghorrock Fortress.
- Use the Ardougne/Edgeville teleport lever (or walk) to level 56 wilderness. You will also need a sharp object, such as a knife to slash the web. From here run all the way west past the agility course. Requires passing through the wilderness
- Ice Plateau Teleport (Lunar Spellbook). Requires passing through the wilderness
- Ghorrock Teleport (Ancient Spellbook). Requires passing through the wilderness
- Lava Titan teleport to level 40 wilderness just south east of fortress. Requires passing through the wilderness
- Using the wilderness Teleport portals to randomly travel to high level wilderness. Requires passing through the wilderness
After arriving at Ghorrock, go east and squeeze past the ice blocks, and climb over the pillar in the southern part of the courtyard. There should be a tunnel in the ice-covered wall. Climb through it - you are standing on the Ritual plateau!
Note: You may wish to collect the heat globe beforehand to save some time (see part: Finding the Stone of Jas).
Avoid the Undead broavs that wander the plain. If you come too close to one, a wizard will appear and teleport you to a cell in Zemouregal's fort. You must search the bed for a chisel and spade and lift up the tiles to the east of the cell, however, the chisel and spade in your toolbelt will work. Dig out the tile and then exit the cell and building. To get back to the ritual site, head north or east once outside of the building. When heading back to the plain, be aware there is one Armoured zombie on the south-east side of the castle. A good way to avoid the broavs is to run around the edge of the map, although this makes positioning beacons more difficult.
TIP: When you place a beacon, open up the world map and double click on the map to set a marker on the exact location of your beacon. By doing that, an arrow will constantly be flashing on your minimap in the direction of your marker (which is where your beacon is), allowing you to easily position yourself across from it.
You will now have to place several items around the ritual site; which will aid the allies in battle.
- Northern Beacon
Run west from the ice entrance at the north of the plateau. Place it on the closest tree.
- Southern Beacon
Run directly south, and place the second beacon in the tree southwest of the ritual stone. If this is done correctly, you should have a message saying the south beacon is opposite the northern beacon.
- Arrav's Heart
Place Arrav's heart in the rocks south of the ritual stone. (The site is several paces south of the marker and just a pace or two east.) If you cannot place the heart in a pile of rocks, you are at the wrong place.
- Western Beacon
Run up the west side of the plateau until you find a tree just north of a central line. Place the beacon here. Please note that using the tree just south of the central line will NOT work.
- Eastern Beacon
Run straight east and place the beacon on the tree directly opposite the western tree. You should have a message saying the east beacon is directly opposite the west beacon.
- Rope
Go to the north-west corner of the plateau and look for an 'overhanging tree' (it's a tree that cannot be chopped down). Use a rope on it to create a rope climb from the beach to the plateau. This will be used for your allies to climb to the ritual. (From now on, you can also use the rope yourself to get between the canoe landing site and the plateau without having to go past the dragons around Ghorrock.)
Zemouregal's Fort
- Note: While talking to Movario, the undead Broav that is patrolling nearby can stop you in mid conversation and send you to the jail cell.

Optionally, speak to Movario in the south-eastern corner of the plateau (be careful not to get caught by the broavs). You must now head to Zemouregal's fort, which is due west of Movario, to reduce his control over Arrav. Once you arrive at the castle, you will find the doors to be locked. Kill the armoured zombie outside the main entrance to gain a code key for the main entrance and some decoder strips.
Read the code key; it will have four letters, for example 'AIBF'. Attempt to open the main entrance door. You need to translate the letters into a numeric code that opens the door. Move the first decoder strip (numbered 1) on top of the first letter on the left (in the example which is used here, AIBF, this would be the A) using the arrow keys in the corner; the slot in the strip will reveal a number. This is the first number of the code. Repeat for the second, third, and fourth strips and letters. For example, code AIBF is decoded as follows: Strip 1 goes over the A line, number, in this case a 6. Strip 2 goes over I, revealing 3. Strip 3 goes over B, revealing 0. And finally, strip 4 goes over F, revealing 2. Input the code your receive (here: 6302) into the dials in the centre of the door to open it. Use the arrows up and down to select the number, then click on the right arrow once to input it. Click on the left arrow to remove one number. The first number will be put in the first slot, the second in the second, etc.

Go through the door into the main room on the ground floor and search the crate that is just north of the eastern weapon rack for the storeroom code key. Read this code and use it to open the storeroom door to the west in the same way the main entrance was opened. In the north part of the storeroom, search the crates there to get a reliquary code key and the heart magic notes. Read them, they will reveal that the further Zemouregal is from Arrav, the stronger his resistance will be. Thus, he made a prism from glass to strengthen his grip, but it failed to function. In the Karamja Volcano, Zemouregal found some obsidian, out of which he made a working prism, which he hid in the fort to avoid the clumsy zombies breaking it. Now go into the main room and climb the stairs to the west. Walk through the hallway - Zemouregal and Sharathteerk are in a locked room on this floor. Examine both of them in turn and you will overhear them discussing their plans: their zombie army is full strength and Arrav is in position.

As you walk back, Zemouregal will say that he has spotted the intruder, but it turns out to be just him practising a speech.
Go up the eastern stairs and use the new code strip to enter the reliquary. Once inside, smash the black stone in the south of the room. The black stone is the 'black prism' the notes speak of strengthening Zemouregal's control over Arrav. You are done in the fortress and may exit it.
Finding the Stone of Jas

Talk to Movario again to learn that he senses the Stone of Jas is nearby, hidden somewhere. He also senses shadow magic. Then, while wearing the Ring of visibility, run west along the south side to find a normally invisible shadow pedestal. It is de-activated, thus you should get a heat globe. Investigating the pedestal will reveal it is similar to the ones in Ghorrock.

Return to Ghorrock (watch out for the broavs) and jump over the pillar (remember to have an anti-dragonshield equipped!). Flee from the dragons inside the courtyard and climb the stairs next to the statue of Khazard. It is advised to turn Auto Retaliate off. Enter the dungeon as you did during The Temple at Senntisten (Go east and climb down the stairs. Climb up the handholds next to the door. Go past the smashed pedestal and jump down the wall at the next corner. Enter the trapdoor.). Be wary of the powerful water- and icefiends, who attack you with powerful ranged and magic attacks. Luckily, the basement is a single combat zone. Enter the room to the west and run south. Do not go east - there is a heat globe lying on the ground in the small room. Take it and return to surface. Exit Ghorrock and go back to the shadow pedestal. Put the heat globe on the pedestal. A nearby wall of ice will melt, revealing an entrance in the southern rock wall of the plateau.
If you are not fully prepared for the upcoming fight, return to a bank and prepare before entering! Dying during the upcoming fights will place your gravestone outside Ghorrock, near the entrance to the Ritual Site cavern. Climb the rope to retry. By respawning in Edgeville or Varrock, using the fairy ring code DKS and running to your grave, you should be able to reach your grave within two minutes.
If you try to put heat globe on the shadow pedestal and it says "That could be a good idea, but you've got other things to do first.", it means that the beacons are not aligned properly or that you haven't talked to Movario after smashing the prism. If you are completely sure the beacons are in their correct alignment, talk to Movario to the east of the shadow pedestal, and he will place the heat globe in the pedestal. A few players have removed a beacon from a tree and put in back in the tree - this also has worked.
The Ritual of Rejuvenation

Prepare yourself for the final fight. Pass through the entrance you opened in the south on the plateau. You will be in a large ice cavern. The passage to the east is blocked by an energy barrier that cannot be passed at this time. Go down the other passage and... the Stone of Jas will be there! Touch it to trigger a vision of the past, like during While Guthix Sleeps.
The fortress of Annakarl, which is now known as the Demonic Ruins, will be shown in the year 3100 of the Third Age - the last part of the God Wars. Zamorakian and Saradominist forces are engaged in a huge battle. Commander Zilyana is seen facing the huge archdemon K'ril Tsutsaroth. As they battle, K'ril gets the upper hand and blasts Zilyana away, killing her. He takes a final look at her body and departs. Saradomin himself comes to rescue her and takes her to the Fist of Guthix arena, where the Stone of Jas lies, and heals her. He shows her the Stone of Jas (which he calls the Eye of Saradomin), and tells her that Zamorak returned from his banishment and started a war in order to reclaim it and it was the most prominent tool he used to attain godhood.

The cutscene will end, but touching the Stone has triggered an alarm! You will be teleported outside, where Sir Tiffy is waiting along with Akrisae, Ali the Wise, and a battalion of Temple Knights. According to Ali, the Ritual has commenced and the ritual plateau is flooded with fighting Mahjarrat. You will head for the ritual site, but suddenly be intercepted by General Khazard and six Elite Khazard guards. He will reveal that Ali the Wise is actually the Mahjarrat Wahisietel, much to the fear of Akrisae, who will suffer a panic attack. Wahisietel and you will convince him to stay calm and Khazard will attack. Your job is to help Sir Tiffy defeat General Khazard while the temple knights deal with his followers.
-
 Commander Zilyana Vs. K'ril Tsutsaroth.
 -
 Saradomin saving Commander Zilyana.


Set-ups
| Equipment set-ups |
|---|
Melee
The equipment used should simply be the best armour you have, preferably Barrows or Dragon, although Elite void is also an option. An amulet of fury or glory is also recommended. Bring a dragon full helmet or a Helm of Neitiznot, dragon boots, the barrows gloves from the Culinaromancer's chest (or dragon gauntlets from Fist of Guthix), and a good cape, such as a fire cape, cape of achievement, or soul wars cape. Boost potions are unnecessary, as your stats will receive a large boost during all of the following battles. The healing ability of Guthan's set is extremely useful for those with high attack and strength levels, and may reduce the need for expensive food. Especially combined with the bonuses of the Stone of Jas, players can easily heal more than they are damaged. |
Ranged (70+ recommended)
Once again, wear your best armour, preferably Black dragonhide armour, Blessed dragonhide armour, Karil's armour or Armadyl armour, along with an amulet, cape and pair of boots with good defence bonuses, as described in the melee set-up above. With the appropriate ranged level, this approach could possibly be much easier than the melee method. Note that due to the boosts, only one dose of prayer potion, 10 monkfish and a relatively weak summoning familiar (along with ruby bolts (e)) are enough for even a level 70 archer, when using the correct strategy. Boost potions are unnecessary, as your stats will receive a large boost during all of the following battles. |
Magic
The preferable choice of armour is something with high magical bonuses, such as Ahrim's robes set, Mystical robes or Infinity robes. The gloves however should be ones from the Culinaromancer's chest for the defence bonuses. Boost potions are unnecessary, as your stats will receive a large boost during all of the following battles. It is not recommended to use saradomin brews unless you are a really low level as they will drain your boosted stats and only make the fights last longer. |
TIP: After every wave of monster killed you are allowed to teleport out of the battle once the cutscenes have finished. Your progress will be saved. You can also click the screen to move somewhere during dialogue to be placed outside and restart from the beginning of the dialogue when you re-enter. If you die during the final battle, your grave can appear at one of two places; near the rope on the tree leading to the plateau and near the frozen fortress. If you do not see your grave at the rope, do not climb up the rope. If you climb the rope you will be transported back to the battle, and if you die again you will lose all your stuff! Open the world map to find the location of your grave and collect your items.
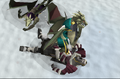
Khazard's Revenge

General Khazard uses a long-range Magic attack, which can be blocked with Protect from Magic or Deflect Magic, and will summon Bouncer, who will constantly inflict small amounts of damage on you. You cannot attack Bouncer, so when Khazard summons him, lure him over to Wahisietel, who will kill him for you. It is possible to lure Khazard next to Wahisietel so whenever Bouncer is summoned it will die instantly. If not killed, Bouncer will inflict rapid, unblockable damage. Note that during this fight, your combat stats have a large boost because you touched the Stone of Jas.
-
 Fighting General Khazard and his forces.
 -
Khazard is hit by Wahisietel's spell.
-
 Khazard teleports away after the fight!


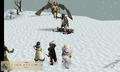
Battle of the Mahjarrat 1: Ice Titans
Once General Khazard is defeated, he teleports away and you proceed to the ritual site. Finding it strangely deserted, Wahisietel senses a nearby Mahjarrat; he steps forward and calls for General Khazard to reveal himself. Instead, Lucien appears. After taunting your group, he summons four enhanced ice titans; Sir Tiffy calls Idria via commorb and requests reinforcements. The immediate arrival of a support group of Guardians of Armadyl signals the beginning of the first battle against Lucien's forces.
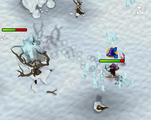
Throughout the battle, Lucien will duel Wahisietel, although he will regularly cast a spell at you. If it hits the ground where you are standing, a pillar of darkness shoots up that deals several hits of 100+ damage each. When you see a smoking black skull flying towards you, move at least two squares away from where you're standing and continue attacking the ice titans. Note that if an ice titan freezes you before you can evade Lucien's spell, you may be hit for massive damage, so make sure your health is up! An easy way of avoiding both being frozen and being hit by Lucien's attacks (or all attacks in general) refer to the picture on the right. Do NOT attack Lucien directly, or he will hit you for 400 damage.
Two of the enhanced ice titans will head for you. Being Summoning familiars, they have the ability to run. Turn on Protect from Melee or Deflect Melee and attack them. The titans have high hitpoints, but protection prayers fully block their melee attack. However, they also have a special attack that encases you in ice. If you do not break free of the ice as quickly as you can by clicking elsewhere to run away, the ice will shatter and deal significant damage. As the titans are large creatures, try to position them such that only one is attacking you at a time, in order to reduce the number of special attacks used against you. The titans are EXTREMELY weak to the attacks of combat familiars; especially fire titans. Even a karamthulhu overlord is able to hit over 900 lifepoints with its melee attack. It is also recommended to use enchanted ruby crossbow bolts, as they can hit well over 2000 in the early stages of the battle, and around 500 otherwise, even under 75 Ranged, due to the Stone's boost to level 150 for this battle. As your Summoning level is also boosted, there is no need for summoning potions. A full inventory of sharks or, if feeling confident, monkfish is advised though, to counter the effects of the blood forfeit special attack and in case you fail to fully evade a skull Lucien flung at you.
If using ranged, it is highly advised to trap the titans. This is done by luring them around the ledge to the east and all the way south. One titan should be trapped between the rocks and the small dead tree, whereas the other one should be stuck behind the large undead tree (in which you could place a beacon) by the ledge. You can calmly kill one titan at a time, and move a few squares back or forth when a skull comes at you. There are also a number of other sites where the titans can be trapped, as they often run behind trees and behind one another. If in doubt, run behind the nearest tree and hope they get stuck. It is usually possible to avoid the spell by stepping a couple of steps forward or backward when it comes, without untrapping the titans.
-
 Lucien demonstrates the power he gained from the Stone.
 -
 Trap the Ice Titans here (far South-east) and run back and forth to avoid Lucien's attacks.


Battle of the Mahjarrat 2: Ice Demons

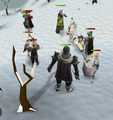
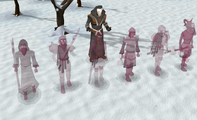
After Lucien's enhanced ice titans are defeated, Wahisietel will taunt him, after which he will summon twenty level 300 ice demons. Even Wahisietel is scared now and just as he says that they will need help, the Mahjarrat Sliske appears (to the surprise of Lucien) and summons the Barrows brothers to aid in the fight. An enraged Lucien orders his army to attack and another battle begins, in which two of the ice demons attack you, Tiffy and Idria take on one (with Akrisae, as usual, healing them) and Sliske and the Brothers hold off the others while Wahisietel continues to duel Lucien.
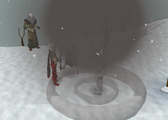
The ice demons use Magical and Ranged attacks, the Magic attack being stronger. It is strongly recommended to protect from magic, as the demons frequently hit 300 against void equipment while protecting against range. Occasionally they will throw icicles that grow on the ground around you, which will block your movement. Protect/Deflect Mage will not prevent the icicles from forming. You can, however, attack an icicle to break it. It takes a combination of two "icicle attacks" from the demons to create enough to completely surround you, so move away from the icicles when they form. Ranging is recommended as your level will be significantly increased by the Stone. The special effect of the Ruby bolts (e) works against the ice demons. Lucien will continue to cast his "black skull" spell at you during this fight, so it is very important to keep moving to avoid being surrounded by icicles when Lucien's spell hits. Combat familiars are not of use in this battle. Unlike the Ice Titan battle, familiars will not be attacked, so a Beast of Burden familiar may be safely used.
One strategy to beat them is, when this fight starts DO NOT move from your current position. Let the Ice Demons come to you so you have enough room to see Lucien's attack coming at you. Protect/Deflect mage during this fight and try to split up the two demons. This will help when they start growing icicles and for Lucien's attack. When fighting one, the other will range/mage you from a distance and when Lucien's attack/icicles appear near you, run and fight the other demon. This is a good way to avoid being trapped by icicles and avoid being blasted by Lucien. Karil the Tainted will attack the ice demons fighting you, if he is in range of them with his crossbow. It is advised therefore to stay near Karil, as his shots occasionally cause damage to the demons.
Another strategy, using range, is to run in a circle or crescent-shape around the demons. Run a few paces, fire a single bolt, then run a few more paces. This can be done either in a complete circle, passing to the north through the busy part of the battle, or in a crescent shape with two curves, running a curve from northwest to southeast or east, then going a few steps in/out and reversing the curve. The constant movement should reduce the risk from icicles and Lucien's spell while still getting in constant hits on the demons. This approach involves using the best range gear available (for high levels, black dragonhide is sufficient), a rune crossbow and ruby bolts (e), Protect from Mage (it is advisable to activate it before climbing the rope and starting the cutscene), 2-3 prayer potions, a healing familiar such as a Bunyip, and high-level food (Sharks or even Monkfish are sufficient at high levels). The main risk with this approach is making sure to watch your prayer points, as you will need to use potions to stay above zero. The player will still take some damage from range but will only need to heal occasionally if using a familiar. This allows the player to stay mobile.
Note: Once the Barrows brothers are done killing the ice demons they will help you kill the demons.
-
 Sliske summoning the Barrows Brothers.
 -
 Watch out for the icicles!


The Beginning of the Ritual

Once the ice demons are killed, Lucien will grow tired of your attempts to stop him, and turn to a more important subject: the Ritual of Rejuvenation. At this point, multiple Mahjarrat will teleport to the ritual site, including Enakhra, who believes that her rival Akthanakos, who also appears, should be sacrificed in the Ritual. More Mahjarrat, including Zemouregal, Azzanadra, and General Khazard, will appear and argue over who will be sacrificed. Hazeel will also appear for players who chose to revive him during Hazeel Cult. Lucien decrees that as the most powerful Mahjarrat, he alone will decide who is sacrificed, and he pulls the frozen Jhallan from the cavern beneath, choosing him as the sacrifice.
Sharathteerk's Armoured Zombies and Arrav
(Note: It is possible to reach this point in the quest without the necessary crafting level. However, it is recommended to get 76 crafting before starting this battle, as the repairing of the beacon needs 76 crafting.)
Wahisietel protests, claiming that Lucien must be the sacrifice due to the threat he presents. While Wahisietel attacks Lucien again, Sliske summons the Barrows brothers for the second time; Zemouregal counters by calling his gargoyle minion Sharathteerk, who will summon four level 135 armoured zombies. Help the Barrows brothers defeat the armoured zombies, who will focus on the Barrows brothers and will not attack you back. (Keep an eye out for Lucien's spell.) Zemouregal will then order Sharathteerk to summon Arrav, who engages all six Barrows brothers at once.
Your job is to attack Arrav, while evading Lucien's dark magic as before, until he turns his attention to you, then lure him over to the rocks to the south, where you planted his heart. Once he comes close enough to it, Arrav will break Zemouregal's control over him. Move around and watch as the hero of Varrock viciously turns on his former master. When Arrav turns his attention to you, it is best to move only a few paces at a time and wait for Arrav to catch up before moving again. If you move too far away, Arrav will stop following and return to battle the Barrows brothers. If this happens, you must attack him until you gain his attention again.
- Warning: If you have a combat follower out, it is best to dismiss it when Arrav starts following you. Otherwise, it is possible that the combat familiar and Arrav will fight. If this occurs when Arrav gets his heart back, the familiar's attack may distract Arrav from attacking Zemouregal. Instead, Arrav will stand near the rockpile where his heart was hidden and will not move. This is a glitch, and the only way to overcome it is to leave the battle, return, and fight the fourth battle again from its start.

Zemouregal will plead to Lucien for aid. When Lucien ignores him, Zemouregal calls for everyone present to attack him. While every other Mahjarrat present turns on Lucien, Azzanadra tells you that the southern beacon has broken, and that you must repair it in order for him to call upon the power of Zaros and end the battle. Lucien retaliates by summoning a level 475 glacor to stop you. Turn on Protect from Ranged or Protect from Magic and gather the four pieces while avoiding the glacor. Assemble them by clicking on one piece in your inventory, then place the beacon back into the tree. At that point, Lucien calls for the fighting to stop, and proceeds with the ritual.
The Ritual of Rejuvenation

Lucien stops the fighting and performs the Ritual of Rejuvenation, sacrificing Jhallan's life in order to renew every other Mahjarrat. As each Mahjarrat is rejuvenated, his or her appearance changes to more resemble a human.
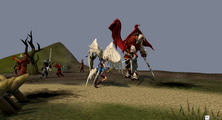
Being stronger, Azzanadra strikes Lucien with the power of Zaros in two massively damaging attacks. While the attacks deal enormous damage to Lucien, leaving him with about a quarter of his life points remaining, he shrugs them off, claiming that he merely "felt" them. In response, he summons the Stone of Jas and touches it, amplifying his power even further. However, before he can use it, Sithaph, Strisath and - although he cannot be seen yet - Sakirth arrive and proclaim Lucien to be the False User, whom they will destroy.
Idria attempts to bargain with the dragonkin and convince them to enter an alliance against a common enemy; however, as a demonstration of their power, Sithaph and Strisath incinerate her. The dragonkin explain that while others such as Lucien may draw power from the Stone of Jas, their power is the Stone of Jas, and its misuse enrages them. Lucien attacks the dragonkin, and a fight commences.
The first dragonkin, Sithaph, attempts to apprehend Lucien, although Lucien knocks him to the ground with the staff and prepares to impale him. The second, Strisath, then grabs him from behind, making him drop the staff. Although he succeeds in disarming Lucien and dragging him a few metres away, Strisath too is soon knocked to the ground. When it looks like Lucien is winning, the third dragonkin, Sakirth, picks up the Staff of Armadyl and hits Lucien from behind, shattering the staff's orb in the process. He then impales Lucien with the remnants of the staff, slaying the "False User". With a last cry, Lucien's life ends. The Dragonkin claim to feel slightly better now and make a threat to destroy the world. They then fly off. Enakhra, who is scared, quickly teleports away, followed by Akthanakos. Hazeel, Khazard, Zemouregal and Azzanadra follow, leaving only you, Tiffy, Akrisae,Wahisietel and Sliske behind.
-
 Two dragonkin appear.
 -
 The dragonkin kill Idria in a display of their power.
 -
 Lucien and the dragonkin fight.
 -
 Sakirth stabs Lucien with the staff.
 -
 The dragonkin making a threat.


Wrath of the Dragonkin

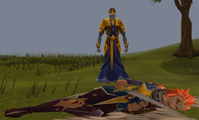
Sliske is impressed by your skill and tries to convert you into a Barrows brother, but Akrisae jumps in the way, saving you, becoming a Barrows wight himself (Akrisae the Doomed). Sliske seems content and quickly teleports away, escaping Tiffy's vengeance. Wahisietel laughs, claiming that, if nothing, "you can always trust that you can't trust Sliske". As a favour to you, he teleports back to Nardah to avoid seeing what happens to the Stone.
Despite your suggestion to keep the Stone as a nice garden feature in your house, Tiffy summons Thaerisk who, with help from the player and Tiffy, performs a mathematical spell placing the stone deep underground in an unknown place. You then all teleport away together back to Falador.
However, rather than returning straight to Falador, you enter a burnt down version of Draynor. As the three of you run forward, dragonfire incinerates Thaerisk, just after he thought he saw Idria. And indeed, Idria, Duradel and Ghommal are standing there, but when each of the heroes are approached, they retreat and exclaim "We're already dead" before dying and disappearing. Going further will lead you to Lucien's body with Kuradal crying next to it, as well as another deceased hero, this time Hazelmere. In the next alley stands Sloane and Akrisae the Doomed walks by. Follow him to the bank, where suddenly Sithaph appears! After a short chase scene, the dragonkin hit and kill Tiffy, and wound you. They let you go, telling you this is a vision of the future.
| Cutscene Gallery |
|---|
|


You return to Falador, and Tiffy doesn't recollect the dream as you do.
Quest complete!
After the quest, Edgeville appears to have been attacked by the Dragonkin, just as they stated in the vision.
Rewards

- 3 Quest Points
- 110,000
 Experience
 - 40,000
 Experience
 - 40,000
 Experience
 - Three 80,000 XP lamps (only available for skills level 72 and higher, cannot be banked)
- Ability to fight a new Barrows brother (Akrisae the Doomed) and gain and wear new Barrows equipment
- Access to the Bane ore mine
- Ability to fletch Bane arrows and Bane bolts (with appropriate Fletching and Smithing levels)
- Access to the Lunar spell Tune Bane Ore (with the appropriate Magic level)
- Access to the spell Storm of Armadyl and the crafting of armadyl runes (with the appropriate Magic level)
- The ability to gain combat bonuses in certain areas. By entering the room the Stone of Jas had been kept (the Glacor cave) you are granted combat bonuses in the areas around the cave, bordered by the wilderness and the troll areas. This includes the God War Dungeon. The bonus is lost when you leave these areas.
- Access to Glacors and the DKQ fairy ring
- Access to the Ritual Plateau and the entirety of Zemouregal's Fort
- The ability to craft Armadyl runes from a ground Armadyl shard
- The ability to create an Armadyl Battlestaff to enhance the speed of the Storm of Armadyl spell
- After the quest you can return to the ritual site and speak to Arrav near the entrance; he will die and you will gain 3,000 bonus Prayer XP
- Access to a Bloodwood tree south of the Ritual Plateau
- 2 extra spins on the Squeal of Fortune
Music unlocked
- The Records Chamber - In Temple Knights' archives (Can also be unlocked during the King of the Dwarves quest)
- Kethsi - Upon entering the plane of Kethsi (note: can be unlocked before even starting the quest)
- Strength of Saradomin (if not already unlocked) - When Saradomin heals Zilyana.
- Return of Lucien - When Lucien summons the ice titans.
Required for completing
Completion of Ritual of the Mahjarrat is required for the following:
- Morytania Tasks:
- Elite: "Bros Before Barrows"
Gallery
-
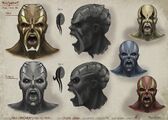 Mahjarrat concept art - Face images
 -
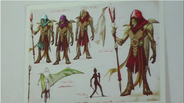
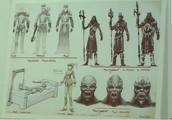 Mahjarrat concept art - Main characters
 -
 Mahjarrat chathead leak
 -
 Dragonkin Concept art for ROTM
 -
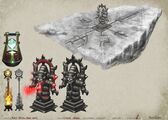 This is the Ritual Stone Concept Art
 -
Ritual Marker
-

-


Transcript
Trivia

- On the first day of the quest's release, the reward portion on the quest help said "A fireball set the rewards alight. Come back tomorrow when we've put out the fire."
- There was a leak on Facebook on 8 June 2011 that this quest would be released July that year, which was removed quickly after it appeared. After this, Mod Mark confirmed this was not true, and should not have been added to Facebook at all.
- When General Khazard summons Bouncer, Wahisietel will kill it while saying "Your dog can't help you now!", a play on words from when Kal'ger the Warmonger yells "Your god can't help you now!"
- It is possible, when fighting General Khazard, to run to the northern corner of the ritual site and wait for Sir Tiffy to kill off General Khazard himself, taking no damage from either him or Bouncer. This method, however, is not recommended, as it might take up to 30+ minutes, and it is much quicker and more efficient to just kill off Khazard yourself. It should only be used if players wish to avoid the first fight, or for the amusing fact of being able to kill the boss without any direct damage by the player. (unconfirmed if this method still works).
- Azzanadra does 9001 damage to Lucien which is reference to the internet meme "Over 9000". This internet meme is from the television show Dragon Ball Z.
- Using the combat stat boost from the Stone of Jas (in particular that for Summoning), it is now possible to investigate Summoning effigies above your level. This has been confirmed.
- After completing the quest, a player's Adventurer's Log will read "I took part in a huge Mahjarrat ritual, encountered a new breed of enemy and helped hide an ancient relic."
- When telling Juna about the quest you say "...after the dragonkin killed Lucien, we hid the stone somewhere safe." to which Juna replies "It is good that the Stone is once more hidden away, but the damage has been done. Lucien was dangerous, but these dragonkin could end up destroying everything."
- This quest currently has the most quest requirements of any quest, and is the first to have a Grandmaster quest (While Guthix Sleeps) as a prerequisite.
- After completing this quest, players who had not yet collected their 400,000 experience reward from Idria at the end of While Guthix Sleeps discovered that this was no longer possible (since she is killed). Jagex fixed this problem within a few days by having Silif give the reward instead.
- The Barrows brothers are all level 115 when summoned by Sliske, even though they have higher combat levels (ranging from 121-196) when fought in their crypts.
- During the fights of the ritual, if you have a familiar with you and make it attack Lucien, it will cause him to stop attacking Wahisietel, as well possibly move him from his spot, in order to start attacking your familiar.
- It is possible that Lucien will stop using his black skull attack during the Ice Demon portion of the quest. After about half an hour he will stop, making the fight much easier for lower level players.
- The undead broavs will still roam the plateau after the quest. They will not teleport you to Zemouregal's fortress, however.
- If you attack Arrav at the exact time that he stops attacking you and starts talking, he can continue to attack you without going to fight Zemouregal. This can be resolved by teleporting out and returning, and repeating the previous fight. He might also continue to talk if you stop attacking him. This is a rare occurrence, however, and may have more ways to solve it than previously stated.
- There is currently a glitch during phase two of the battle, when fighting the ice demons using goliath gloves. If the special of the gloves activates, it will cause typeless damage which does not register to Sir Tiffy and his damage output, as he is supposed to have the same damage output as the player. This causes the ice demon that Tiffy is fighting to not die as the typeless damage never registered. This has yet to be fixed.
- The spirituals in the cutscene with the battle are still using their old graphics, despite having been updated on 5 September 2012.
| Mysteries of the Mahjarrat |
1. The Tale of the Muspah • 2. Missing My Mummy • 3. The Curse of Arrav • 4. The Temple at Senntisten • 5. Ritual of the Mahjarrat |
| Rise of Lucien |
1. Temple of Ikov • 2. While Guthix Sleeps • 3. Ritual of the Mahjarrat |
| Rise of Zaros |
1. The Dig Site • 2. Desert Treasure • (Devious Minds) • 3. The Temple at Senntisten • (Ritual of the Mahjarrat) |
| Arrav |
1. Shield of Arrav • 2. Defender of Varrock • 3. The Curse of Arrav • 4. Ritual of the Mahjarrat |
| Other quests |
Hazeel Cult • Fight Arena • Enakhra's Lament • The Firemaker's Curse |
| Related miniquests | |
| Related lores | |