Dream Mentor
| File:Dream Mentor.png | |
| Release date | 15 May 2007 (Update) |
|---|---|
| Members only? | Yes |
| Quest series | Fremennik (#8) |
| Official difficulty | Master |
| Official length | Short |
| Developer | Tim C |
Official description
| “ | RuneScape is not the safest place to live - dragons, trolls, demons... dangerous and despicable monsters of all sorts roam free.
In this quest, you must help a fellow adventurer that doesn't do so well against these threats. With perseverence and the magical help of the Moon Clan, there should be no monster that can't be beaten. But is that really true? How about the monsters in your dreams? How about your own inescapable fears? How would you defeat them? Well, you'll soon find out as a tough and often bizarre quest awaits those of a strong will! |
” |
Walkthrough
| Start point: | ||
| Members only: | Yes | |
| Official difficulty: | ||
| Description: | None | |
| Length: | Medium | |
| Requirements: |
| |
| Items required: |
Toolbelt: Recommended:
| |
| Enemies to defeat: |
|
The Fallen Man
To begin the quest, first talk to Lokar Searunner to travel to Pirate's Cove, and then onwards to Lunar Isle by speaking to Captain Bentley. Alternatively, you can use the Lunar Isle Lodestone.
When you arrive on Lunar Isle, you may want to change your Spellbook to the Lunar Spells, as you will save time by using the NPC Contact spell during the quest.
With your 20 pieces of food, head to the north-eastern part of the isle to find the Lunar Isle Mine, marked by a quest icon in the minimap. Enter the mine through the small shed.
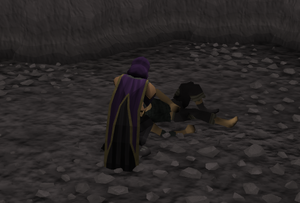
After entering the mine, go south-east, and look for a small cave entrance by the ice chunks and north of the large Rune Stone essence. Crawl through the cave entrance, and you will see a fallen man.
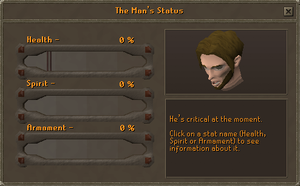
When you inspect him, you will receive a message, asking if you want to help him. Accept, and you see a short cutscene, that shows that the man is in very poor conditions - weak breathing, ragged clothing and various cuts and bruises. You need to rejuvenate the man to get him to talk to you.
Regeneration
Feed four pieces of food to the man, rotating amongst the three kinds of food you brought, because he gets bored with the same food. Be careful not to eat the food yourself and make sure to not use sacks of food on him, as they only count as one each.
- After four pieces, his Health status starts to gain and he opens his eyes. Speak with him.
Raise his spirit by saying encouraging words to him: It is all based on trial and error, but try to choose the most positive things. There are no dire consequences if you get it wrong.
- After you raise his Spirit status up, his appetite returns, so feed him four more pieces of food.
He is now healthy enough to stand up and speak coherently. Speak with him to cheer him up, and he says that his name is Cyrisus and tells you how he got in the cave. Feed him six more pieces of food, and speak with him some more. He finally asks you to go to the bank and bring him his armour. (You will now be able to talk to Cyrisus via the NPC Contact in your lunar spell book)
Return to the upper surface, and talk to 'Bird's-Eye' Jack, one of the bankers in town. Select the "Cyrisus in the mine" option. After a heated conversation — rehashing the first time you and the pirate-banker met — ask him if you can get some items out of Cyrisus's bank account. Bird's-Eye' Jack gives you a chest to carry the armour. Select a helmet, top, legs, boots, and weapon.
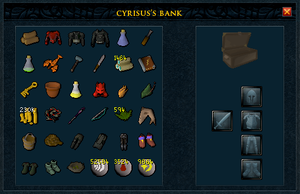
It is mostly guesswork, and you need to check with Cyrisus to see whether you got it right. The easiest way to do this is by using the NPC Contact spell to ask Cyrisus whether you chose right. Speak with 'Bird's-Eye' Jack again and swap the items Cyrisus didn't like for other pieces of armour. Keep swapping and checking in with Cyrisus till you have the right armour.
Note: Cyrisus's armour selection is usually based on your highest level of combat (that is, melee, ranged, or magic). Here are some common combinations:
- Melee: Dragon helm, Ahrims robe top and robe skirt, Ranger boots and an Abyssal whip.
- Ranged: Robin Hood Hat, Karil's leathertop, Black d'hide chaps, Ranger or Adamant boots, and a Magic shortbow.
- Magic: Splitbark helm, Ahrims robe top and robe skirt, Infinity boots, and an Ancient staff.
When he approves of your armour choices, go back to him in the cave and return the armour you picked out for him. You see a short cutscene, where Cyrisus modestly puts on his kit. His Armament status is now at 100 percent. If Cyrisus's Health and Spirit stats are still down, embolden him and feed him the last pieces of food to raise those to 100%.
You see another cutscene, where Cyrisus says he is feeling healthy and "dressed like a war machine!" He says that he has traveled over a lot of areas in RuneScape including the frozen wastes in the Wilderness, the pyramids of the Kharidian Desert, Ape Atoll and has also dined with the TzHaar under the volcano of Karamja. But even then, he is afraid of combat. He has come to the Moon Clan to see if they can help him visit his dreams again and conquer his fears. He tells you to go talk to the Oneiromancer on Lunar Isle, and he will meet up with you shortly.
Dreamland
Head south to the lower tip of Lunar Isle to find the Oneiromancer. She is near the Astral Altar, so watch out for Suqahs. Talk to the Oneiromancer and select the "Cyrisus" option, and Cyrisus arrives near you. The Oneiromancer says that with a certain Potion of Shared Dreaming, Cyrisus and you can travel to Dreamland and help him overcome his fear. The Oneiromancer gives you an empty Dream vial to store the potion into. Cyrisus says he will meet you at the Ceremonial Brazier and teleports away.
The potion requires Goutweed and an Astral rune.
- If players don't already have one, they may obtain goutweed either by growing it from a Gout tuber in a herb patch or by stealing it from the Troll Stronghold storeroom.
- To obtain a ground astral rune, you need to first break the rune into a number of shards by using it with an Anvil and then grind these shards to obtain fine, ground astral essence.
To make the potion, first fill the Dream vial with water. There are several water sources west and south-west of the bank. Next, use the goutweed on the vial. It is now called Dream vial (herb). Finally, add the ground rune to the vial to get a Dream potion.
Courage
Bank and prepare for a fight — or four fights, to be exact. You can't bank between fights. Keep caution though, if you leave the Dreamworld, you will need to start over at the beginning.
Bring a tinderbox (the one in the tool-belt will work) to light the Ceremonial Brazier and the Dream potion.
- Multi-target blood spells from Ancient Magicks are highly recommended for the fight. This will greatly decrease the need for the player to repeatedly eat food for the first, and most difficult, battle.
- However, if you don't have access, or you don't feel like changing spell books, the Polypore staff also works very well here. Its accuracy makes it easy to kill all four bosses, and you will only end up using very few amounts of food.
- As well as using blood spells to boost health point regeneration, another effective method if using the Polypore Staff (or any other high damaging single target weapon) is to make use of the vampyrism aura. Part of the Members Loyalty Programme, this allows for the player to achieve extra health point regeneration if Ancient Magicks are not available.
- Also, Iban Blast is effective against all the monsters, more so on the last three than the first.
- IMPORTANT: Prayer cannot be used here. As such, instead of bringing prayer potions, use the space to bring extra food.
Do not bring anything though, that you can't afford to lose if you die. A ring of life will not activate during the fights even if you drop below 10 percent health. You cannot use Prayer or bring familiars in with you for the fights. Boosted stats are retained after entering the Dreamland.
Tip: After you light the brazier, bank the tinderbox, your combat potions (after drinking from them, of course), and any other items you don't need for the battles. This way, you open up inventory space for more food. You may also use Excalibur special to boost your Defence and bank the sword before proceeding. This is recommended over the Dragon battleaxe.
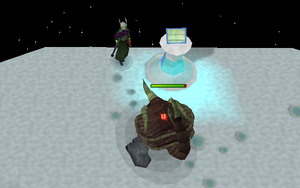
You will find a Safe spot to the side of the lectern for the second and third monsters, if you intend to fight using range, mage, or a Dragon halberd.
You can escape Dreamland during the battle by using the lectern at the northern end of the room. You cannot teleport out, so this is your only possible route out alive if a battle goes south. If you escape, there is no need to make another potion, just talk to Cyrisus after relighting the brazier.
Do not wait until you are almost dead to run to the lectern. If you choose to run, do so when you have at least 300 life points remaining when on the first monster. Its attack may still kill you outside.
During the fight, a bar will appear at the top of the screen, showing Cyrisus' courage. It fills up as you damage the monsters. As it rises, Cyrisus will occasionally cast Vengeance Other on you, and when the bar is full, Cyrisus will deal some damage to the monsters. However, he would only hit once, and his courage would empty completely.
If you die, your gravestone will come up near Cyrisus. Have an Enchanted Lyre or runes for Moonclan Teleport ready in case you die for a quick way to get back to Lunar Isle. Alternatively, Home Teleport to Lunar Isle may be utilised.
Zzz..
Head over to the west side of the town, into the building that has the Ceremonial Brazier in it. Cyrisus is waiting for you there. Light the brazier, talk to Cyrisus, and proceed into his dream.
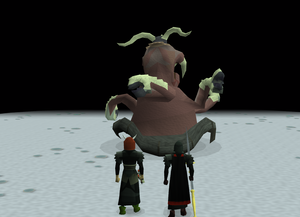
You see a short cutscene, where while you gape at the huge creature that symbolises Cyrisus's fear, he admires the lectern. Inadequacy is apparently the major cause of Cyrisus' insurmountable fear of combat.
The Inadequacy
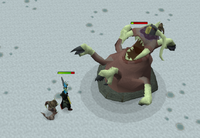
The first monster, a level 343 named The Inadequacy, summons many little creatures called A Doubt (level 78) during the battle to also attack you. The Inadequacy uses melee and ranged attacks, and hits in the range of 200s. It is immune to poison, so poisoned attacks are not helpful.
This is unquestionably the hardest battle, and if you can make it through this one, the rest should be comparably easy.
- Set auto-retaliate to off.
- Do not try to kill the Doubts. Focus on The Inadequacy.*Using the multitarget Blood spell at this stage is extremely effective, as it gives you a major advantage for health regeneration, in the summoned Doubts, if they are within range. It is recommended that you make use of this method.
- Black dragonhide works very well with a rune crossbow and emerald bolts or better.
The Everlasting
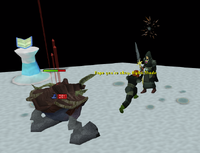
The next monster is a level 223 called The Everlasting. It attacks slower than The Inadequacy and is relatively inaccurate. This one should be relatively easier than The Inadequacy, but you should still take a lot of caution as it hits harder with melee (245) than The Inadequacy.
There is a safe spot to the side of the lectern that will keep you from being hit if using ranged or magic. Using this is a major advantage, but it may backfire as one ill-timed movement may cause The Everlasting to trap you and force you to tank its high hits.
The Everlasting is a fairly easy boss to overcome, if you can hold your own for sometime.
The Untouchable
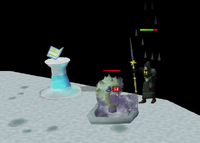
The third monster, The Untouchable, is easier, still — at level 274 — and certainly should be easier than the first form as it only uses a fairly slow melee attack. However, it has the highest maximum melee hit (269) of the four monsters, and is immune to poison like its previous forms, so take caution.
It has high defence, which makes up for its relatively low life points.
You can also safe-spot this monster by using the same place as you did for The Everlasting.
Another efficient way to kill it (if you ran out of food, for example), is to use the hit-and-run tactic. Run a few squares away from it, strike, and run away again. Doing this will allow you to kill the monster without losing many life points.
- Sometimes, if you used the safe spot for The Everlasting, The Untouchable will spawn on the same spot as the just-defeated Everlasting and be able to attack and trap you (as you cannot pass through these monsters). If you are relying on the safe spot, leave the area straight away if this occurs. There is a way to prevent this, and that way is to use ice spells on The Everlasting. When he is defeated, The Untouchable will wander off to some where else. Then kill it and you're on your way to the final form.
The Illusive
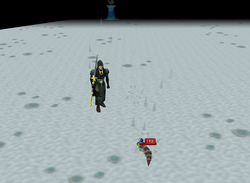
The fourth monster, The Illusive, has the ability to dig into the ground regularly during the battle, similar to when you fight the Giant Mole, except that The Illusive does not burrow so far away. Its only attack is a relatively slow melee attack that rarely hits over 80, and it very rarely retailiates when attacked. Be patient, as you can only hit once or twice before it digs underground again.
Run after it, and hit it. Returning to the middle of the platform makes it easier to spot its new location. You can then also see it pop up as a yellow dot on the Minimap.
This monster is a complete joke after the first three. More often than not it doesn't even attack you before it tries to burrow.
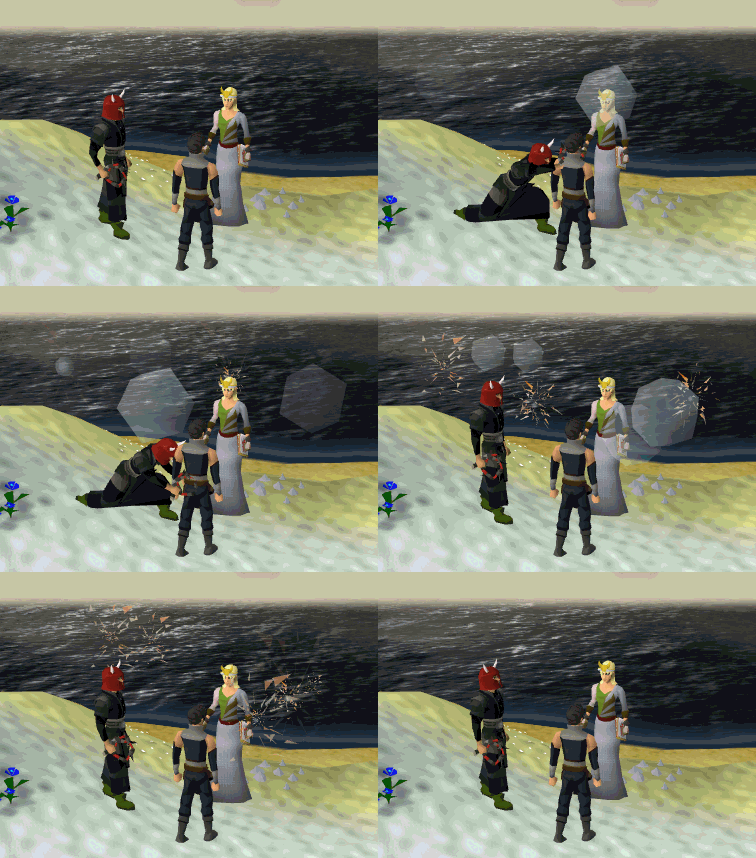
After defeating The Illusive, now brimming with bravery, Cyrisus stomps on The Illusive to finish it off, and gains courage enough to let his fear go.
Rise Up
Back in reality, head back to the Oneiromancer. Speak with the Oneiromancer and Cyrisus. Cyrisus says he has conquered his fear of combat and passes some of his knowledge onto you to reward you for your help.
Congratulations – Quest complete!
Reward
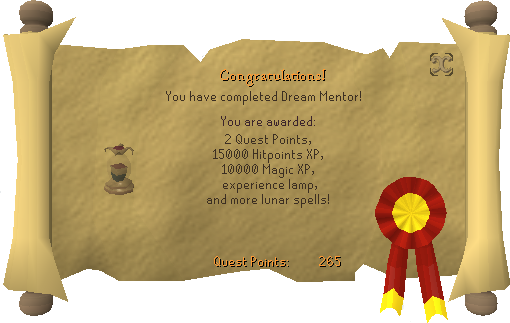
- 2 Quest points
- 15,000
 Experience
 - 10,000
 Experience
 - Dreamy lamp, which will give you 15,000 experience in a combat skill of your choice (Strength, Ranged, Magic, Constitution, or Defence)
- 7 new spells added to the Lunar Spells book:
- Monster examine
- Humidify
- Hunter kit
- Stat spy
- Dream
- Plank make
- Spellbook swap
- Access to the 'Random' option on NPC Contact
- 2 extra spins on the Squeal of Fortune
Music unlocked
- Down and Out - upon entering the cave with Cyrisus
- Everlasting
- Illusive
- Inadequacy
- On the Up - during cutscene when Cyrisus stands up
- Untouchable
Required for completing
Completion of Dream Mentor is required for the following:
Trivia
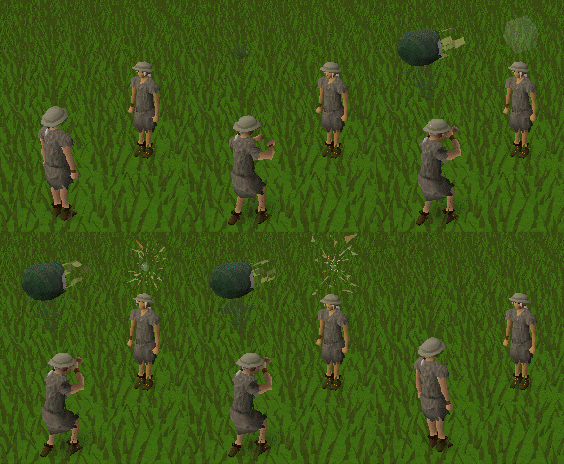
- The quest battle shows a strong resemblance to the film Dreamcatcher.
- On the day of release, if you clicked to see the rewards of the quest it said: Spoilers? On the day of release? Tell him he's dreaming! This may be a reference to the film The Castle.
- Cyrisus still uses the old teleport animation.
- Cyrisus's dragon helm looks like the helm before the armour update.
Template:Fremennik Series fi:Dream Mentor nl:Dream Mentor pt:O mentor do mundo dos sonhos