Blood Runs Deep
| File:Blood Runs Deep.png | |
| Also called? | BRD |
|---|---|
| Release date | 15 December 2009 (Update) |
| Members only? | Yes |
| Quest series | Fremennik (#10) |
| Official difficulty | Master |
| Official length | Long |
| Developer | Matthew H |
Official description
| “ | A stranger has washed up on the shores of Lunar Isle, broken and delirious, and Baba Yaga requests your aid in getting him back on his feet. Yet beware the horrors that lurk in his mind, for they could prove to be a very real threat for Fremennik everywhere... | ” |
Walkthrough
| Start point: | ||
| Members only: | Yes | |
| Official difficulty: | ||
| Description: | None | |
| Length: | Long | |
| Requirements: |
Temporary boosts do not work for any skill requirement. Must have all skill requirements before starting.
Fremennik tasks Easy, Medium and Hard require:
| |
| Items required: |
| |
| Enemies to defeat: |
|
Note: Through much of the quest, you frequently need to restock and pass through Rellekka. Consider moving your player-owned house to Rellekka, as this would be a convenient way to return to the action. You can also use an enchanted lyre for quick access to Rellekka. Another option is to cast the home teleport to Lunar Isle and take the boat back to Rellekka. After the quest Love Story players can also use a chisel on a House Teleport Tablet to create a teleport tablet to the Rellekka Player-owned house portal without moving the player's house to Rellekka.
The sick man's dream world

Travel to the Lunar Isle to speak with Baba Yaga in her chicken-leg house.
Talk to her about the man in the bed. She tells you he washed up on the shore and asks if you can help her.
She says you two can travel to the sick man's dream world and find the root of his problem. She reminds you that anything can happen in a dream world, so she suggests you prepare for war. She says to meet her back in her house when you are ready.
Warning: During this trip with Baba Yaga, you are attacked by level 90 dagannoths that use melee, a level 88 dagannoth that attacks with range, and a level 98 Wallasalki that uses magic. You do not need to kill them (since they will just respawn), but you do need to survive their attacks for a few minutes while Baba Yaga works to get you two off the platform and back to her house.
Bring good defensive armour and a weapon. Bring a dozen or so sharks or higher-healing food and Prayer potions. Turn on the Protect from Melee prayer when they arrive. Also, you may want to bring mage or range with you to try to attack the level 88 and level 98 because they will be on a different platform. With the Lodestone update, it is recommended to use the lodestone in the centre of the Moonclan Island city to retrieve your items on death. A protection aura, such as Aegis, or Vampyrism is recommended to reduce the amount of food needed. You do not need to attack the dagannoths, as they respawn a few seconds later, but it is a good idea to do so if you have the Saradomin Godsword (for the special), Vampyrism or Soul Split.
Once you are ready, talk to Baba Yaga in her house again. In a cutscene, you and Baba Yaga go to the Ceremonial Brazier and then enter the man's dreams.
In the dream, you find yourself on the first floor of the Lighthouse and figure out that the man is Silas, the previous Lighthouse keeper. Choose the Listen Silas option on Silas to hear what he is muttering as he writes in his journal.
Baba Yaga then suggests you search the room. Search the bookcase on the north side of the platform to find a Prophecy Tablet (Lighthouse). If you have no empty inventory slots, Baba Yaga will take the tablet for safekeeping.
Talk to Baba Yaga again, and she wonders where the stairs lead. Climb the stairs. You see rows and rows of dagonnoths below you, walking out of a tunnel.

Talk to Baba Yaga, who suggests you listen for anything. Choose to Eavesdrop-on either Silas or the Dagannoth Mother.
You learn that the Dagannoth Mother is gathering an army to attack "the barbarian port" of Rellekka. She says the "Jah-Nay Islands" (Jatizso and Neitiznot) will not attack her army once they see what the dagannoths have done to Rellekka, and that Misk island (Miscellania) will quickly surrender, once its citizens realise the dagannoths have captured their king. The mother goes on to say that once her children have developed the new immunities she has mastered, the world will be their toy.
After listening in, Baba Yaga says you two need to find a lectern to escape and suggests going through the tunnel.
Enter the tunnel to the west on your platform. You and Baba Yaga find yourselves on another platform, with Silas slumped over on the ground and a lectern to the south holding a book called Our Lives.
Talk to Silas — who asks who you are — and then try to read the book on lectern, which isn't working. Baba Yaga says she will have to study the lectern, but Silas hysterically says the mother has sent the dagannoths after you.

Turn on the Protect from melee prayer, eat when you have to, and stay alive while Baba Yaga figures out what is wrong with the lectern. Occasionally Baba Yaga will heal you, but only a certain amount of times, as she has limited sharks to heal herself — she will announce how many she has. She will also sometimes cast Vengeance on your character.
If you brought range or mage weapons, you can take out the Wallasalki and the ranging Dagannoth on the platform across from you, to prevent taking damage whilst using protect from melee. Both of them will respawn a short while after, and will try to retreat after being attacked, but less damage will be taken than if they are left alone. The Dagannoths appearing from the nearby cave will typically line up, and since they use melee, you will only have to deal with a couple. Do not use your dwarf multicannon in this area.
If you die, your gravestone will appear near Baba Yaga's house. Use the Lunar home teleport, or the Moonclan Lodestone, to arrive right next to the moonclan bank within seconds.
After the fight, Baba Yaga will congratulate you, mentioning how close the battle was, and you will both leave the platform and find yourself back in the chicken-leg house.
The Dagannoths Attack

Safely back in her house, talk to Baba Yaga. The Oneiromancer appears in her house and talks to Baba Yaga, using an unknown communication method, probably telepathy.
Ask what is happening. The leader of the Moon Clan tells you Rellekka is under attack by hordes of "daggermouths." She asks you to go help. Baba Yaga says she knows "a trick to get you there quickly." Her trick is to take your Seal of passage. Without it, she will not recognise you and will expel you to Rellekka. (This is strange, as an update <ref>RuneScape-News Potion Flasks</ref> makes it possible to talk to them without a seal of passage.) If you are ready to fight many dagannoths, agree to her trick. If not, bank, stock up, and then talk to her again. Note that if you teleport to Rellekka any other way, you will not see the attacking dagannoths, just the city as normal.
In Rellekka, join the Fremennik in defending their city against level 88 and 90 dagannoths that use melee and ranged attacks. Protect from Melee is recommended, and keep an eye on damage from the ranging dagannoths. For faster kills, help the Fremennik instead of fighting alone. A cannon greatly speeds up the process. Guthans is also a useful method of fighting them. Using the Vampyrism aura will limit the amount of food you need.
After 50 dagannoth kills, Brundt the Chieftain calls for you to join him on his ship on the indicated dock, marked with a yellow flashing arrow.
On the longship, speak with Queen Sigrid. She tells you that King Vargas is missing and that the two of them are engaged to be married. She then gives you the mighty Balmung. She mentions to not let Vargas near the axe, as he can be so clumsy at times. You can also speak to your own beloved (Princess Astrid or Prince Brand) on the boat if you want.
After receiving the Balmung, talk to Brundt and ask him for another seal of passage. He tells you to keep an eye out for Bardur on Waterbirth Island as he might have seen something.
If you are ready, head out for Waterbirth Island. If you are not, go with Brundt back to Rellekka to prepare or have him take you to the bank on Etceteria. If you choose Etceteria, he drops you off just west of the bank.
Saving King Vargas
Warning: Your trip through the Waterbirth Dungeon will take you through several multicombat rooms. You'll be attacked from all three sides of the Combat triangle, so wear good all-around defensive armour. Bring a few Prayer potions; lots of high-healing food for yourself and King Vargas; and maybe even a useful Familiar, such as a Beast of Burden to carry more supplies, a healer (a Bunyip or Unicorn stallion for example), or a Titan to boost your defence. Leave one space open for a rope Bardur will give you. If death occurs in this dungeon, your gravestone will appear inside the dungeon where you died.
Once on Waterbirth Island, go to the dungeon entrance to find Bardur. Ask him if he's seen anything strange.
He tells you he is hearing voices, like an old man's. Talk to him again. He tells you he saw a hole on top of the island "round to the south" from where you are standing, near a snape grass spawn and hobgoblins. He gives you a rope to go down the hole.
Make your way round to the south-western tip of the island, and choose the Tie-rope option on the hole and then climb down the hole.
Once down in the cave, you see an injured King Vargas north-east of the rope. Talk to him, and he tells you he is being held captive. (You may want to turn off run, as Vargas is too injured to keep up with you otherwise.)
Bardur yells down that "daggermouths" are swarming around the cave entrance above and you'll have to find another way out. Vargas tells you of another way, through an underwater passage that puts you in the middle of the Waterbirth Dungeon. He also asks for food but then says you should hold on to it for now. Later, in one of the rooms, you will need to feed him to keep him alive when he is under attack.
Tell him you will stay close to him when the option arises.
Inside the Chamber

NOTE: If you die in this part, your gravestone will appear outside the entrance to the Dagannoth Cave. Upon death your Balmung will not appear under your gravestone, however it can be freely re-obtained from Chief Brundt back in Rellekka.
Proceed north and then east to the ladder at the end of the corridor. Take your time and turn off run, as Vargas, limping, has difficulty keeping up with you. Don't get too far ahead of him, or the dagannoths will get him and return him to the first chamber. Vargas walks slower than walking pace, so make sure to stop and let him catch up with you.
Climb down the ladder, and you find yourself in room 15 on sublevel 5 of Waterbirth Dungeon. See the map to the right for the path to take from this room out of the dungeon.
This first room is a Multicombat area with Wallasalki with magic attacks, Rock lobsters with fast melee attacks, and Dagannoth with ranged and melee attacks. The rock lobsters can deal a lot of damage if you don't turn on Protect from Melee. They are level 156 and have a high defence, they can hit twice as fast as a whip. Give them a wide berth as you pass them - some may not notice you and will not attack.
Head to the far-east side of the chamber, past the small Summoning obelisk, and climb up the next ladder.
In this second chamber on the map to the right, you and the king are among a group of dagannoths attacking with melee and ranged. Kill the dagannoths that are attacking King Vargas, and use food on him to keep him alive.
You need to kill or distract the dagannoths attacking Vargas before you can climb up the ladder.
One method is to be on the Ancient spellbook and cast Ice Burst or Ice Barrage on the dagannoths attacking Vargas, freezing them and giving Vargas time to escape. Alternatively, when in a room of monsters using only a single attack style (wallasalkis - magic, dagannoths - ranged, rock lobsters - melee), attack each of the monsters before they notice King Vargas, using the appropriate protection prayer. This can be quite a drain on one's prayer points, so bringing a prayer potion along can be useful.
Climb up the ladder at the west side of the chamber.
After exiting the second room, the only monsters left to pass are rock lobsters, which do not target King Vargas. Make your way through the last two rooms.
After reaching the final room, King Vargas climbs the ladder first, and a trap set by the dagannoths causes rocks to fall, killing you. You awake to find yourself in the Fremennik spiritual realm, where fallen Fremennik warriors go when they die. This will be your future respawn until the quest is over.

Spiritual Realm
Note: If you leave the Spiritual Realm or log out, you may return by getting a letter From Brundt the Chieftain and continue from then on.
Talk with Eir — who explains where you are — and then with Nial Swiftfling and Asleif Hamalsdotter, who have walked up to the two of you.
After speaking with all of them, talk again with Eir so she can take you back to your friends.
You wake up on Brundt's longboat. Talk with Brundt, who explains what happened.
Speak next with King Vargas. He gives you a Prophecy tablet he found in the dagannoth cave. Vargas with Queen Sigrid then tell you they wish to be married on the boat and ask you to conduct the wedding ceremony. Marry the royal couple, choosing whichever options you feel are appropriate.
Following the ceremony, your own betrothed (either Prince Brand or Princess Astrid) suggests that the two of you also get married. You can agree or choose not to marry by selecting the "Let's discuss it later" option. (Any choice is fine, as events later in the quest will show.) If you have changed your gender since the original quest, both Brand and Astrid will simply say that you did a good job and you will not have the option to marry.
Finally, talk to Brundt, who offers to take you to Rellekka or to the bank on Etceteria.
The Fremennik fleet sails
Warning: Ahead you will face 2 fights - first against the Dagannoth Sentinels and then continuing straight on for a battle with the Dagannoth mother. It is possible to kill the sentinels and then teleport out to prepare for the second battle.
Get ready for a battle:
- The sentinels use melee up close and magic and ranged attacks at a distance, and will heal each other if not attacked correctly.
- The sentinels can be poisoned.
- The area is multi-combat, so combat familiars may be used.
- If you are not banking between fights, switch to the Normal Spellbook.
Back in Rellekka, talk with Brundt in the long hall about the war against the daggermouths. Tell him you are ready to go. You see a dramatic cutscene of the Fremennik fleet sailing for Waterbirth Island.
On board a ship, talk with Baba Yaga and Brundt about the meaning of the Prophecy Tablets. You three work out that the daughter of the old Dagannoth Mother has grown up and become the new mother to the dagannoths. To prevent a new mother from emerging again, instead of killing the mother, you must weaken her severely and then seal her in her chamber.
On Waterbirth Island, head to the dungeon entrance on the south-western tip of the island, where you originally found King Vargas, and climb down.
In the chamber, you find Koschei the Deathless, Baba Yaga, and the prince and princess of Miscellania. Talk to them, and then try to enter the tunnel to the south of where you are standing. Koschei says he will watch the entrance to the tunnel.
In the second chamber, attempt to enter the tunnel to the south. You hear a roar, and Koschei enters the chamber and says the Dagannoth Kings have entered the hatchery. He needs help, so the rest of your companions go back with Koschei while you go on to finish the quest by yourself.

The fight with the sentinels
See the map to the right for directions to the sentinels.
NOTE: If you stand between the two sentinels it is possible to prevent them from healing (May have been patched, did not work in some cases).
Enter the third cave, where you find the two Dagannoth Sentinels (level 193).
The sentinels will heal each other if the difference between their lifepoints becomes too large. To keep them from healing each other, alternate your attacks between the two and try to spread your damage equally. If their lifepoints are both reduced at a similar rate they will not heal.
Any weapon can be used to harm them. If you are going to melee, the sentinels are not immune to poison, so you can equip a Dragon dagger(p++) and use its special attack on both monsters twice at the beginning of the battle and then switch to the Balmung.
If you are on the Ancient spellbook, the Blood spells are effective on the sentinels, letting you save food for the final battle. However, keep in mind that it is recommended to bring Blast, Wave, or Surge spells, which will not be possible to cast if you are using the Ancient spellbook.
If you bring a Beast of Burden, Titan, or other attacking familiar, you can set it to attack one of sentinels while you alternate between the two: The sentinels will not heal damage inflicted by a familiar's attacks.
Once killed, either teleport away and prepare for the final battle, or proceed. The final battle will be difficult if not fully prepared. The sentinels will be permanently gone - teleporting away after they are killed will not cause them to return.
The Dagannoth Mother
From the now-empty dagannoth-sentinel chamber, enter the tunnel to the south to get to the next cave. You find Dagannoth guardians here.
Make your way through the cave, avoiding the guardians: Head east, climb over an obstruction, loop around to the west, enter a tunnel entrance, and then head south. See the map above right for the path to the mother.
You find the entrance to the Dagannoth Mother's chamber.
Strategies

Much like the mother from Horror From The Deep and the Gelatinnoth Mother from the final subquest of Recipe for Disaster, this new mother signals her weakness by the colour on her back. Unlike those preceding mothers, however, her colour changes do not follow a predictable pattern. Instead, she randomly moves between colours and sticks with colours you either didn't bring a weapon for or you yourself have a lower combat level in.
To cover her shifting vulnerabilities, bring the required Balmung, runes for casting each of the four elemental spells, and a ranged weapon.
She is a strong foe, using a powerful melee attack up close—which can strike for 430 life points—as well as range and mage attacks. She does not move toward you to attack with melee, so you can attack with mage and range from a distance and then guard against her mage and range attacks. Protection prayers or Deflect Curses can prevent a lot of damage.
Choose armour with a high magic-defence bonus and without much of a magic-attack penalty. For your inventory, consider a Prayer Potion or two, a Super defence potion, enough runes to cast each of the four elemental spells at least 50 to 100 each, and the rest high-healing food. A Beast of Burden filled with extra supplies would be useful.
After you enter her chamber, the dagannoth mother will briefly speak with you. Be prepared to turn on your Protect from Melee prayer, because she attacks you after the short dialogue and can hit up to 430 with melee. The mother's stripe will be grey at first and will not change until you hit her with the Balmung, which activates her colour changes.
You will not be able to leave the fight except by teleporting out.
If you die while fighting her, you end up in the Fremennik spiritual realm again. Eir gives you the option of returning to Waterbirth Island or your regular Spawning spot. You don't lose regular items when you die, so you can return to a bank and re-stock before trying to fight again. You still lose items you normally lose on dying, such as Fremennik sea boots 3.
Make sure you are on the standard spellbook so you can use the elemental spells.
The battle must be started with a Balmung attack.
The following table lists the mother's vulnerabilities:
| colour | Attack Weakness |
|---|---|
| White | Air Spells (Wind Strike, Wind Bolt, Wind Blast, Wind Wave, and Wind Surge) |
| Blue | Water Spells (Water Strike, Water Bolt, Water Blast, Water Wave, and Water Surge) |
| Brown | Earth Spells (Earth Strike, Earth Bolt, Earth Blast, Earth Wave, and Earth Surge) |
| Red | Fire Spells (Fire Strike, Fire Bolt, Fire Blast, Fire Wave, and Fire Surge) |
| Orange | Melee attacks with Balmung |
| Green | Ranged attacks or Special attacks |
If you cannot clearly see her colour changes, go to Graphics Settings and try setting Lighting detail to Low. Your chat box also tells you what colour she has changed to. You will do little or no damage if you are not attacking the correct weakness.
See the Dagannoth Mother page for more on how to fight her.
The Final Showdown: vs Dagannoth Mother
Enter the dagannoth mother's chambers. You are in a small antechamber with a Bronze pickaxe, a Plank, and a tinderbox to the west.

Enter the tunnel to the south to find the dagannoth mother. After a brief conversation, get ready to turn on your Protect from Melee prayer because she is about to attack you.
After her attack, begin the fight with the Balmung. Your Balmung attack damages the mother and initiates her colour changes. Another option is to use the dragon dagger p++ special. Once poisoned, you can simply stand in the safe spot and wait for the mother to run out of lifepoints!
If you are mainly using range and mage attacks, step back, keep your distance, and switch to your Protect from Missiles prayer. Eat as needed, and change your attack style to match her changing colours.

This is one battle where the function keys are best utilised to switch interfaces quickly. F1 goes to the inventory for food and weapons, F2 goes to the equipment screen, F3 goes to the Prayer menu to switch prayers, F4 goes to the Spellbook to switch spells, and F5 goes to the attack styles screen. This greatly reduces mouse movement and clicking. Practice switching interfaces beforehand to get used to which button does what.
When the mother runs out of life points, she collapses, yells "No! You cannot do this!" but does not die.
Note: After the mother has collapsed, if your familiar attacks her, she may briefly stand up and retaliate against you, possibly causing damage. To be safe, keep on the Protect from Melee prayer until you are out of her chamber, if you are using a familiar.
If you are wearing a ring of life and are teleported but manage to kill the mother before this, the mother will be lying on the ground just as if you had killed her. Exit her chamber, and return to the small antechamber, which contains the pickaxe, plank, and tinderbox.
Seal her chamber
In the small antechamber you passed through earlier, pick up the pickaxe, plank, and tinderbox and choose Collapse Pillar on one of the pillars in the room to seal in the mother.
Note: The toolbelt currently does not work for this.
Your plan goes amiss, however, and the ceiling caves in, killing you once more and sending you back to the Fremennik spiritual realm.
Talk to Eir, who says it's still not your time to be in the realm and she probably won't see you again until your real time comes. She tells you to stop wasting her time and sends you back to your companions in the main chamber, where you first found King Vargas.
Fremennik Fatalities

Back in the main chamber of the dungeon, you see the dead bodies of Prince Brand and Princess Astrid on the floor. Choose the Check option on them.
Talk with Baba Yaga and Koschei to learn what happened. Baba Yaga tells you the prince and princess didn't die in vain. Koschei says he thinks he has died again.

Attempt to climb up the rope. Brundt the Chieftain calls down, telling you to head to his boat as the Fremennik offence is failing.
Onboard his ship, talk with Brundt about what happened. If you use a teleport to escape the dungeon instead of the rope, talk to Brundt in Rellekka, where he tells you he is waiting for you on Waterbirth Island. The quest then continues.
You sail to Miscellania and Etceteria and watch a poignant cutscene where King Vargas, Queen Sigrid, Brundt, and you launch and set fire to pyre ships bearing the bodies of Prince Brand and Princess Astrid. Brundt and you then return to Rellekka.
Congratulations. Quest complete.
Speak to Brundt three times after the quest to receive your experience rewards.
Rewards

- Three lots of 150,000 experience in either Attack, Defence, Strength, Constitution, Ranged, Magic or Prayer (level 75 and higher), for a total of 450,000.
- Balmung
- 2 Quest Points
- 2 extra spins on the Squeal of Fortune
Music unlocked
Required for completing
Completion of Blood Runs Deep is required for the following:
- Fremennik Tasks:
- Elite : "Axe'll Grease"
Gallery
-
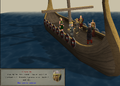
 Fremennik fleet sails to repel the invasion.
 -
 King Vargas and Queen Sigrid marry.
 -
 Your marriage to Princess Astrid.
 -
 You may kiss the bride.
 -
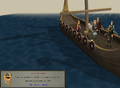
 The mother is now at your mercy.
 -
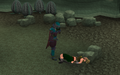 Princess Astrid lies dead
 -
 The Pyre funeral
 -
 The pyre funeral.


Transcript
Trivia
- When the quest first came out, the spoilers for the quest read, "Eir is keeping the rewards a secret for now. She'll let us know what they are sometime before the End of Things..."
- Upon the completion of this quest, one's Adventurer's Log will read: "A new dagannoth mother threatened civilisation itself around the northern seas, but with a mighty force of Fremennik and their allies at my back, I have trapped her."
- While you are escorting the king out of the dungeon, the monsters you kill in the dungeon have significantly reduced drops until you finish the quest or enter the dungeon a different way.
- There currently is an unfixed bug that, right after their suggestion to get married as well, Princess Astrid/Prince Brand starts crying, leaving you unable to get married. Reading the quest log results in you apparently having rejected their proposal.
- This is the first quest that requires players to have finished a whole tasks list before they can start the quest.
- This quest gives the most experience directly when completed: A total of 450,000 experience. Previously, the highest reward came from While Guthix Sleeps, offered a total of 400,000 experience. Nomad's Requiem gives 70 Zeal points, which can potentially be converted into more experience if it is spent on a skill of a sufficiently high level.
- When Baba Yaga takes the player's seal of passage, the player states "But I have a seal of pass-- Oh, I get it. I see what you did there." This is a reference to a popular internet meme.
- During the battle in Rellekka, some Fremenniks say "This is Rellekka!". This refers to the film 300, where King Leonidas said "This is Sparta!"
- The quest includes an Aliens reference in the first conversation that you have with King Vargas underneath Waterbirth Island ("They mostly come at night. Mostly...").
- The quest also includes two Star Wars references, when you speak to Nial Swiftfling. Nial says, "You've got a lot of guts coming here, after what you pulled." Lando Calrissian says this to Han Solo when Han arrives at Cloud City during Star Wars Episode V: The Empire Strikes Back; like Lando, Nial was merely pretending to be upset. Also, right before the final battle if you ask the Mother for a speech she responds:"what, something like, if you strike me down now blah blah blah?" Which is a reference to Obi-Wan Kenobi's threat to Darth Vader in Star Wars IV.
- There is a Helm of Neitiznot and a Steel Longsword on the dry stone wall near Eir.
- If your gender has changed since you finished Throne of Miscellania, in the case of male to female, Princess Astrid will say "Oh, [player name], how I wish you were still a man. It's so hard to be alone at a time like this." Similarly, in the case of female to male, Prince Brand will say, "Oh, [player name], how I wish you were still a woman. You were such a lovely Muse..."
- If you are on a Dagannoth Slayer task during the quest then the Dagannoths you kill count towards your task but you will only receive 1xp per kill (though a Slayer helm helps by increasing your damage and accuracy).
- The path into the final floor of the Waterbirth dungeon (where you went in to rescue the king) is closed off after completion of the quest and cannot be used as a short-cut for Daganoth King slayers.
- When you die due to the cave ins, the place you end up in is a reference to Asgard and Valhalla, the place where men who died honorably in battle end up in Norse Mythology. The great battle is a reference to the Ragnarok, the last battle before the universe is destroyed, and Midgard (earth) sinks back into the sea.