Extremely long (Can take 4-8 hours, depending on degree of preparation. Considerably less if your stats meet the requirements and you have the items and supplies required ahead of time, as well as having read the guide for a general understanding of the quest. It is highly recommended you gather the supplies needed prior to starting) At higher levels the quest can be completed in as little as 1.5 hours.
Note: Temporary boosts DO work for all of the above
A Mid-High combat level is recommended e.g.
75 Combat (However, with Protect from Melee and several prayer potions, a player may take little to no damage in every combat situation throughout this quest)
NOTE: The quest can be started even if the player doesn't have all the required skills.
This used to be one of the hardest quests in RuneScape, however it has become much easier with summoning and modern gear. It is easier than quests like Recipe for Disaster and Desert Treasure. While those quests are harder to complete, this one is quite hard to build the requirements for and it is very long. Alternatively, skill boosts such as Spicy stew can be used for most of the requirements, if not all. Once a player has met all the requirements, though, it's time to do the quest. Remember, the way to leave Shilo Village on foot is to go out both front gates (Past the Undead Ones) and search the cart.
Getting Started
Starting the questTalk to the guards just outside the Legends' Guild (Fairy Ring BLR). If they think players are worthy, they'll send them through the gates to talk to Radimus Erkle to get their assignment.
Radimus gives the player some notes, listing a few tasks to do:
Bring a gift from the jungle locals to be displayed in the guild.
Before leaving, grab a machete from the cupboard and at least 3 papyrus from the desk. (Both of these can be bought from the general store in Shilo Village too, but these are free.)
Note: Before, if players stood outside the guild, they could see two Radimus Erkles at the same time. This has since been patched in a hidden update.
Items to complete this part of the quest:Radimus notes, machete, hatchet, 3-5 papyrus, 3-5 Charcoal. Armour, weapons, and food may be useful due to some aggressive level 64 wolves. Players need a crafting level of 50 to draw the map. The general store in Shilo Village sells charcoal, machete and papyrus if players need to buy some before leaving for the jungle. A vial of antipoison is suggested, but not truly needed.
Go to Karamja. Suggested methods:
Take a boat for 30 coins (less with discounts) from Ardougne (a good method because the Legends' Guild is close to Ardougne)
To get into the Kharazi Jungle, cut through the overgrown jungle vegetation using a hatchet and machete.
The fastest way through is either the western or eastern edge of the jungle (marked 1 and 4 on the map, above), depending on the travel method chosen.
Make each section of the map by right-clicking Radimus notes and choose Complete Radimus Notes in each part of the jungle (west, centre, and east). It is possible to fail, destroying one papyrus and one charcoal, so bring spares.
Items to complete this part of the quest:Radimus notes, machete and a hatchet, Agility boost may also be useful (if not 50 Agility).
Head back out of the jungle, and ask any of the Jungle Foresters who wander the edge of the jungle if they have seen any natives. Offer to trade for the item which calls them, then use the completed Radimus notes on the forester. The player gets a Bull roarer. If you lose it you will need to get a new one by giving an Oomlie wrap to a Forester.
Go into the (Kharazi) jungle and swing the bull roarer to call a local named Gujuo.
Players should tell Gujuo that they wish to make friends with the jungle locals. He tells players about his tribe and its totem pole.
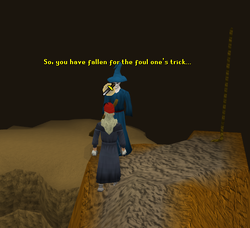
His tribe needs help because his tribe's shaman, Ungadulu, who has the special Yommi tree seeds to make a new totem pole, is trapped in caves in the Kharazi jungle. Agree to release Ungadulu.
Toward the north-west edge of the jungle are three rocks that form a triangle (marked 5 on the map, above). Search one of the rocks to crawl through a narrow opening to get into the cave (50 Agility required). Failing this action damages players for 50 lifepoints, and players must try it again.
Investigate the flame wall to talk to the shaman. He tells the player that only pure water can quench the flames. But he looks a little strange. (Note: If you touch the flame wall instead of investigating it, you will be hit a minor 10-20 damage; a higher Agility level seems to lower the chances of this)
Search the items in the cave to find notes from Ungadulu. Search the crate to find the Scrawled note; search the table to find A scribbled note; and search the bed to find the Scrumpled note. The notes provide a hint to what has happened to Ungadulu.File:Evil shaman.png
Once back outside the cave, call Gujuo with the bull roarer. He tells of a pool of sacred water in the middle of the jungle. The water can only be carried in a special vessel that he sketches for the player.
Items to complete this part of the quest:Lockpick (possibly several; bring extras if your thieving level is lower), Pickaxe (with 2 Dwarven Stouts (m) if you're 50 mining), Cut gems: Opal, Jade, Red topaz, Sapphire, Emerald, Ruby and Diamond, and Runes to spell SMELL (soul, mind, earth, 2 law runes for the English version), (If restocking after the gathering of the water, a hatchet, machete and Radimus notes are needed). (If you die in the shaman's cave you will lose your items and won't be able to get them back.)
Go back to the cave and notice there's a crevice hidden behind one of the bookshelves (the north-eastern one - right click).
Squeeze through the crevice and cross the cavern to the large Ancient Gate.
Search the gate to pick the lock. Failure may cause the lockpick to break, so be sure to bring extras, as the door cannot be picked without one. A Hair clip can be used instead of a lockpick. Note that when you fail, a message will tell you that you failed before the lockpick breaks, and if you click somewhere and walk away, the pick will not break. (50 Thieving is required for this part)
Next use the pickaxe and Mining to "smash-to-bits" the boulders to a second Ancient Gate. Failure damages Mining level temporarily. (Level 52 Mining is required to smash the rocks.) If you are 50 mining, you can use the two Dwarven Stout (m)'s for this part. In order to smash through all three boulders, you'll need two of them because by the time you get to the third boulder, your Mining level will deplete to level 51.
Force open the second Ancient Gate using Strength. Failure damages Strength level temporarily. (Level 50 Strength is required to open the door.)
Beyond the door are level 83 Death wings. Killing one accomplishes a hard Karamja task, but it is not necessary to finish the quest. Be careful, as this is a Multicombat area.
Run further into the cave, and jump over the low, jagged wall. Failure results in 60 damage.
On the south-west wall of the cavern is a Marked wall. Search this spot to learn the runes to get through the wall.
Use in order the SMELL runes Soul, Mind, Earth, Law, and Law runes on the wall.
Walk through the door into a large cavern. The next puzzle is composed of a number of stalagmites sitting in pools of water. Search one of the stalagmites to see the riddle. Use the gems on each stalagmite. Facing north-west, the order of the gems by value is: opal, jade, topaz, and sapphire down the right column, then emerald, ruby, and diamond down the left column. (See map insert for layout.) A quicker way of doing this is to drop the gem directly next to the rock and it will automatically glide towards the rock. A message saying "As you drop the gem, it slowly glides over to the sharp rock. And gently floats above it, rotating slowly. The *gem name* glows and starts spinning as it hovers above the rock. The gem soon begins to fade."
When all of the gems are in place, the player is levitated to the centre of the cavern and treated to a light show that leaves behind the Book of Binding. (If players log out during the light show, they need to search the stalagmites to restart it.)
This book enables players to bless vials. (NOTE: Enchanting vials drains Prayer AND Magic level. It's advised against doing this just prior to battle if you're going to be fighting with Magic! Filling blessed vials with pure water from the Blessed gold bowl makes vials of Holy water, a stackable ranged projectile useful for fighting demons.
Go to the start of the cave, and investigate the octagram. Talk to Ungadulu and he will tell you that you need pure water to get to him. Then go outside and use the Bull Roarer and ask Gujuo about pure water. He will draw you a sketch of a vessel of sun metal (a gold bowl).
Take a hammer and at least two gold bars to any anvil. The closest is in Safta Doc's hut north of Tai Bwo Wannai. Try to make the gold bowl. It is possible to fail, so to be safe bring more than two bars. Remember: the way to leave Shilo Village on foot is to go out both front gates (Past the Undead Ones) and search the cart.
Head back into the jungle and call Gujuo. He helps to bless the gold bowl so that it can carry the pure water.(This can be interrupted by combat) It is possible to fail, costing 50 prayer points with each failure. If players fall below 420 prayer points, Gujuo no longer helps players until they restore prayer points to at least 420. For this reason, it is advisable to bring at least one dose of a prayer potion.
With the Blessed gold bowl, go to the pool of pure water in the middle of the jungle (marked 6 on the map of the jungle, above).
Use the machete on the reeds by the edge of the pool to obtain some hollow reeds. Use them to siphon the water into the bowl.
The water evaporates in the jungle heat, so players must probably return to fill the bowl again before the coming fight.
Fighting the Demon
Round 1.
Items to complete this part of the quest: Blessed gold bowl filled with pure water, Radimus notes, Book of Binding. Darklight and vials of Holy water may be helpful. If using prayer for the fight prayer potions are a must.
If required, go back to the bank and resupply.
Use the pure water on the fire wall to step through without damage.
Use the Book of Binding on Ungadulu to release the demon Nezikchened.
The demon is level 187 and drains prayer. Prayer is drained at the beginning of the battle to the sum of the digits of the prayer level before being drained. (For example, 54 after being drained would be 9. Note that you will not be left with more than 100 prayer points after this spell. If the sum of the digits of your prayer level exceeds 10, 100 more prayer points will be drained. For example, 65 after being drained would be 1.)
The demon casts a Fire Blast just before dying, so players should keep their Lifepoints up so that he doesn't kill them with his last-ditch attack.
Players can lower his stats by hitting him with Silverlight or Darklight (melee) or by throwing Holy water at him (ranged). Players with lower combat levels should use both methods in the beginning of the battle.
If the battle takes too long, the demon vanishes, and players must begin again by using the book on Ungadulu.
Once the demon is defeated, talk to Ungadulu, who thanks the player with some Yommi tree seeds.
It is a good idea to use the drop trick at this point to obtain at least six Yommi tree seeds because the seeds often to not grow on the first attempt. This saves coming back to get more seeds later if needed.
If player accidentally attacks Ungadulu, he hits them to the wall and deals between 80 and 160 life points damage. The player will have to re-enter the firewall.
Ask him how to get out. He casts a spell to let players walk through the flames. (to do this, right click and use the option "investigate firewall")
A Vial of water, Ardrigal and Snake weed, Blessed Golden Bowl, Yommi tree seeds, Radimus notes, Machete, Hatchet, a Lockpick (possibly several), Pickaxe, Bull roarer (briefly, bank it when you have the potion), Rope (very important for winch step), an Unpowered orb (possibly several), runes to cast any Charge Orb spell (an Elemental staff may substitute for runes; you must be on the standard spellbook). Arms and supplies, including a Prayer potion, for the second battle would be helpful.
Use the seeds on the bowl, if there is any water remaining in it after possibly making Holy water and walking through the fire.
Go to the pure water pool and try to refill the bowl.
The saplings must be watered after they're planted, so players shouldn't try to plant them unless they can refill the bowl.
If players can refill the bowl without the pool going dry, then they can skip to later in the quest.
After a small time, it may look like the pool is replenished, but it isn't. Attempting to refill the bowl again should demonstrate this.
Call Gujuo. He says that the underground source has probably been blocked off by some evil spirit. He also says that the underground source is a very scary place, guarded by undead adventurers who have sought it before. Players need a potion of bravery made from Ardrigal and Snake weed. Players have already found these herbs during the Jungle Potion quest.
Collect the herbs and mix them into a vial of water for a Bravery potion, which is consumed in 1 dose, however, do not drink the potion now.
Go back to Ungadulu's cave then go through all the same areas behind the bookcase as before. This time, when players reach the area with the seven pools, no runes are needed.
Go to the north part of the chamber, where you will find another door. Search it to read the riddle, if desired. Cast any Charge Orb spell on the door to go through it. (Players must be on the standard spellbook.) If the spell fails to open the door, try again. If you exit the cave then you will need to cast the spell again to get in. WARNING: Attempting to open the door at the same time as another player will result in both players failing. Go one at a time.
Beyond the door is a room with several barrels in it. Ignore the barrels for now.
Players can smash the barrels to obtain several Dark Daggers, fish (raw or cooked, noted), ores (noted), logs (noted), food, rope, rocks, weapons, potions, coins, metal bars, runes, caskets, Paramaya tickets, half a meat pie, or probably a lot of other things not listed here. A player may also be attacked by a Death Wing.
If a barrel contains nothing, a player will NOT be damaged.
There is also a chance that players could hit a barrel at the wrong angle and lower their Attack a few levels temporarily.
There is also a chance that the barrel will explode causing 64 damage.
Use a rope on the winch, drink the bravery potion, and climb down the rope.
If the rope "disappears" before players can climb down, they can just search the winch to "find" it attached again.
It is possible that players may slip off the rope and fall, taking up to 180 points of damage.
If a player leaves the room and comes back at a later time, a new Bravery Potion is not needed.
Players should find themselves on the top of a long, winding ridge with several obstacles on it, next to a Blue hat. Attempting to take it invokes the skeletal apparition of Viyeldi, who gives players some clues about what is to come.
Climb over the rocky ledges using Agility to get to the bottom of the ridge. Failure results in one of the following:
Falling off the ridge completely and taking up to 450 points of damage
Slipping off just that one obstacle for less damage, but taking a temporary reduction in Agility level, making it more likely that players fail subsequent obstacles.
Resting between obstacles will restore lifepoints & Agility if you have lost any.
At the bottom of the ridge, players must defeat three spectral monsters named Ranalph Devere (level 92), Irvig Senay (level 100), and San Tojalon (level 106). Using Protect from Melee makes the battles fairly easy. Talk to each one to fight him. Once players have beaten them, they won't attack again. From defeating each monster, you should get a Lump of crystal, a Chunk of crystal, and a Hunk of crystal.
Take the pieces of crystal to the furnace in the north-east part of the chamber. Use each one on the furnace to make the Heart crystal (requires 50 crafting). "Look-at" the Heart crystal to hear the clue, "Bring life to the dragon's eye."
Southwest of the furnace, find a mossy rock surrounded by crumbling walls. Notice on the minimap that the area looks like the head of a dragon, and the mossy rock is the eye. Use the crystal on the mossy rock to activate the crystal.
On the south side of the chamber is a magical barrier which the crystal can now open when players put the crystal in the heart-shaped recess to the left of the barrier. On the other side of the barrier are Lesser demons and beyond them is the source of the pure water.
Choose a Path
There are three boulders blocking the water flow. Try to push one, and a spirit named Echned Zekin appears. He says he's being tortured and begs the player to help him by killing Viyeldi.
Players may notice that "Echned Zekin" is an anagram of "Nezikchened." Players may also notice that Echned Zekin uses the same design as the mysterious shades in Daemonheim. It also has a combat level of 187, which is the same as Nezikchened, though he cannot be attacked in his ghost form.
At this point, there are two paths the player can choose. WARNING: Default click is wield which will kill Viyeldi.
The Short and Hard Path
Killing Viyeldi.This path involves complying with Echned Zekin's request. It takes a shorter time to complete because players do not need to exit the dungeon. However, it makes the combat a little harder since the demon will drain prayer this time too.
Go back to the ridge and walk back up to the very top. The blue wizard hat is Viyeldi, whom players may have met on the way in. Stab him with the dagger, it will become a "Glowing Dagger".
Return to the cave with Echned Zekin. Push a boulder to get him to appear.
Unwield the Glowing Dagger and use it on him. He reveals himself to be Nezikchened and attacks the player, draining the player's prayer.
The Long and Easy Path
This path involves reneging on the agreement with Echned Zekin. It takes a longer amount of time to complete, and another orb and charge orb spell to return because players must exit the caves. However, the combat at the end is only against the demon, not the guardians as well.
Ignore the previous agreement. Instead, leave the cave. Go to a bank and get another unpowered orb and runes for the charge orb spell, and, if neccessary, restock food and potions.
Return to Ungadulu back at the entrance in the first room and talk to him. NOTE: You may have to teleport out, since the Ancient Door dialogue will be interrupted by aggressive Death wings. Use the dagger on him, and he takes it. He recognises the evil in the dagger and uses it to create the Holy force, which he gives to the player.
Return to the cave with Echned Zekin. Push a boulder to get him to appear.
Use the Holy force. He reveals himself to be Nezikchened and attacks the player, but doesn't drain prayer.
REMEMBER TO PUSH THE BOULDERS OUT OF THEIR PLACES.
Note: One can lodestone to Edgeville, bank there, run east to the Fairy Rings, use CKR, and just head south. This will cut down tremendously on time, and one doesn't have to waste 10 coins for the Shilo Cart.
Fight the Demon Again
Nezikchened may begin with magic attacks, but switches to melee. At one point, he throws a dark dagger at the player, which may hit for up to 180 life points. Players may dodge the dagger, also, but there is no way to control whether it hits or misses. After he throws the dagger, Iban Blast no longer will harm him this time around.
After defeating him, push the boulders out of the way of the water's flow. The boulders roll back after a short while. Nevertheless, the flow is unblocked. It is also possible to refill your golden bowl with sacred water right here - after you push aside the boulder, a spring of sacred water appears and your empty bowl may be used on it and be filled.
Then, get out from the cave and go back to the jungle.
Restoring the Totem
The Yommi Tree
Items to complete this part of the quest: Radimus notes, Bull roarer, Yommi tree seeds, Golden bowl, machete, and hatchet (rune or better). Armour and supplies, including a Prayer potion, for the third battle would be helpful. Spicy stew or Greenman's Ale is necessary if you do not have the required 45 Herblore level to plant the tree.
Fill the bowl from the restored pool. If necessary, use the seeds on the bowl to make them germinate into saplings, then fill the bowl again.
Use the bull roarer to call Gujuo. He tells the player what to do next to make a new totem.
At this point, the wolves can prevent players from completing the totem. It's a good idea to kill the one north-west of the pool before proceeding. The next few steps should be complete before it respawns. Everything happens very quickly until the totem is complete.
Plant a sapling in the fertile soil just north-west of the pool. It's a brown spot, bare of vegetation. Note that it is possible to incorrectly plant a Yommi tree seed, resulting in a lost set of seeds. Water the sapling with pure water to make it grow. If you don't water it, the Yommi tree sapling will die shortly after being planted. If this happens, you'll have to remove the dead Yommi tree by using a hatchet on it, and then wait for the now "damaged earth" to turn back into "fertile soil", roughly a minute later, before trying again with another seed.
Stay alert, as the tree grows in about ten seconds. Once the tree gets to full size, players must immediately chop it down and shape it. If the tree rots (which also happens quickly) before or after it's cut down, players get only regular logs, not a new totem. There are three saplings, so there are three chances to get it right.
Chop down the tree when it's big enough. Keep chopping after it's down until it becomes a Yommi totem. The first click chops down the tree. Three more clicks shape it. It's done when the default action is Lift. Players must "use" their hatchet on the tree from inventory, not wield it. Simply clicking the tree uses the hatchet, just like it would if you were cutting any other tree in RuneScape with a hatchet in your inventory.
The Final Battle
Finishing at the totem
Find any of the locations where there's an old, brown totem. One is located just east of the pool, but there are some all over the forest.
After finding one, make preparations for the last fight.
Players who chose the long, easy path should turn on Protect from Melee, then use the new Yommi totem on the old one. The demon appears and attacks the player.
Players who chose the short, hard path can just use the new Yommi totem on the old one at this point. They must fight the three guardians first, one at a time, from the highest-levelled to the lowest-levelled (It is possible to have a friend can attack the guardians for you, however they will not be able to attack the demon). Players should then turn on Protect from Melee before the demon appears, if they hadn't already turned it on for fighting the guardians. The demon appears after the three guardians are defeated.
File:Nezikchend Defeat.pngNezikechened being defeatedThe demon gets several free blows before players can respond. This lag is intended and can result in a swift death, especially for lower-levelled players. Protect from Melee negates all damage from his "sucker-punches", including ones in between the 3 undead warriors (If you took the short and hard path). Once again, the demon drains prayer, but only when he fights you himself. He attacks with melee and magic, which is more effective this time.
Using ranged, magic, or a halberd from between the trees with the Protect from Magic prayer activated allows players to defeat him without risking health. Many players, however, have reported that the demon does not even attempt a magic attack during close-up melee, so Protect from Melee should be sufficient in that case.
NOTE: If you die, you will receive a grave; If you aren't skulled, the Radimus notes are one of the items always kept on death, so you can easily re-enter.
Finishing Up
When Nezikchened falls for the last time, use the new totem on the evil totem again. Gujuo appears and rewards the player with a Gilded totem. NOTE: Do NOT use the bull roarer after you killed Nezikchened and restored the totem: the Jungle Savages (Level 90) will attack you.File:Gildedtotem.pngThe Gilded Totem.
Go back to the guild with the completed Radimus notes and the gilded totem.
Talk to Radimus Erkle in his office to give them to him. He wants to meet the player in the main hall.
Go to the main hall and talk to him again to be admitted into the Legends' Guild.
When fighting the demon, you can use safe spots to range, mage, or halberd it. One of the safe spots for fighting him the second time is prone to a Lesser Demon wandering into your safe spot, beware!
First safe spot: Behind the table. It might take you a while to get into position, so it is recommended you use prayer potions until you get into position. Exiting the hexadecagon works too.
Second safe spot: Directly east of the most southern boulder. It is between the wall and a few stalagmites.
Third safe spot: Behind random bushes around the area. You can also use the totem east of the water pool.
44: Use Spicy Stews with 1-3 brown shakers, or Greenman's Ale.
Spicy Stew is very random, so it is suggested you bring many brown spice shakers with you while you plant the Yommi seeds. If the stew does negatively affects your herblore, wait until it regenerates to your normal level. Then add 3 brown spices to another stew and repeat the process.
You can also do the quest with 44-49 agility. To do this, drink an agility potion/spicy stew/summer pie every time you need to enter the cave.
You can do the quest with 47-49 crafting if you use a Crafting potion to make the map, and when forging the heart in the furnace.You can use a Dwarven Stout or a mature dwarven stout to raise your Smithing level by 1 or 2 respectively. This makes it possible to complete the quest with 48 smithing.
You can pick the lock to the door using only one lockpick without it breaking by walking away from the door when you receive the message that you failed to pick the lock. However, this point is probably a bug. Players are encouraged not to exploit bugs.
You can do the quest with only 47-49 thieving by drinking a Bandit's Brew sold in Bandit Camp. You should not wear anything of a god (although wearing Guthixian items is allowed) if you wish not to be attacked. Also you can use Spring (+1), Autumn (+2), and Summer (+3) Sq'irk juice glasses from the activitySorceress's Garden, or 44 thieving with a lucky yellow spicy stew +6, also the Abyssal Stealth special move of an Abyssal lurker can temporarily increase one's thieving level by four (also their agility), (62 summoning needed also).
A useful "technique" on restocking is (when finished with each section) casting Lumbridge Home Teleport, recharging prayer points at the altar in Lumbridge, banking in the Culinaromancer's Chest (or the bank upstairs if you haven't started Recipe for Disaster), grabbing some Ardougne Teleport runes/teletab and 40 gp, grabbing a trip to Brimhaven from Ardougne, and using the cart to Shilo. Using this technique can speed up restocking time considerably (as well as save money that might have been spent on extra prayer potions). Even faster, if levels allow, is to move your house to Brimhaven. Teleport to any bank, cast home teleport, exit to Brimhaven, and then take the cart back to Shilo.
Alternatively, if one has coins on oneself, one can skip the home teleport and simply teleport to ones house, exit, run to the cart, board it, and use the bank in Shilo Village.
Trivia
This is the first master quest released.
There was once a glitch in the "Final Fight" where Nezikchened would spawn on top of the totem pole, and you would have to kill him twice. This first time you killed him he was unable to attack you.
Upon the completion of this quest, one's Adventurer's Log reads: "To gain access to the Legends’ Guild, I explored the depths of the Kharazi Jungle and defeated the demon Nezikchened. The locals rewarded me with a totem pole."
During the RuneScape 2 beta, Radimus was temporarily replaced by a non-player character named Erasmus. After RuneScape 2 itself was released, Radimus once again became the starting point for the Legends' Quest.
In one of the steps, in which you agree to help Echned Zekin, and he gives you a dark dagger, you can drop the dagger and talk to him again to receive another. As the dagger is taken from you during the quest, this item may be considered a fairly rare item, as very few players have done this.
File:Nezikchends.pngFighting two demons at once.There is currently a glitch where if you talk to Radimus after you have finished the quest, It will say that you completed the quest. Even though you have had it done for a while.
There is currently another glitch, which makes it possible to spawn the Bosses for more than one time. If you use the totem and you don't attack the demon, your friend is able to kill the demon. You can summon more demons while your friend is fighting.
During the final battle, any of the guardians may start to attack a nearby player when they spawn.


