Salt in the Wound
| |
| Release date | 5 July 2011 (Update) |
|---|---|
| Members only? | Yes |
| Quest series | Sea Slug quest series Temple Knight series |
| Official difficulty | Intermediate |
| Official length | Medium |
| Developer | Patrick N |
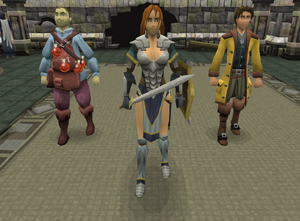
Salt in the Wound is an intermediate members quest that was first announced in Behind the Scenes - July update,<ref name="News">Mod Mark. "Behind the Scenes – July". 1 July 2011. RuneScape News. *</ref> and was released on 5 July 2011. It is the last quest in the Sea Slug quest series.<ref name="Salt">Mod Trick. "Salt in the Wound". 5 July 2011. RuneScape News. *</ref> The quest involves defeating Mother Mallum, the Queen of the Sea Slugs, and involves several characters from the previous quests in the series such as Ezekial Lovecraft and Kennith, as well as new ones such as Eva, Sir Tiffy Cashien's niece.
This quest is only the second to involve Dungeoneering as a requirement and as a feature, the first one being A Clockwork Syringe. Its involvement in the quest has to do with an ingredient for a serum, which can disrupt the Sea Slugs' mind control, being contained within Daemonheim.
Walkthrough
| Start point: | ||
| Members only: | Yes | |
| Official difficulty: | ||
| Description: | None | |
| Length: | Medium | |
| Requirements: |
| |
| Items required: | None
Recommended:
| |
| Enemies to defeat: |
Note: These enemies can be fought with the playable characters so a high combat level is not required. As well, you do not have to battle the Daemonheim monsters. |
Note: This whole quest can be completed without your character fighting anything but this makes the quest much more difficult. You will not lose any items if you die during the dungeon or citadel parts of this quest, as this will only restart the current floor.

Starting off
Begin by talking to Kennith. Kennith can be found on the far east side of the Daemonheim Peninsula standing near Sonje and the Fremennik shipmaster. He will be an adult now, having grown up with Bailey on the Fishing Platform and also having learned powerful spells, up to Fire surge. He will say that he is glad to have found you, after having had contact with Sir Tiffy Cashien. He will want to talk in private and teleport a small distance away. Go west, up the stairs and Kennith will be waiting there. Talk to him and he will teleport two other helpers in, the fisherman partner from Kennith's Concerns, Ezekial (who is completely unaware of the mission), and Sir Tiffy's niece, Eva.
Introduce yourself and talk to Kennith again, agree to start the mission. Ezekial will throw one of his rubium bombs at the wall, which will open up. The party will enter the dungeon. A humorous cutscene takes place, in which Elfinlocks slays a Soulgazer and gets a hexhunter bow as a drop, only for the wall near her to be blown open, killing her, resulting in Ezekial becoming skulled. Qutiedoll and 1337sp34kr will approach looking surprised. They run through the hole, planning to sell their gatestone on the Grand Exchange.
-
Elfinlocks receives a Hexhunter bow as a drop from a Soulgazer.
-
Elfinlocks is killed by Ezekial making the entrance into Daemonheim.
-
You enter, and 1337sp34kr announces he is going to sell his Gatestone on the Grand Exchange
Daemonheim Dungeon
Once in the dungeon you need to find a blue key. The blue key will unlock the puzzle room. You will be required to fight some NPCs to get to the key room. If you have a low combat level, you may want to bring some food.
The Puzzle Room
You will enter the room with a Caustic gazer standing in front of a familiar dungeoneering puzzle. Choose a hero (preferably the one with the most health). Your character will distract the Caustic gazer while the chosen hero must cross the gaps to the other side without coming within one square of the Guardian Sphere.
One way to solve the puzzle is:
- Jump south across the first gap
- Jump west twice
- Jump south
- Jump north
- Jump east three times
- Jump south two times and the puzzle is completed.
Inspect the Seeker of Truth and return across the gap (regroup does not work). One way to get back across is to simply have the Guardian Sphere capture the character chosen. (This will hit for 500 lifepoints) If the character dies, just reenter the dungeon and talk to Kennith to teleport. After completing the puzzle Kennith will ask if you are ready to be teleported to the Fishing Platform. Say I'm ready and teleport to the fishing platform.
Fishing Platform
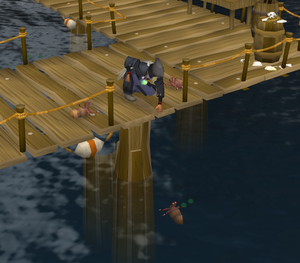
The Fishing Platform is located due east of Witchaven. To reach the Fishing Platform, if you didn't take the offer of being teleported when asked in the quest, talk to Jeb who can be found in the northern part of Witchaven. He will row you out to the fishing platform.
Once you reach the platform talk with Kennith and he will tell you that you need some ingredients for an anti-mind control serum. He says you will need some blood, given freely. To get the blood you simply punch Bailey and then respond, "So you don't feel pain?". Then say, "No pain? Prove it." Bailey will then take a shard of glass and cut his arm to prove that he no longer feels pain. He will give you the Blood-stained glass as proof of this.
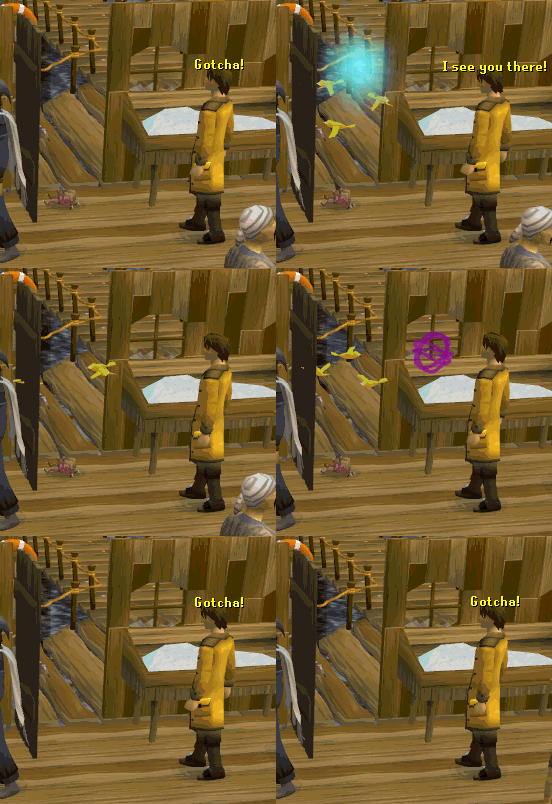
Kennith also tells you that you need a live specimen for the potion. To get a sea slug, head east to the fishing spot. Lure the fishing spot (don't try to take the slug, as this will damage you for 30 life points) and go back to Kennith, the slug will follow you.
Kennith will daze and telegrab the slug for you. A dazed sea slug will appear in your inventory. You will need a free inventory slot for the slug. Talk to him and he will say that you have all of the ingredients and give you the Seeker gland. Pick up the pestle and mortar in the room (a pestle and mortar from the toolbelt will work as well) and use any piece of the potion to make the anti-mind control serum. Talk to Kennith to prompt your team to move to the cave entrance.
Go west to the cave. Enter the cave by talking to the Slug thralls and ask, "Why can't we come in?". Then "I'm not a stranger", "I seek enlightenment in the joining", and finally, "I wish to hear the...". The guards will let you enter the Slug Citadel.
Slug Citadel
The Slug Citadel consists of a series of rooms. You will need to make your way, with your party of adventurers, though the rooms by solving puzzles. The rooms have a varying number of Risen Knights, some of which will need to be killed and some of which can be avoided. The members of your party will be healed to full health automatically when you move on to the next room. Unfortunately your character is not healed so you will need to bring some food. The exception to this is if one of your party dies before the room is completed, in that case, all members will be healed (including yourself) and you will only need to restart that room.
Note: If you log off you will find yourself outside on Witchaven near Jeb but all completed rooms will remain completed, and killed Risen Knights will stay dead except the ones the village people conjure. You will have to walk yourself and your characters through all completed rooms to return to the last room you were in before you logged out.
Your characters will follow you automatically wherever you go and if they are attacked they will fight to the end unless you move them or regroup.
To make a character stay in or go to a specific point simply click on the character and click where you want them to go. The same principle applies to using them to knock out witchaven guardians/killing Risen Knights or pulling levers.
Always make sure that you click the character again to return control to your player or you will find your character running aimlessly around the screen. Alternatively, you can click control straight from one character to another, but practise this first as this action will be needed when in the 4th citadel room which is the most difficult.
It doesn't matter which characters you use, but they are named in the guide to allow you to keep track of them.
First Room
This room has a number of gates blocking your way to the exit. There are levers which can be pulled to open the gates. The levers need to be opened in a particular order so you can progress. If you are spotted by Witchaven villager, you will be frozen for a few seconds and a Risen Knight is summoned and attacks you.
| Leave one character by the Witchaven villager just north of the entrance and move the remaining 2 to the metal gate to the northeast. Make sure they stay there and don't follow you. |
| Use the character you left behind to knock out the Witchaven villager and proceed south with your player. There is a safe spot by the narrow opening to pause before knocking out the other Witchaven villager, then proceed into the room with the lever and pull it. |
| The metal door to the north will now be open. Send a character through, but do not pull the lever yet. |
| Pull your lever again and knock out the villager again. Go to the same safe spot and again use the character you left near the entrance to knock out the other villager again, allowing your player to run north to the other characters you left by the gate without being stunned and attacked by risen Knights. |
| Bring the character you left at the entrance to join your player. Use the character in the room to pull the lever to let you all in. Pull the lever again and run south, east then north to the exit. |
| Some characters may lag behind and get attacked, simply click 'regroup' for them to catch up. |
| Exit through the cave to go to the second room |
Second Room
This room is similar to the first room in that a number of levers have to be pulled in a certain order to open gates for your character to progress to the exit.
| Send everyone to the north as far as they can go, using your player to knock villager out. |
| Pull the lever and send Kennith and your character in the room to the east. Send Ezekial to the western room and leave Eva in the central chamber. |
| Leave Kennith in the eastern room and send your character south to pull the lever. |
| After the lever is pulled send Kennith in to the easternmost room to pull the lever. |
| Have your character pull the southern lever again. |
| Send Ezekial west and then all the way south to pull the lever. Make sure Ezekial knocks out the villager in his path or time it correctly so that Ezekial can run past the villager without being seen. |
| Make Kennith pull the lever and then send him into the southern room on his side to pull the lever. |
| Send your character back to the central chamber with Eva. Make Ezekial pull his lever and then send Kennith back to the central chamber. |
| Make Ezekial pull the lever again and send him back to the central chamber. You will need to knock-out or sneak past the villager here too. |
| Now that your party is regrouped, go to the next room. |
Third Room
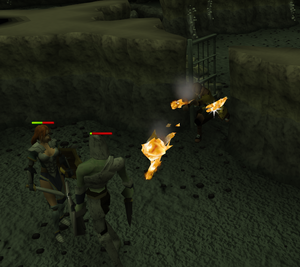
Killing all the Risen Knights will make the room easier.
| Send Kennith to mage the rangers on the central pillars then to the NE room to kill the risen knight. Leave him there. Send Eva to the SE and Ezekial to the SW, killing Risen Knights as needed. Have them pull the levers in this order: northeast (Ken), southeast (Eva) and southwest (Ezek). |
| Have your character run to the northwestern corner with a patrolling Witchaven villager (sneak behind her and knock her out), and pull the lever. This will open all the gates in the middle of the room and the outer four gates. |
| Have Eva pull her lever one last time. |
| Send your player to the newly opened gates and 'regroup' characters. Proceed to the next room to the north. |
Fourth Room
In this room your character releases various waves of Risen Knights while trying to open the exit. The Risen Knights have to be killed in order to proceed. Unfortunately, your character is stuck and cannot fight. You have to use the other members of your adventurer's party to kill the knights.
Use your character to search the strange device; your character will become unplayable and Risen Knights will begin to appear one at a time. The knights are not usually aggressive so take time to plan. Once the first wave of three knights are dead your character will investigate the second hole. Two knights will appear at a time for a total of six knights in the second wave.
Once the second wave is dead a third wave will appear and two to three knights will appear at a time for a total of 9 knights in the third wave. Continue on into the last room.
Note: If a party member dies, you will have to restart the room.
Strategy: Make sure you take advantage of the combat triangle or this battle will be difficult. The hero that you send into battle first will take the most damage, so keep the lower health ones as backup.
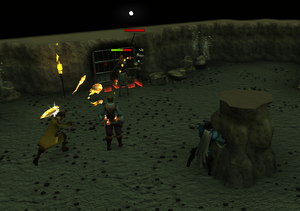
It is best to use the 'select all' command to attack the Risen Knights and then pulling back Eva to behind the pillar as the knights will continue take damage from Kennith and Ezekiel. When more than one Risen knight appears, target Mage first, then Melee and Finally the Range knight.
Alternatively send the player who corresponds to the opposite in the combat triangle to attack first, then use a secondary player (Kennith is most useful) to double up on the attack. Ezekial can be useful here even with the number of Melee knights here. He can be used to tank hits due to his high life points. He may also be used to lure the knights behind the pillar so that they cannot damage your party.
You cannot heal your characters in this room and once they die, you have to restart the room. Once the fight is over, there is no need to heal your party for they will be back to full health upon entering the last room.
Mother Mallum
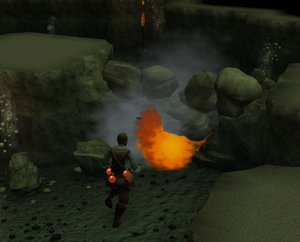
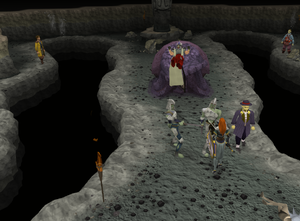
This is the last room and is the climax of the quest. Once the cutscene is complete,
| Use Kennith to speak to Brother Maledict who is located just to the west. |
| Once the gate to the west is open, knock down the wall in the western chamber with Ezekial and move Kennith north. Place him as close as possible to Mother Mallum while standing on the western ledge. |
| Take control of Ezekial and knock down the wall to the east and proceed north. |
| There is a knight on route, either attack and kill him or just run straight past and position Ezekial directly opposite Kennith, who is on the other side of the chasm. If Ezekial is low on life points, there is a safe spot behind a group of rocks to the southern portion of this cave (north of the wall you just knocked down). |
| Take control of Kennith again and attack Mother Mallum once Ezekial is in place (make sure that Ezekial is on the opposite side of the chasm of Kennith or it won't work). |
| You will now have control of Eva. Talk to Mayor Hobbs and knock him out, and then attack Mallum and she will throw you over herself. |
| Use Eva to move north of the statue and topple the statue. This will push the statue onto the slug queen, killing her. |
-
Mother Mallum takes control of the player.
-
Mother Mallum throws Eva into the Pillar.
-
The Pillar is toppled over, killing Mother Mallum, and freeing the player.
You can talk freely with any of the three characters/adventurers before leaving the cave of the Slug Citadel. Questions that once had a response of "We have a mission to do," will be answered by the characters. Note that not all of the information given by the characters pertains to the quest itself. They will talk about themselves or their relations with the other adventurers in the party. Talk to Lucy, the choice will not have any effect on the outcome. Leave the citadel using the cave exit (the same one you entered with).
Congratulations, quest complete!
Rewards
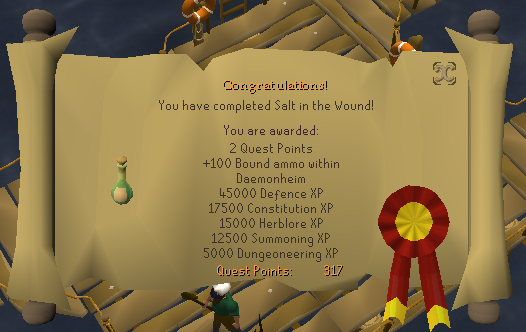
- 2 Quest points
- 45,000
 experience
 - 17,500
 experience
 - 15,000
 experience
 - 12,500
 experience
 - 5,000
 experience
 - 100 more bound ammunition/runes in Daemonheim (raising the total to 225)
- 2 extra spins on the Squeal of Fortune
Music Unlocked
Trivia
- On the day of the release, the spoilers read "The spoilers are currently oozing with slug goo. Come back tomorrow once we've laid out the slug pellets."
- At the beginning of the quest when Eva tells Ezekial to go, he uses the NATO phonetic alphabet terms "Foxtrot", "Tango" and "Whiskey", their first letters spelling the slang term "FTW" which mean "for the win".
- After entering the hole made by Ezekial, Eva will mention "a Seeker of Truth", this could reference Terry Goodkind's Sword of Truth series
- This is the first quest to include voice acting besides the now-removed tutorial Unstable Foundations.
- Before you enter the Slug Citadel the two thralls ask what Kennith is doing. He then tells them that he is not there and that he is not important, and they ignore him. Also, when facing the queen, he tells Brother Maledict to open the door and he does so. These are references to Jedi mind tricks from Star Wars.
- When convincing the two thralls to allow you to access the citadel, there is an option to say "I AM YOUR FATHER!", this is also a reference from Star Wars.
- When talking to Kennith after the mother is dead about teaching others his magic, he will ask the player to imagine a box, and then think outside of it by getting past the fourth wall. This is a reference to thinking outside the box and breaking the fourth wall, which is, traditionally, the "wall" between the performers and the audience.
- This quest contains many plot holes. One of which is that Captain Marlin is controlled by sea slugs, but no reference to that is made during the quest. In addition, if one was to complete Salt in the Wound before Hunt for the Red Raktuber, then there would be no explanation for why Captain Marlin is controlled by sea slugs, despite them becoming harmless after Salt in the Wound is complete. Another is that, while Kennith grows older and the sea slugs are gone at the end of the quest, Kimberly and her family remain in the mines, unchanged, and your character does not make any mention of slaying the slugs. If the player speaks to Kimberly in the mines, a dialogue will occur, in which Kimberly raises the question: "Maybe the sea slugs will go away soon?" The player will reply, "Perhaps they're already gone." Plot holes such as these drew some negative criticism from questers and former Jagex moderators who developed the previous quests.
- Ezekial seems to be very fond of tuna. This is not only shown by his constant mention of tuna sandwiches but also if the player uses a tuna to heal him it heals 500 life points instead of the usual 100. Tuna potatoes heal him 1,100 life points.
- After the quest's release, jokes about pillars falling and crushing various things ran rampant throughout the forums. This was due in large part to the quest's ending and players who were disappointed in the lack of a boss fight and the implausibility of a pillar conveniently placed behind Mother Mallum that was somehow weak enough to be broken by a single swipe of a sword without letting the entire cavern room collapsing. In an unknown update the pillar was later changed into a statue.
- When trying to make the Anti-Mind Control Serum, if you do not have all the ingredients and try to make the potion, a message will appear saying: "You do not have all the required ingredients: blood, freely given; a live slug; and a live seeker gland." This could possibly be taken from the revival potion to bring back Voldemort in Harry Potter and the Goblet of Fire as the ingredients included "Blood of the enemy, forcibly taken" (Harry's Blood) a body for him to be reborn in (in HP "Bone of the father, unwillingly given" (in this case the live slug) and a part of one's body (Wormtail's hand, or in this case, the seeker gland).
- While in the slug citadel, attempting to leave a room without all of the party together presents the message "You must gather your party before venturing forth." This is a reference to the Baldur's gate series, which uses exactly the same wording when leaving a map without the party closely gathered.
- This quest may be a reference to a song by the music artist Pendulum and their song Salt in the wounds.
References


