Tormented demon/Strategies
This article contains information for players seeking to kill tormented demons. Recommended equipment, levels, and strategy are all covered here.
Tormented demons can be slain in a group or alone; this article applies to both groups and individual players who wish to solo them.
Requirements
- Completion of While Guthix Sleeps
- A sapphire lantern (keep a spare in your bank in case you die, so you can get to your grave as quick as possible)
- At least two combat styles (melee, Magic and Ranged)
- Darklight
Skill level recommendations
- Level 80+ in your chosen attack styles (


 )
) - Level 80+

- Level 80+

- Level 70+

- Level 68+
 (for bunyips)
Additionally, the following levels may prove useful:
- Level 88+
 (for extreme attack and extreme strength potions)
 - Level 79+ (for healing titan familiars)
Preparation
Inventory
- Sapphire lantern
- Darklight
- Runes - if maging, bring at least 200 or 300 casts' worth of runes for your preferred spell. More runes mean longer trips.
- Polypore staff - If the cost of runes is an issue, a Polypore staff is highly effective as the demons have a weakness to magical attacks.
- Healing - While high-healing food (sharks or better) should be brought, do not rely on it for your primary source of healing. A healing familiar, such as a unicorn stallion, bunyip, or fire, ice, or moss titans, is highly effective. One option is to bring a Beast of Burden familiar filled with food, then dismiss it once it is empty and summon another familiar. Enhanced excalibur is a good choice if you're not using your special attack bar for something else. Soul Split can provide some additional lifepoints, and if using a godsword, consider a Saradomin godsword. Although Saradomin brews combined with super restores are popular for killing bosses, do not use them at tormented demons, as it will be impossible to maintain your stat boosts, slowing down your kills considerably. Ignore this if you are using overload potions. Once you have everything else in your inventory that you need, fill the remaining slots with food.
- Combat-boosting potions - Bring potions to enhance the combat styles you are using. For melee, bring a super set (use of a super defence potion is unnecessary if using enhanced excalibur) or the melee extreme potions. Overloads are a great choice for those who have access to them. Mages should use Magic potions or extreme Magic potions; alternatively, a vecna skull will work. Rangers should use ranging potions or extreme ranging potions. If you are using Ancient Curses, consider leaving Berserker on the entire time you are in the Ancient Guthix Temple in order to maximize your boosts.
- Prayer potions - You may need to bring several prayer potions depending on your stats. If you plan to use combat-boosting prayers such as Piety, bring extra prayer potions. Finding the balance between food and prayer potions is something that comes with experience. Plan on bringing more food for initial trips.
- Emergency teleport
- Dreadnip - to activate the demons Protect from melee (only use while using magic and take at least 100 as they are stackable)
Equipment
In terms of weaponry, any chaotic weapon is strong enough to be effective on tormented demons. Of particular note is the chaotic maul, which can deal an exceptionally high amount of damage in a single attack. This is important when fighting tormented demons because their protection prayers will change depending on the amount of damage they receive from a given style; however, extra damage (damage that passes the 310-damage point for that style) still counts, so the larger the individual hits, the better. Keep in mind that tormented demons are weaker to stab and crush attacks than slash. If chaotic weapons are unavailable, godswords are an adequate substitute. A Brackish blade is also an adequate substitute to a chaotic weapon.
Conventional melee armour (including melee Barrows equipment) is not recommended for fighting tormented demons for three reasons. The first is that melee armour gives penalties to Ranged and Magic accuracy, and if you are using melee to kill tormented demons, you must also use one of those two styles. If you wear melee armour, your accuracy in your other style will suffer. (However, it's worth noting that this penalty is much more severe for Magic than for Ranged.) The second is that melee armour is highly weak to Magic attacks, which will result in much more damage taken not only from their regular Magic attacks, but from their area-of-effect Magic attack. Their attacks are accurate enough without nearly guaranteeing their success with a penalty to Magic defence. The third reason is that it's generally not a good idea to attempt to tank their attacks because of their accuracy, so defence bonuses (aside perhaps from Magic defence to help mitigate the area-of-effect spell) aren't quite as important as usual.
When choosing armour for tormented demons, focus on offence rather than defence. Void Knight equipment works well because of the set effects, lack of offensive penalties, and Magic defence bonus. Elite Void Knight equipment is even better because of its Prayer bonus. On the other hand, you may consider simply wearing your Magic or Ranged armour, as neither of these substantially inhibit melee attacks, yet provide good bonuses to their respective styles.
The staff of light, chaotic staff, Armadyl battlestaff, or polypore staff are the best choices for magical weapons to use when killing tormented demons. If none of these are available, any other weapon with a bonus to Magic damage will work; a Void Knight mace adds a hefty Prayer bonus in addition to +10% damage. Using magic allows for a steel titan to use its special attack constantly, which results in faster kills if using a steel titan.
The only plausible spells/weapons to use would be Storm of Armadyl with Armadyl Battlestaff or Polypore staff. However, if the player intends to make profit, the polypore staff would be the best option as one charge costs 89 coins while Storm of Armadyl costs Expression error: Unrecognized punctuation character "[". coins.
Even at level 99, Magic suffers from some accuracy problems against tormented demons. Wear equipment that boosts Magic attack. Dagon'hai robes can work if you're willing to take the loss of melee defence that Ahrim's robes provide, but do not use any weaker armour. Ganodermic armour is also a good choice for magical attack and defence, however the set has very little ranged defence. If using Ganodermic gear, players should be careful of the ranged attacks of the demons. Void mage is an acceptable alternative, although you may notice a drop in Magical accuracy. Do not use Magic in melee or Ranged armour, as it will cripple your accuracy.
A wide variety of Ranged weapons can be used to kill tormented demons. The chaotic crossbow and magic longbow (sighted) are the two most accurate Ranged weapons in the game, while the hand cannon provides the most pure power (take care to bring a backup weapon in case the cannon explodes). The hand cannon's exceptional damage potential is important when fighting tormented demons for the same reason as a chaotic maul: the highest hits possible reduce the advantage of the demons' protection prayers, and lead to quicker kills. A rune crossbow with diamond bolts (e) is good for getting through their defence. Karil's crossbow, the crystal bow and the dark bow may work as well.
Royal dragonhide armour is widely regarded as the best Ranged armour for fighting tormented demons. It has very high Magic defence, allowing you to more easily resist their Magic attacks, and has no negative melee stats. Armadyl armour should not be used if you are using melee and Ranged, as Armadyl armour gives a dangerous accuracy penalty to melee attacks.
Recommended equipment lists
| Recommended Equipment for Melee/Ranged | ||||||||||||||||||||||||||||||||||||||||||||||||||||||||||||||||||||||||||||||
|---|---|---|---|---|---|---|---|---|---|---|---|---|---|---|---|---|---|---|---|---|---|---|---|---|---|---|---|---|---|---|---|---|---|---|---|---|---|---|---|---|---|---|---|---|---|---|---|---|---|---|---|---|---|---|---|---|---|---|---|---|---|---|---|---|---|---|---|---|---|---|---|---|---|---|---|---|---|---|
1. Recommended to bring either a 2nd hand cannon or a secondary ranged weapon to complete a kill or trip in case of explosions. 2. Does not increase the drop rate of Dragon armour pieces or dragon claws; only helps in improving Rare drop table drops. Do not bring a shield if you plan to use any 2h weapon as it will take up space. If you use Korasi's Sword do NOT use the special, as it could potentially hit other tormented demons, causing them to attack you. | ||||||||||||||||||||||||||||||||||||||||||||||||||||||||||||||||||||||||||||||
Familiars
It's a foolhardy player who takes on tormented demons without some kind of assistance from a familiar. One of the most common mid-level familiar combinations is a war tortoise full of food, with a bunyip pouch ready to summon after the tortoise supplies have been exhausted. With sufficient concentration, and good demon trapping, such a player can well last until the end of the bunyip timer too. Those with 79 Summoning can call upon elemental titans which offer more healing power than a bunyip, though at the cost of using up scrolls.
More experienced summoners can bring a unicorn stallion, which generally provide enough healing on their own to keep up with any damage you may take (though bring a few pieces of food just in case). This makes for a relatively stress-free fight - especially since using a familiar scroll does not interrupt your attacking.
High level summoners working as a team may wish to choose a pack yak. Although it offers no direct healing, it is capable of holding a large quantity of supplies such as prayer potions to extend the trip. Fighting demons in a team naturally means that each individual player takes less damage, so the endurance conferred by a yak may be worthwhile. It should also be noted that the pack yak can use its special ability, Winter Storage, to bank lower valued drops, such as herbs or rune equipment.
At the top of the tree, yielding some of the fastest kill rates possible, is the steel titan. Though this method requires intense concentration and significant development in other skills (inadvisable without 95 prayer and access to overload and chaotic weaponry) 50 kills per hour is quite possible. See below for a dedicated section, since this method differs quite significantly from ones where a healer is available.
Quick tips
The key things to remember about tormented demons when fighting them:
- Darklight must be used to take down their damage-reducing shield.
- When they rear back and roar, they are switching attack styles.
- Their melee attack is weaker than their Magic and Ranged attacks.
- After taking enough damage from a given attack style, they will switch their protection prayer to guard against that style.
- Being attacked by multiple demons at once is highly dangerous. Therefore, luring them is important.
Luring

To solve the problem of being attacked by multiple demons at once, you must lure other demons that would threaten you into getting trapped behind obstacles in the room. The image at right illustrates the approximate spawning locations of the six tormented demons (red dots) as well as the most common places from which to fight them (green boxes). Note that it is not necessary to try to lure all six demons in order to stay safe, as this is extremely dangerous. Rather, focus on the three demons to the north or the three to the south; if you do not cross the room, the other three should not bother you. However, it is possible for the demons to wander over to your side of the room and start pursuing you; if this happens, simply log out for a moment (while behind cover) and log back in. The demons will have lost their aggressiveness towards you and as long as they don't see you, they should wander back to their normal areas.

It is strongly recommended to turn Auto Retaliate off when luring tormented demons.
There are several different ways to effectively lure tormented demons in order to safely fight one at a time. This is one example of how to do it:
- Enter the room from the northern side of the entrance. Catch the attention of the north-west demon (make sure the south-west demon doesn't see you) and lure it over to the large pillar.
- Run to the northern safespot (topmost green square). The north-west demon should follow you and get stuck behind a rock. The northernmost demon should see you and follow, becoming stuck between the two northern rocks shown on the map.
- With the north-west and northernmost demons trapped, move around to the eastern side of the rock (the other green square in the north) and lure the north-east demon to you. (Be careful not to move too far away from the second green square, or one of the other demons you trapped might be able to attack you and, more importantly, move out of its trapped position.)
- From here, you are free to kill the northernmost (middle) demon at your leisure, safe from the attacks of the other two. Use the large rock for cover if necessary to eat, drink potions, etc.
Fighting the demons
Your first priority when killing a tormented demon is to take down its fire shield with Darklight. When it initially spawns, a tormented demon will use Protect from Melee; therefore, you must hit it with Magic or Ranged until it switches prayers, and then attack with Darklight. Once you score a hit with Darklight, the shield will go down for 60 seconds; each successful hit with Darklight resets the 60-second counter, so use Darklight often to prevent the shield from absorbing too much damage.
Once the shield is down, you'll have to keep an eye on several things at once. The most important thing to look for is what attack style the tormented demon is using. Make sure you're using the correct prayer at all times, and when it roars (signifying that it's going to change styles), be prepared to switch prayers. The roar emote takes a moment, giving you time to pull up the prayer menu and switch protection prayers. A fairly safe bet is to assume that the demon is switching to either Magic or Ranged, and to switch prayers accordingly. If you miss the bet and it uses melee, you will lose fewer lifepoints than if it had switched to either Magic or Ranged, both of which are substantially stronger and more accurate than its melee attack. If the demon is using melee and switches styles, switch your protection prayer to the style that you are weakest against.
Monitor your lifepoints closely. It is always possible to receive 200+ damage out of nowhere from a tormented demon's area-of-effect Magic attack, even if you're behind cover. Keep your lifepoints above 600 just to be safe. If you are using a titan familiar to heal, activate its special move often, as it can only be used three times consecutively before the special move bar has to recharge.
The second priority is to watch the tormented demon's current protection prayer, and to switch attack styles accordingly. One trick that helps with this is to open the XP Counter and watch for sudden large gains in XP that signify a large hit (which will almost certainly cause the demon to switch prayers). Be prepared to switch if you earn 100 or more XP in a given attack. (However, if using Magic, remember that part of the experience you gain for a spell is the base experience for casting it, so you may need to watch for higher numbers to know when you've dealt a large hit. [If using polypore, this is not the case].) Use of hotkeys (detailed below) significantly helps with this, as you may be switching back and forth between two or three menus when you change attack styles.
Turning Auto Retaliate on helps speed up kills by a small amount. However, beware of automatically running towards another demon if one attacks you. This could compromise your luring.
Finally, keep a loose eye on the other demons in the area. If your luring is effective, you should be safe; however, it is always possible for something to go wrong. If another player comes along and gains the attention of the demons you've lured, they will move to attack that player instead and potentially break out of their trapped positions. If this happens, get behind cover to make sure you aren't suddenly attacked by multiple demons, switch worlds if necessary, and prepare to re-lure the demons.
Hotkeys
Use of hotkeys will drastically improve your efficiency when fighting tormented demons. You will often be switching between your inventory, prayer menu, and spellbook and/or attack style menu, and it is much quicker to use keyboard keys to switch to and from these menus than the mouse. The relevant shortcuts are:
- F1: Inventory
- F3: Prayer menu
- F4: Spellbook menu
- F5: Attack style menu
If you are unfamiliar with the use of hotkeys, practice switching between these menus before fighting tormented demons.
Steel Titan
If you have chosen to bring a steel titan to battle, your approach will necessarily be different. Spots which serve a player using a Unicorn may not be applicable for a steel titan user. Two things must be taken into account:
- The titan must be in a position to use the desired attack style (melee/ranged)
- You must be able to "see" the demon. This criterion is often somewhat arbitrary.
These two criteria make the small rock to the west of the large north rock a good spot to fight these demons. Ensure that the demon has walked all the way north, or you will receive the "Cannot see" message.
The fight itself involves essentially using the titan scroll whenever it is applicable. Most commonly this involves having the titan a tile away from the demon so that it can deploy ranged attacks, on the basis that melee is usually capable of dealing more damage in a single hit (especially true of chaotic weapons). Such a player would attack the demon with their melee weapon until the demon begins to pray against melee, at which point they trigger a special move, switch to their ranged weapon, and continue attacking. The steel titan's scroll is particularly potent against tormented demons because even if all four attacks miss (itself rather unlikely) the damage counter has still advanced by 80. If you are wearing a helm capable of storing Summoning scrolls it is worth filling it. Some of these extra specials will inevitably go off while the demon is praying against the titan's style, but helm specials consume none of the special bar and so this does not significantly affect the fight. If you find that you commonly have a special bar too low to use the special move, consider bringing a summoning potion. This should not occur more than a couple of times per trip.
Soul Split is almost required for this method. It is safest to soul split during the melee attack since this is the least dangerous, but with practice other attacks can be flashed with soul split. Remember that the attack isn't calculated until the projectile appears. This is the tick during which the protection prayer needs to be on.
Spiritualize Food spell might be effective here as it boosts the Steel Titan's combat stats, which results in faster kills. (Unlocked at Livid Farm)
Gallery
-
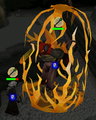 A tormented demon's Magic Attack.
 -
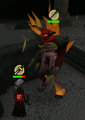 A tormented demon's Ranged Attack.
 -
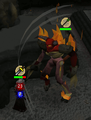 A tormented demon's melee Attack.
 -
The area-of-effect Magic attack, And the demon switching attack styles.


