Nomad/Strategies
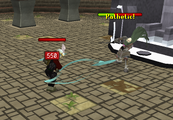
Defeating Nomad and completing the Grandmaster quest Nomad's Requiem is an aspiration for many players. Because he is widely regarded as one of the most difficult quest bosses in the game, it is very common for players to ask for advice on fighting Nomad. This article will attempt to provide a complete, thorough understanding of Nomad's capabilities, as well as common strategies and tactics for defeating him.
Nomad's capabilities
Offence
Nomad is an extremely powerful warrior and battlemage who is able to cause massive amounts of damage. In addition to his basic Magic attack, he has a number of special attacks that he will frequently use during the fight. These attacks are used in the same order in which they are listed below.
- Nomad's basic attack is an at-range Magic attack that is capable of hitting up to 322 damage. It deals typeless damage, which means that Protect from Magic and Deflect Magic have no effect whatsoever on it. However, your Magic defence does affect the attack's accuracy; for this reason, armour with high Magic defence is strongly recommended when fighting him. Nomad will begin using this attack immediately when the battle begins, and will use it in between his special attacks.
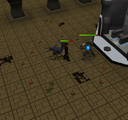
- His first special attack is to lay a number of flame vortices in a pattern around you. Each vortex occupies one square. If you step on a flame vortex it will explode, dealing 400 damage and draining your run energy to zero. After about a minute, they will explode on their own. Avoid these at all costs! The pattern in which Nomad deploys the vortexes leaves a gap to the south; if you run directly south when the vortexes appear, you will safely get away from them. If you are meleeing Nomad you will want to turn off Auto Retaliate when he deploys the vortexes, or else you might accidentally wander over one.
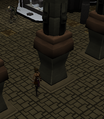
- Nomad's second special attack, Soul Blast, is a powerful Magic attack that deals 750 damage. Before using Soul Blast, Nomad will teleport to his throne (or to roughly the center of the battle arena in the Dominion Tower). It is strongly recommended that you hide behind a pillar in order to dodge this attack, because otherwise it does not miss.
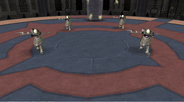
- Mirror Image is Nomad's third special attack. He teleports to the center of the arena and creates three copies of himself. These copies will attack you along with the real Nomad, although each can only hit up to 50 damage. If you attack a copy, it disappears; if you attack the real Nomad, all of the copies disappear. You can easily tell which is the real Nomad by waiting for them to attack; the real Nomad will attack last, just after the three copies.
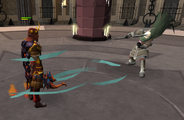
- Nomad's final and most powerful special attack is Disintegrate. He will teleport you and himself to the center of the arena, then hit you with an Ice Barrage-like attack that won't deal any damage, but will freeze you in place. He will then spend several seconds charging an immensely powerful Magic attack that will deal an amount of damage equal to your maximum life points minus one. For example, if you have 80 Constitution and 800 life points, this attack will deal 799 damage. You will have time to eat while he is charging the attack, and will have a few moments to heal after he unleashes it. It is worth noting that armour that absorbs Magic damage will reduce the damage dealt by Disintegrate, so you won't have to be at maximum life points or higher if wearing armour with a Magic soaking bonus.
NOTE: There is currently a glitch during Disintergrate where, if a player has a familiar summoned and either has no special move scrolls or is out of familiar special move points, by setting their summoning button to cast special move and spam clicking it when Nomad freezes the player, after the freeze the player will still be able to attack Nomad while he is charging his spell.
-
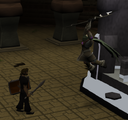
Nomad leaps to attack, beginning the great battle.
-
The pattern in which Nomad deploys his flame vortexes. Note the escape route to the south (left side of the image).
-
Nomad and his three clones.
-
Nomad's Disintegrate attack.
-
Nomad defeating a player.
Berserk
The first time Nomad is reduced to 25% of his maximum life points, he will heal himself 2,500 life points. The second time, however, Nomad will go berserk and switch to using a melee attack with his staff. Although he will not use any of his other attacks when he goes berserk, his melee attack will hit very rapidly (throwing knife speed), and it can deal 300+ damage. Protect from Melee and Deflect Melee appear to have some small effect against his melee attack, and the staff of light's special attack will further reduce its damage. One way to reduce the damage that he can do is to hide behind a pillar, quickly run out and attack him, run back into hiding, and then repeat the process. This will prevent Nomad from attacking so rapidly.
Defence
Nomad has very high Defence against all forms of attack, although he is weakest to stab attacks and Ranged, the former more so than the latter. Additionally, he is immune to damage from a number of sources, including Vengeance, poison, deflect curses, dragonfire damage from the dragonfire shield and dragon bolts (e), chinchompas, and rings of recoil. Dwarf multicannons cannot be deployed in Nomad's arena. Damage from ruby bolts (e) is capped at 750.
While Nomad has a maximum of 10,000 life points, he will heal himself 2,500 life points the first time he is reduced to 2,500 life points. This effectively gives him 12,500 life points.
Face me!
In addition to his powerful offence and defence, Nomad will not tolerate cowardice. If you hide from him, such as standing behind a pillar such that he cannot attack you, he will say "Face me!" If you do not allow him to attack you within several seconds of this, he will shout "Coward!", teleport to the center of the room, and fully heal himself, effectively resetting the fight. However, once he does this, he also becomes unaggressive, allowing you to teleport out or leave if you wish. If you know that you can't win the battle, you can hide from him and then leave instead of being killed.
The exception to this rule is when Nomad uses Mirror Image to copy himself. You can hide behind a pillar and neither the clones nor Nomad himself will attack you; additionally, he will not shout "Face me!" or heal himself. The clones will last approximately sixty seconds, during which time you can heal, drop vials, manage your familiar, or just take a breather. Once the clones disappear, Nomad will run to attack you again, at which point he will shout "Face me!" if you continue to hide from him.
WARNING: When in Berserk Mode, Nomad can get stuck behind a summoning familiar and be unable to attack. During this time, even if you are attacking him, he will eventually call you a "coward" and heal himself.
Recommendations
Skill levels
Players who wish to fight Nomad are encouraged to have the following skill levels. However, the higher these skills are, the better.
- 76+
 for surviving his Soul Blast attack
 - 80+
 and
and  for resisting his basic attack
 - 70+
 (if using Ranged)
 - 80+
 and
and  (if using melee)
 - 70+
 if using standard prayers, or 80+ if using Ancient Curses
 - 52+

- 80+
 is optional but helpful, as the chaotic rapier, chaotic longsword and chaotic crossbow are all very effective against Nomad.
Equipment
Ranged
| Equipment list | |||||||||||||||||||||||||||||||||||||||||||||||||||||||||||||||||
|---|---|---|---|---|---|---|---|---|---|---|---|---|---|---|---|---|---|---|---|---|---|---|---|---|---|---|---|---|---|---|---|---|---|---|---|---|---|---|---|---|---|---|---|---|---|---|---|---|---|---|---|---|---|---|---|---|---|---|---|---|---|---|---|---|---|
| |||||||||||||||||||||||||||||||||||||||||||||||||||||||||||||||||
Ranged (with Void Knight equipment)
Melee
| Equipment list | ||||||||||||||||||||||||||||||||||||||||||||||||||||||||||||
|---|---|---|---|---|---|---|---|---|---|---|---|---|---|---|---|---|---|---|---|---|---|---|---|---|---|---|---|---|---|---|---|---|---|---|---|---|---|---|---|---|---|---|---|---|---|---|---|---|---|---|---|---|---|---|---|---|---|---|---|---|
| ||||||||||||||||||||||||||||||||||||||||||||||||||||||||||||
<references/>
Melee (with Void Knight equipment)
| Equipment list | ||||||||||||||||||||||||||||||||||||||||||||||||||||||||||||
|---|---|---|---|---|---|---|---|---|---|---|---|---|---|---|---|---|---|---|---|---|---|---|---|---|---|---|---|---|---|---|---|---|---|---|---|---|---|---|---|---|---|---|---|---|---|---|---|---|---|---|---|---|---|---|---|---|---|---|---|---|
| ||||||||||||||||||||||||||||||||||||||||||||||||||||||||||||
Magic
NOTE: Defeating Nomad with Magic is extremely difficult, and should not be considered by players who are attempting to complete Nomad's Requiem.
| Equipment list | |||||||||||||||||||||||||||||||||||||||||||||||||||||||||||||||||
|---|---|---|---|---|---|---|---|---|---|---|---|---|---|---|---|---|---|---|---|---|---|---|---|---|---|---|---|---|---|---|---|---|---|---|---|---|---|---|---|---|---|---|---|---|---|---|---|---|---|---|---|---|---|---|---|---|---|---|---|---|---|---|---|---|---|
| |||||||||||||||||||||||||||||||||||||||||||||||||||||||||||||||||
Inventory items
Note: If Nomad kills you, you will respawn in the Soul Wars lobby, very close to your gravestone. You will easily be able to retrieve your items. However, Barrows equipment will break if dropped, and if you had any items in your beast of burden, they will be lost.
When fighting Nomad, you must devote as much inventory space as possible to healing items, in order to endure his massively damaging attacks. For the majority of players, the most recommended method of healing is to drink Saradomin brews in conjunction with super restore potions, at a rate of one super restore for every three Saradomin brews. The chief disadvantages of using Saradomin brews are that they are expensive (3,419 coins per 4-dose potion) and that you cannot use stat-boosting potions along with them. While overloads can be used with Saradomin brews, many players who wish to fight Nomad will not have access to them.
High-level players (combat level of 130+) can bring stat-boosting potions, such as a super set or extreme potions, and use rocktails instead of Saradomin brews. In this case it is recommended to supplement the rocktails' healing with a unicorn stallion and Soul Split (covered below).
Aside from healing items, you may need to bring:
- Summoning scrolls if you are using a familiar with a useful special attack
- A special attack weapon, such as a Bandos godsword, Darklight, or Statius' warhammer, with which to lower Nomad's Defence
- Diamond bolts (e) if using ruby bolts (e)
- An extra Summoning pouch if you plan to switch familiars mid-fight
- Prayer potions if not using Saradomin brews
- If you have unlocked them from the Dominion Tower, you may wish to bring ascendancy mines, as each mine can deal up to 2,000 damage to Nomad. However, bear in mind that the mines are not stackable and do not appear under your gravestone.
Ascendancy mines cannot be used when fighting Nomad within the Dominion Tower.
Familiars
There are three types of familiars that are useful when fighting Nomad. The first is a beast of burden, specifically a spirit terrorbird, war tortoise, or pack yak. Beasts of burden can hold additional healing supplies, increasing the amount of damage you can withstand.
The second is a combat familiar. Players with access to them could use an iron titan or steel titan against Nomad, both of which are effective. Players without 95+ Summoning can summon a spirit kyatt at level 57 and use its special move, Ambush, to repeatedly attack Nomad. However, you must be rather close to Nomad for Ambush to target him, which can produce problems when using Ranged.
Finally, a healing familiar may be used. A bunyip's healing (20 life points per 15 seconds) is too low to be useful against Nomad; however, a fire titan, ice titan, or moss titan may be used, along with Titan's Constitution, to quickly restore up to 240 life points and boost Defence. Players with 88+ Summoning are encouraged to bring a unicorn stallion, which provides the best healing of any familiar at high Constitution levels.
One common strategy with regards to familiars is to bring a beast of burden filled with food or Saradomin brews. Once the beast of burden is empty, dismiss it and summon a combat or healing familiar.
Prayers
Although protection prayers cannot be used to block Nomad's attacks, other prayers can still be very useful. If using Ranged, Rigour is very helpful, boosting your offence and defence at once; alternately, Eagle Eye and Steel Skin can be used to boost Ranged and Defence by 15% respectively. Melee users will want to activate Piety. Magic users should turn on Augury, or Mystic Might and Steel Skin.
For players with 95+ Prayer, the Ancient Curses are arguably more useful versus Nomad than the standard prayers. Leech Defence drains Nomad's Defence by 25% when fully activated, which makes it significantly easier to hit him, as well as boosting your Defence by 10%. Sap Mage may be used as a substitute, which drains his Magic and Defence by 20% when fully activated, but does not boost your stats at all. Because Leech Ranged is not useful against Nomad, Ranged users may wish to stick with standard prayers. However, meleers will find use in Leech Attack and Leech Strength. Magic users can use Leech Magic alongside Leech Defence to lower Nomad's Magic and Defence, which will reduce his offence and significantly reduce his defence against Magic attacks.
With 92 Prayer, Soul Split is exceptionally helpful against Nomad, provided you can hit him consistently enough. At 95 Prayer, Turmoil will offer melee users the best possible melee bonuses against Nomad, though it will not lower any of his stats.
If you are using Saradomin brews and super restores to heal, note that the latter potion restores prayer points, so there is no need to bring prayer potions. Otherwise, you will need a few, and possibly a prayer renewal.
The fight
Ranged
When the fight with Nomad begins, first use up your Defence-draining special attack if you brought one. Then, turn on whichever prayers you're using and run to the side of the room, to stand next to a pillar. Ideally, you want to stand next to a pillar's rear corner, as in the first image below. Begin to range Nomad, drinking Saradomin brews and super restores as needed, using your ruby bolts (e). The special effect of the ruby bolts can deal up to 750 damage to Nomad, although you will lose 10% of your life points. Keep your health reasonably high; 600 life points or higher is safe enough. Remember to drink a dose of super restore for every three doses of Saradomin brew.
If you find yourself in need of a few seconds to heal, drop vials, withdraw from your beast of burden, or just focus yourself, you can step behind the pillar as shown in the second image below. Remember that if you hide for too long, Nomad will teleport and heal, resetting the fight.
When Nomad deploys his flame vortices, remember that you're safe from them as long as you only stand in the two squares shown below. When he teleports to use Soul Blast, move behind the pillar in order to avoid it. Duck back out afterward in order to continue attacking him.
When Nomad uses Mirror Image and copies himself, hide behind the pillar and wait for them to disappear. This gives you about a minute with which to manage your health, items and familiar. Once the clones vanish, step back out.
Eventually, Nomad will teleport and freeze you, then begin to charge up his Disintegrate attack. Heal until you are at or above your maximum life points, in order to survive the attack. If you are using Saradomin brews, don't drink any super restore doses until after the attack hits, or you will have to drink a super restore twice. Switch to diamond bolts (e) and range him until Disintegrate hits you. You do not want to use ruby bolts during this phase, because if the special effect activates and hurts you right before Disintegrate hits, it can kill you. Once Disintegrate hits, immediately heal, drink super restores if necessary, re-equip ruby bolts (e), and run back to the pillar. Resume ranging him, and remember that at this point, his cycle of special attacks resets.
If you brought a spirit kyatt pouch, summon it once your beast of burden is empty. The kyatt's Ambush special attack is capable of dealing high damage to Nomad if used frequently. However, bear in mind that if you are too far away from Nomad, the kyatt will not attack him. This can present problems when avoiding his flame vortices. When necessary, focus on survival rather than offence.
Follow this strategy until Nomad goes berserk. Remember that he will heal himself back to half health when he's reduced to a quarter of his maximum health; once you reduce him to a quarter of his health again, he goes berserk. When he goes berserk, switch to diamond bolts (e), turn on Protect from Melee or Deflect Melee, and, if necessary, move forward until he can attack you. Range him with the diamond bolts and duck behind the pillar if you need a moment to heal, but as always, heed his command of "Face me!" Consider activating Retribution or Wrath if Nomad is almost dead, because if he kills you and Retribution or Wrath deals enough damage to kill him, it will count as a victory on your part.
Melee
Fighting Nomad using melee is somewhat simpler than using Ranged, in terms of strategy. Also, if using a stab weapon, it is statistically more effective, since Nomad has much less stab defence than Ranged defence. When the fight begins, activate your prayers and begin attacking him. If you brought a weapon with a Defence-draining special attack, use it first. (If you are using Turmoil, consider hitting Nomad once with a standard attack before using the special attack, in order to give Turmoil its full boost.) Attack him with your stab weapon and keep yourself healed with your food or Saradomin brews; 600 health is a safe limit.
Make sure you keep Auto Retaliate off! When Nomad deploys his flame vortexes, don't move quite yet. Continue fighting him standing in the middle of the flame vortexes, where you are safe from them. Take extreme care not to misclick and move on top of a flame vortex. After a short time Nomad will either teleport or stop attacking; either way, he is about to use Soul Blast. Move directly south until you are away from the vortexes, then hide behind a pillar. Heal yourself up to 750 lifepoints beforehand, just in case you don't make it to the pillar in time. Once he uses Soul Blast and the vortexes begin to explode, run out and continue attacking him as normal, but stay away from the exploding vortexes.
When Nomad uses Mirror Image and summons his clones, you can either attack him to get rid of them (remember, he will attack a split second after the clones), or hide behind a pillar and use the time to heal, drop vials, manage your familiar, or just take a breather. After about a minute, the clones will disappear, and you must resume fighting him as normal.
If you don't bring a Ranged weapon, you won't be able to hurt Nomad when he freezes you and uses Disintegrate. You may wish to bring a crossbow and diamond bolts (e) for this reason; remember that the special effect can activate regardless of your Ranged accuracy. Make sure you are at or above your maximum life points, and if you're using Saradomin brews, wait to drink super restores until after you've healed from Disintegrate. Once he hits you, heal up and continue to attack him. His cycle of special attacks will reset at this point.
Using a spirit kyatt is somewhat easier when meleeing, as you do not have to worry about Nomad being out of range of the kyatt's special attack.
Once Nomad goes berserk, turn on Protect from Melee or Deflect Melee and finish the fight. Remember that you can hide behind a pillar for a few seconds if you need to, but as always, heed his command of "Face me!" Consider activating Retribution or Wrath if Nomad is almost dead, because if he kills you and Retribution or Wrath deals enough damage to kill him, it will count as a victory on your part.
Deathtouched dart
On 1 October 2012 the Deck of Fate cards, was a gift to members who had been subscribed for August and September 2012. It contained the Deathtouched dart, an item that will instantly kill almost any monster in the game. The Dart may be used on Nomad in this quest, dealing to him a lethal dose of 10,000 range damage and ending the battle.
Dominion Tower
Once Nomad is defeated in his temple and Nomad's Requiem is completed, you can fight him again in the Dominion Tower. Although he will not appear in Climber mode, he may appear in Endurance. Additionally, one of the special fights, entitled "No More Nomad... No More!", involves fighting Nomad twice, one after the other and without a break between fights. However, Nomad can appear as low as the sixth floor in Endurance.
Defeating Nomad is one of the requirements for unlocking the goliath gloves. Defeating him in Endurance will work, as well as completing the special double Nomad fight. However, defeating one Nomad during the special fight and losing to the second will not count. Once Nomad is defeated in Endurance, or the special fight is completed, Nomad is unlocked in Freestyle mode and can be fought at will.
Fighting Nomad in the Dominion Tower is nearly identical to fighting him during Nomad's Requiem. The key difference is the arena, which features four larger pillars instead of multiple smaller ones. These pillars can be used to hide from him much the same as the pillars in his throne room. Additionally, Retribution and Wrath cannot be used to damage Nomad. Otherwise, all of the strategic information in this article applies.
While fighting Nomad in the Dominion Tower, you are able to use power-up items, such as dominion swords, dominion crossbows, and help horns. For this reason, fighting Nomad in the Tower may be easier than fighting him during Nomad's Requiem. If you choose to use dominion weapons during the No More Nomad... No More! special fight be sure to bring at least 2, as one alone will not make it through the entire fight.
