Lunar Diplomacy
| File:Lunar Diplomacy.png | |
| Release date | 24 July 2006 (Update) |
|---|---|
| Members only? | Yes |
| Quest series | Fremennik quest series |
| Official difficulty | Experienced |
| Official length | Long |
| Developer | Tim C, James B |
Lunar Diplomacy is a quest released on 24 July 2006. It mainly grants players access to Lunar Isle.
Walkthrough
| Start point: | ||
| Members only: | Yes | |
| Official difficulty: | ||
| Description: | None | |
| Length: | Long | |
| Requirements: |
Please note the following requirements are not boostable
| |
| Items required: |
Can be obtained during quest:
(advised to buy at G.E instead, especially if low combat level) Toolbelt: Recommended:
| |
| Enemies to defeat: |
Meet the Pirates
The word "stern" refers to the back of the ship while the word "bow" refers to the front.
Talk to Lokar Searunner on the westernmost dock of Rellekka, west of the wide dock to Miscellania and Etceteria (He will only talk to you after you get all requirements). He talks about his life as a pirate and the Moon Clan. To visit the Moon Clan, he tells you to obtain a Seal of passage, which allows you to safely travel and stay on Lunar Isle.
Go to the Rellekka Longhall Bar and speak with Brundt the Chieftain to get a Seal of passage. Keep it in your inventory whenever you are on the Lunar Islands or related places, or you will be teleported back to Rellekka.
Talk to Lokar again to sail to the Pirates' Cove. Players can board the pirate's ship, the Lady Zay, from the cove.
Board the Lady Zay

Climb up two ladders, and board the pirate ship (Be sure to be aboard the ship when you talk to the captain). Make sure that you are wearing the Seal of Passage and talk to Captain Bentley. When you ask to sail to Lunar Isle, the ship strangely sails around in a circle.
Speak to Captain Bentley again. He is puzzled and asks you to talk with the ship's navigator.
Talk to the navigator, 'Bird's-Eye' Jack, on the lower deck, in the aft-port (south west) corner of the ship. He tells you his navigation skills are perfect and grows annoyed with you.
Talk to Captain Bentley again. He sends you back to speak to 'Birds-Eye' Jack. Return to 'Bird's-Eye' Jack. After an amusing conversation, he concludes that the ship is jinxed. Talk to Captain Bentley again. He asks you to investigate who or what on the ship has been jinxed.
Talk with the Crew
Start with 'Eagle-eye' Shultz (he is on the bow, on the same deck as Captain Bentley, at the head of the ship). He explains jinxes to you.
Next, talk to 'Beefy' Burns on the bottom level of the ship, in the left-rear corner, in the galley. (He is downstairs at the stern of the ship, in front of bunks, middle deck) He tells you a bit about the pirates' visit to the Moon Clan.
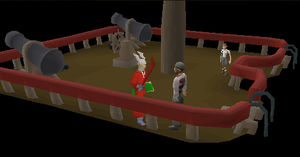
Go up three levels to the stern of the ship, and ask 'Lecherous' Lee about the big feast. He says he saw the first mate slip away for bit.
Confront First mate 'Davey-boy' (who is on the same deck as Captain Bentley, in the room at the stern of the ship). He is, however, able to explain his absence but mentions that he couldn't find the Cabin Boy at the feast.
Finally, talk with the Cabin Boy. He is on the same deck as 'Lecherous' Lee. He confesses that a girl from the Moon Clan tricked him into drawing five symbols throughout the ship.
The cabin boy gives you a special lantern and lens that you can use to search the ship for the symbols. Use the Emerald lens on the Bullseye lantern to create a mystical Emerald lantern. Then light the lantern by selecting 'light'.
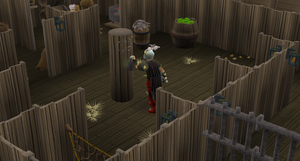
The cabin boy also gives you five clues for finding the symbols:
- The First one is on the Cannon: Right there on the top deck, in the stern (where you found 'Lecherous' Lee and the Cabin Boy). Use the lantern on the cannon on the east side of the deck, and select Rub away!
- One was up on a wall: On the same floor as the captain, in the First Mate's cabin, in the stern of the ship. Use the lantern on the wallchart to the west of the door, and select Rub away!
- One was on a chest: In the very bottom of the ship (the hold). Use the lantern on the only chest, near the stairs, and select Rub away!
- One was on a box of some sort: Same floor (the hold), in the stern. Use the lantern on the two large stacked crates east of the cook's galley, and select Rub away!
- One was on a support: Still on the same floor (the hold), near the stern (in the same area with the bright green apples). Use the lantern on the support beam just outside the cook's galley, and select Rub away! Tip: the correct support is the only one with an examine option.
Talk to Captain Bentley again, and set sail for Lunar Isle!
On Moonclan Isle
Climb down from the raised dock, and head north-west into the city. A cutscene of a bird's-eye vision of the city plays upon your initial walking through the city gates.
Talk with Meteora, in the south-west part of the village. She tells you that although the clan doesn't have a leader, the Oneiromancer is able to help you more than anyone.
- Note: If you wore no armour, now would be a good time to access the bank, equip yourself, food too, as you have to run through the Suqahs. Energy potions would be useful here.)
- It is also suggested that you kill the Suqah now to obtain a Suqah tooth and 4 suqah hide. (will be needed soon)
Go to the south-east part of the island, to the Astral altar, and talk to the Oneiromancer (watch out for the Suqahs). She tells you more about the Moon Clan's feud with the Fremennik. She also asks that you try to understand the Moon Clan's ways. To do so, you need to go through their ritual. To prepare for the ritual, you need to make three things: a Waking Sleep Potion, a Lunar staff, and Ceremonial travelling clothes.
Waking Sleep Potion
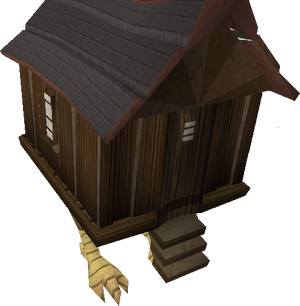
Talk to Baba Yaga in the chicken-leg house in the north of the village. During your talk, she gives you a special vial and says you need guam leaf, marrentill, and some ground Suqah tooth to complete the potion. Before going to kill Suqahs, make sure to fill up the vial with water in the house west of the bank. You can also fill your vial in the sink in Baba Yaga's house.
- If you have not already, kill Suqahs until one drops a Suqah tooth (You will also need 4 Suqah Hides later in the quest) and then grind it with your Pestle and Mortar. (If you don't have the herbs in your bank, Suqahs also drop Marrentil and Guam commonly. They have a very high rate of dropping Marrentill, so you should rather get your own Guam)
- Note: There is a safespot available for those who want to range or mage a Suqah while in the process of collecting hides and teeth. It's located at a tree near the first bridge to go to the Oneriomancer.
Use water from a sink to fill the vial—fountains do not work—but as luck would have it, a sink is on the house's eastern side. (inside)
Make your potion, and take it back to the Oneiromancer. She keeps it for you. Note: Make sure you give Oneiromancer the potion before taking the staff to the altars. Otherwise, nothing will happen and you will have to go back and give Oneiromancer the potion anyway.
Lunar staff
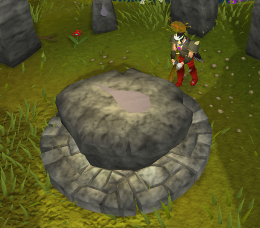
Note: You may want to make more than one Lunar staff. After you give one to the Oneiromancer, you lose the ability to create the staff, so making a few backups might be useful.
Grab your Dramen staff (or staves) along with the appropriate Talisman or Tiara to get into the altar(note a Omni-Talisman can be used for all altar or an Elemental Talisman can be used but it can only enter the four elemental altars), and use the staff on each of the four elemental altars in this order: Air altar (west of Varrock), Fire altar (in Al-Kharid), Water altar (in the Lumbridge Swamp), and Earth altar (north-east of Varrock).
- Note: If you brought more than one, you need to use each staff on each altar to enchant it. Also, if you have 50 Runecrafting, you can go in The Great Orb Project.
Your Dramen staff is now a Lunar Staff. Return to Lunar Isle, talk with the Oneiromancer. She takes your new Lunar staff .
- (Warning: You will not be able to wield the Lunar staff until you return at least one to the Oneiromancer. If you anticipate a delay in completing the quest, keep a spare Dramen staff unenchanted to retain access to the Fairy ring transportation system, unless you have completed Fairy Tale Part 3 .)
Ceremonial travelling clothes
The suit to enter the land of dreams is composed of eight items that can be obtained in any order:
The helm
Items needed: Pickaxe and Hammer.
With any pickaxe, head north-east on the isle to find the Lunar Isle Mine. (It is marked with a dungeon symbol on the minimap. Mind the Suqahs.) Enter the mine through the small shack, and mine one of the grey stalagmites in the western part of the mine (next to the walls) to get a Lunar ore.

Assuming you have fire and nature runes in the bank, you can Superheat the ore once you get back to town. When you're ready to smith the Lunar bar, there's an anvil in a small building on the south side of town next to the water stream, If you don't have the required runes in the bank, you can buy if from Baba Yaga or you can travel to Rellekka (don't forget your Hammer). To the south-west of the market is a small building with a furnace and anvil. Refine the ore, and then smith the Lunar bar into a Lunar helm. If you forget your hammer, Sigmund in the market sells one.
If you still need Suqah hides, you can get them while you're near the mine.
The cape
Travel back to Lunar Isle, and talk with Pauline Polaris, in a house in the north-west corner of the village. She wants you to guess her real name before she gives you the Lunar cape:
- First, choose Pauline. She tells you that is her alias, and gives you a clue:
- OK. Change a letter from the word Dane to get my first name.
- The first part of my surname rhymes with wood
- The third part rhymes with spade
- And the second rhymes with magic
- Only one name fits those clues, Jane Blud-Hagic-Maid.
After you have guessed correctly, she gives you the cape.
The amulet
Talk to Meteora (she is in the south-west part of the village, by the house next to the L-shaped room with the water icon). She asks you to retrieve the tiara she lost to the Suqahs.
Kill Suqahs until one drops A special tiara, (now would be a good time to collect four Suqah hides, as you need them to make the ceremonial clothes in the next step), and then go back to Meteora and trade her tiara for the Lunar amulet.
The torso, the trousers, the gloves and the boots
Items needed: 400 coins, Needle, spool of thread, four Suqah hides (obtained by killing Suqah).
Speak with Rimae Sirsalis, who runs the Moon Clan Fine Clothes shop, across from the bank. She can tan Suqah hides for 100 gp each. Have her tan the four Suqah hides you got earlier. (If you didn't collect them yet, go kill four now.) Buy a needle and a spool of thread (if you don't have them), and make the four Lunar pieces.
- (Note: If you attempt to make a second set of lunar torso/legs/gloves/boots, you will receive the message, "You already have the ... part of the ceremonial clothes." This occurs whether the first set is in your inventory or your bank, or in the magic chest in your player-owned house, and it is not possible to drop the clothes without destroying them.)
- You should bank now to free up 11 slots in your inventory.*
The ring
Items needed: Spade (Toolbelt will NOT work).
Talk with Selene, near the centre of the village. She gives you a clue to finding a ring.
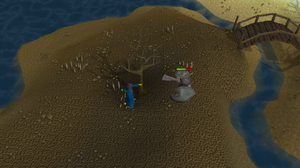
Grab a spade, and go out the eastern gate of the village. Travel south-east until you reach a bridge. Cross it, go west, and cross another bridge. Keep heading west till you see a patch of blue flowers near a starfish. (See the image to the right for the location.) Dig on top of the flowers to obtain the ring. You cannot dig the ring out if you haven't talked to Selene first.
Back to the Oneiromancer
With all the Lunar items you just made and found, go back to talk with the Oneiromancer. (Make sure you have 11 empty spots.) She first takes everything from you for safekeeping and then gives you back all your ceremonial clothes, Lunar staff, and potion, plus some Magic kindling for the ceremony.
If you die during this portion and lose some or all of the equipment required for the ritual, the Oneiromancer will have a replacement.
In Dreamland
Note: Make sure bloom is set to "off" for this section of the quest in order to be able to see while in Dreamland.
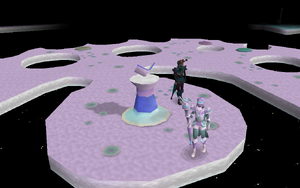
Note: BEFORE entering Dreamland, make sure you have your Seal of passage and some food with you. You may also want to bring an Agility potion (or a summer pie) and a hatchet (The Dwarvern Army Axe does work for this task), although you can also get a hatchet in Dreamland. (You can bring a valuable hatchet because you won't leave it behind) Be sure you have at least four inventory spots free. If you log out or otherwise leave Dreamland while doing this part of the quest, you'll have to reobtain the Waking Sleep Potion and the magic kindling by speaking to the Oneiromancer. So make sure you have at least a free 30 minutes without interruptions. When you return to Dreamland, you will pick up where you left off and have to do only those tasks you haven't completed yet. If you have an extra set of lunar equipment stored in your Player-owned house, you may enter a dialogue loop with your character asking for more equipment and the Oneiromancer refusing, without getting more kindling. This can be resolved by removing the extra equipment and having it in your inventory while speaking to her. If, when entering Dreamland, your screen turns black and white, go into graphical options and turn bloom effects off.
Put on your ceremonial clothes, wield the Lunar staff, and go to the big building far west of the village that has the Ceremonial Brazier in it. (The building is just south of Pauline Polaris.)
Use the Waking sleep vial on the kindling, light the brazier with a tinderbox, and place the Soaked kindling in the brazier. Welcome to the land of your own dreams. Make sure you do not read the "My Life" book or else you will teleported back into the real world and have to obtain another kindling and Waking Sleep Potion from the Oneiromancer. Also, make sure you are wearing ALL of the Lunar equipment and wielding the staff or else you will also have to get another Waking Sleep Potion and another kindling from the Oneiromancer.

Talk to the Ethereal Man or Ethereal Lady, depending on your character's gender. He/She explains you are about to take a test by completing a series of tasks or puzzles. (You do six lessons and then a final challenge with yourself.) If you fail any of the tasks, you can try again. After completing each task, talk to the Ethereal Man in the centre. You can do the tasks in any order. Note: If you need to leave, click the My life book on the lecturn in the centre to go back to your reality world.
A game of chance

To get to this task, step on the platform located at the 7 o'clock position, if you have the map oriented north (the platform is avocado green, the same colour as your Agility potion, if you brought one).
Speak with the Ethereal Fluke, who explains how to play the game. The Fluke shouts out a number.
Flip over the six dice so the sum of the numbers facing up on the dice equals the Fluke's number. So, for example, if the Fluke shouts out "15," you could roll over the six dice to show 6 + 4 + 2 +1 + 1 + 1 to equal 15.
- Each die has just two possibilities, however: The number facing up, and the number on its opposite side. So depending on what is facing up, any one die can show:
- 1 or 6 (+5/-5)
- 2 or 5 (+3/-3)
- 3 or 4 (+1/-1)
- Remember the top and bottom of a normal 6-sided dice ALWAYS add up to 7.
Remember the pattern well, the +1/-1 means that flipping the given dice will have that effect.
Once you have the correct number of dots on the dice showing, the Ethereal Fluke shouts out the next number. He gives you five numbers in this task. An easy way to do this is to set all the dice to their lowest values and calculate the increase needed.
- A tip for the math, 1+2+3+4+5+6 = 21
- the number given will be at least 12, at most 30
- and you will always have the dice set to one of each after you complete a number, as the tip shows you.
- For example, if you are asked for 22, you just need to flip the dice that has "3" on it , to make it "4" which is simply "add one" to the starting 21.
- One may get tricky if it's adding/subtracting an even number (+2/-2). In that case, simply first +3 then -1 or vise versa.
Answers Are :
- Question --- Answer
12 ........ 1,1,2,2,3,3
13 ........ 1,1,2,2,3,4
14 ........ 1,1,2,2,4,4
15 ........ 1,1,2,5,3,3
16 ........ 1,1,2,5,3,4
17 ........ 1,1,2,5,4,4
18 ........ 1,1,5,5,3,3
19 ........ 1,1,5,5,3,4
20 ........ 1,1,5,5,4,4
21 ........ 1,6,2,5,3,4
22 ........ 1,6,2,5,4,4
23 ........ 1,6,5,5,3,3
24 ........ 1,6,5,5,3,4
25 ........ 1,6,5,5,4,4
26 ........ 6,6,2,5,3,4
27 ........ 6,6,2,5,4,4
28 ........ 6,6,5,5,3,3
29 ........ 6,6,5,5,3,4
30 ........ 6,6,5,5,4,4
After you have completed it, talk with the Ethereal Woman/man again to tell her/him what you learned.
Communicating in numbers
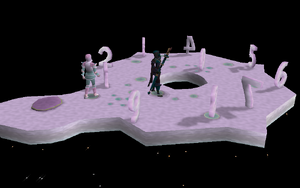
To get to this task, step on the platform located at the 4 o'clock position, if you have the map oriented north (the platform is lavender). Speak with the Ethereal Numerator, who explains how to complete this task. He speaks with a mixture of numbers and words, so making out his meaning can be challenging. If you skip over the numbers in his conversation, however, and just read the words, you can understand him.
Be sure to examine the numbers before you leave. Their examine text is amusing. For example, the examine text for the number 5 is "Gimmie!"
The Ethereal Numerator tells you a sequence of numbers. Look for the pattern in the sequence, and then press the two numbers that would come next in the pattern. You can ask the Ethereal Numerator for the sequence again if you forget. If you are wrong, the Ethereal Numerator just gives you another sequence of numbers to work on.
Here are sequences the Ethereal Numerator may possibly give you, with the next two numbers in the pattern in bold:
| 0 | 1 | 3 | 4 | 6 | 7 | ||||
| 1 | 1 | 1 | 2 | 1 | 3 | 1 | 4 | 1 | 5 |
| 1 | 1 | 2 | 2 | 3 | 3 | 4 | |||
| 1 | 1 | 2 | 3 | 1 | 1 | 4 | 5 | 1 | |
| 1 | 2 | 3 | 4 | 5 | |||||
| 1 | 3 | 5 | 7 | 9 | |||||
| 1 | 4 | 2 | 5 | 3 | 6 | ||||
| 1 | 6 | 2 | 5 | 3 | 4 | ||||
| 1 | 9 | 2 | 8 | 3 | 7 | ||||
| 2 | 3 | 5 | 6 | 8 | 9 | ||||
| 2 | 6 | 3 | 7 | 4 | 8 | ||||
| 3 | 4 | 2 | 5 | 1 | 6 | ||||
| 7 | 3 | 6 | 2 | 5 | 1 | ||||
| 8 | 6 | 4 | 2 | 0 | |||||
| 9 | 7 | 5 | 3 | 1 | |||||
| 9 | 8 | 7 | 6 | 5 | 4 |
After you have solved five patterns, talk with the Ethereal Woman/man again to tell her/him what you learned.
Chop, chop, chop away

To get to this task, step on the platform located at the 1 o'clock position, if you have the map oriented north (the platform is slate blue). Speak with the Ethereal Perceptive, who explains this test.
This is a fairly easy task: The Ethereal Perceptive challenges you to a log-cutting race. The first one to pile 20 logs in the centre wins. (The Dwarvern Army Axe does work for this task. Patch Date: 28 Sept 2011) The Ethereal Perceptive deposits two logs at a time and walks. To easily beat him, turn on run, cut all four of your dream trees, deposit your strange logs in stacks of four in the centre, and then head back to your trees.
To help you keep track, you receive messages telling you how many logs you and the Ethereal Perceptive have each deposited.
Note: If you do not have a hatchet or the Dwarven Army Axe with you, he supplies you with a Bronze hatchet.
After you have completed it, talk with the Ethereal Woman/man again to tell her/him what you learned.
Where am I?
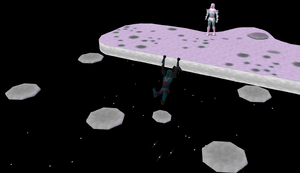

To get to this task, step on the platform located at the 10 o'clock position, if you have the map oriented north (the platform is pink/white, a bit darker than the surrounding area). Speak with the Ethereal Guide, who explains this task.
Similar to the the pit and the grid part of the Underground Pass (dungeon), and the unstable web from the 2009 hallowe'en event, jump from one floating dream puff to another to reach the other side, hoping not to land on a not-real dream puff that gives way under you and send you back to the platform. If you fail, you do not receive any damage. You can't move diagonally but can jump north, east, south, and west. You shouldn't have to backtrack to reach to other side.
Note: The dream puffs are laid out in 4x8 grid, so you may want to grab a pencil and piece of graph paper or draw a 4x8 grid on a piece of paper. Then mark your path as you discover how to successfully hop your way across the dream puffs.
After you have completed this task, speak with the Ethereal Woman/man again to tell her/him what you learned.
The race is on!

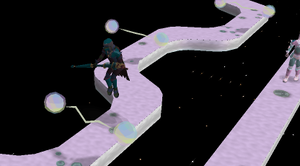
To get to this challenge, step on the platform located at the 3 o'clock position, if you have the map oriented north (the platform is tea green). Speak with the Ethereal Expert, who challenges you to a race.

He bets he can beat you to the other side of the island. He takes the left and straight route. You take the right and curvy route—with four hurdles. Despite the Ethereal Expert's advantage, this isn't as one-sided as it looks. The Ethereal Expert walks a few steps, pauses, takes a few more steps, pauses, and so on to the finish.
NOTE: If you fail 3 or more times you won't win, it's best to wait and lose to save food.
If you brought an Agility potion, take a sip before the race begins. Turn on run. Even at 99 agility, it is still possible to fail the obstacles. Jump over the four hurdles, and eat when necessary, because failing a hurdle deals 80 life point damage.
After you have won the race, speak with the Ethereal Woman/man again to tell her/him what you learned.
Anything you can do...

To get to this task, step on the platform located at the 5 o'clock position, if you have the map oriented north (the platform is blue-green). Speak with the Ethereal Mimic, on the musical-note island, who explains how to complete this task.
The Ethereal Mimic performs an emote that you then copy, much like you do in the Mime random event. The Ethereal Mimic uses only the basic emotes that every player has.
Talk to the Ethereal Mimic again if you forgot the emote he asked you to perform. After each emote, the Ethereal Mimic teleports to a different part of the island, so speak to him after each emote.
After you have successfully copied the Ethereal Mimic five times, talk with the Ethereal Woman/man again to tell her/him what you learned.
Pleased to meet me
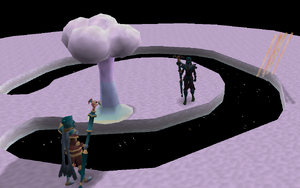
Once you have completed all the tasks, speak with the Ethereal Man (or Lady) in the centre of the island. He talks about the six core lessons you just learned and say there is one more challenge you must face. Tell her/him you are ready.
You are teleported to another island with two dream trees and five floating beams that look like rays of light. You also see Me, a 79-level version of yourself wearing lighter-coloured Lunar equipment. As you fight Me, both you and Me teleport around the platform every 15 seconds or so. Turning Auto Retaliate on while fighting him means you can easily run back to Me after you both teleport.
- Note: Your chats with Me are quite amusing and worth following.
- Note: If you still cannot access the battle, try unequiping your lunar staff and talking to the Ethereal Woman/man.
Attack Me with your Lunar staff. As Me only uses melee attacks, activating Protect from Melee is advisable.
Once you have defeated Me, you are teleported back to the Ethereal Woman/man. Talk with the Ethereal Woman/man again, and then exit by reading the My life book.
Back in reality, wear your seal of passage and talk with the Oneiromancer and tell her what you learned.
Congratulations! Quest complete!
Reward

- 2 Quest Points
- 5,000
 Experience
 - 5,000
 Experience
 - Access to Lunar Isle
- Ability to use Lunar Spells
- Use of the Astral runecrafting altar.
- 50 Astral Runes
- Ability to get Suqahs as a Slayer task. (Only with the Slayer Masters: Duradel/Lapalok and Kuradal)
- An extra 10,338 magic experience when Swept Away quest is completed and you bring the Broomstick to Baba Yaga (With level 73 Magic).
- Access to Livid Farm
- The ability to Home Teleport to the Lunar Isle lodestone.
- 2 extra spins on the Squeal of Fortune
- The Seal of passage, which can be used to teleport to the Lunar Isle once per day.
Music unlocked
- Dreamstate - In Dream World
- The Galleon - At the Pirates' Cove
- Isle of Everywhere - On the northeast coast of Lunar Isle
- The Lunar Isle - On the Moonclan Isle
- Waking Dream - When at one of the challenges in Dream World
- Way of the Enchanter - In the Lunar Isle mine
Required for completing
Completion of Lunar Diplomacy is required for the following:
- Dream Mentor Quest
- Glorious Memories (for the extra reward)
- Falador Tasks:
- Elite: "A String and a Flare"
- Fremennik Province Tasks:
- Hard: "Runes on the Moon", "Easy As Pie" and "Totally Livid"
- Elite: "Astronomical!"
- Seers' Village Tasks:
- Elite: "Moon Raker"
- Ardougne Tasks:
- Hard: "Ourania Mania"
Trivia
- In one of the conversations with Captain Bentley, the player says "O Captain, my captain,", the name of a poem by Walt Whitman.
- Also while talking to Capt Bentley, at one part his parrot says, "I want guns, lots of guns!" which is a quote from the movie The Matrix.
- Baba Yaga comes from Slavic mythology, where she is an old witch (or old wild woman or mistress of magic) that lives in the house with chicken legs.
- After completing the quest, your Adventure's Log will show "I now know the mystical Moon Clan fairly well and they can hopefully start to live in peace with the Fremennik."
Template:Fremennik Series no:Lunar diplomacy es:Lunar Diplomacy nl:Lunar Diplomacy fi:Lunar Diplomacy