Defender of Varrock
| File:Defender of Varrock infobox.png | |
| Also called? | DOV |
|---|---|
| Release date | 29 September 2008 (Update) |
| Members only? | Yes |
| Quest series | Arrav (#2) |
| Official difficulty | Experienced |
| Official length | Medium-Long |
| Developer | Paul Gower |
Defender of Varrock is a quest released on 29 September 2008 featuring the return of a Mahjarrat, Zemouregal, to invade Varrock with the help of an undead Arrav.
Official description
| “ | Troubling reports are arriving from scouts in the Wilderness: zombies are amassing and organising. Zombies alone are incapable of such intelligent behaviour, and each time it has happened in the past great tragedies have come to pass. Captain Rovin, suitably concerned, needs your help to go on a dangerous mission to verify the reports.
Are the Varrock Guard just being paranoid, or could this be a major threat to their city? Reading the Legend of Arrav in the Lores and Histories section of the website will give you a better appreciation of the storyline of this quest. |
” |
Walkthrough
| Start point: | ||
| Members only: | Yes | |
| Official difficulty: | ||
| Description: | None | |
| Length: | Medium | |
| Requirements: |
| |
| Items required: |
Toolbelt:
Recommended:
| |
| Enemies to defeat: |
|
The warning beacons are in use and thus you are unable to play All Fired Up during most of this quest.

Organised Zombies?
Head to Varrock Palace, and make your way to the second floor of the north-west tower. Talk to Captain Rovin in his room.
He tells you that zombies have been organising in the Wilderness. He calls for his scout Hartwin, who reports a "shadowy figure" and an army of zombies in the Graveyard of Shadows. Rovin asks you and Hartwin to investigate further. Before moving on, make sure that you don't have a familiar summoned, otherwise Hartwin will not follow you outside.
Tracking 'em

Items needed: Armour, weapons, supplies to survive in the Wilderness and to fight level 85 Armoured zombies.
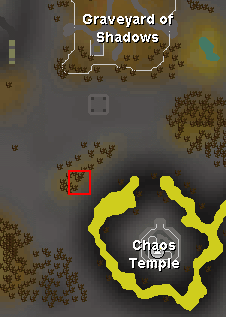
After speaking with Rovin and Hartwin, Hartwin and you will teleport to the Graveyard of Shadows. During the quest, this area is non-wilderness. This means that you will be safe from player-killers and other immediate threats usually found in the wilderness. Bringing armour is highly recommended to ward off many zombie attacks found in this quest. Go in the graveyard and talk to Hartwin once inside. You see a cutscene, showing a trail of zombie footprints leading away from the graveyard. After the cutscene, you and Hartwin are standing near some footprints.
Similar to how you track when hunting, use your Hunter skills to follow the zombie footsteps. Adjusting the display mode to "Safe Mode" will make the tracks significantly easier to see. You need 51 Hunter only to uncover the first set of tracks. Inspect nearby bushes, trees, tree stumps, mushrooms, and bones to uncover the tracks. You may encounter several dead ends and places where the trail seem to go in circles. Mind the zombies, who attack when you are near the graveyard.
Eventually, you uncover a grubby key along the tracks, in a thicket of trees. Continue tracking until the footprints come to an end at the entrance to the Chaos Temple and you receive the message: "The trail seems to stop as it reaches rockier ground. Hopefully you can find out what happened to the zombies in this area."
Zemouregal's Ally
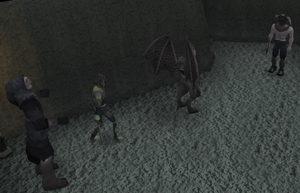
- See the Temple dungeon page for a map and description of the dungeon. If you die during the previous section, you will have to return to Varrock Palace to fetch Hartwin again. You cannot enter the dungeon alone.
Use the grubby key on the trapdoor just south of the altar in the Chaos Temple, and enter the tunnels under the temple. Note that Armoured zombies attack as soon as you climb down the ladder. Run north to get out of range. Head north in the dungeon, and look for a balcony to the east that overlooks a chamber. Choose the Look-over Balcony option.
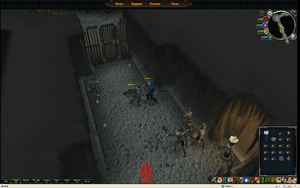
In a cutscene, you see Sharathteerk and Zemouregal talking about allying with Lucien. Zemouregal rejects the idea because he has "significantly powerful resources" of his own: An undead Arrav, who will take command of Zemouregal's zombie troops! You now need bottles of red mist to pass through the next few doors, as they behave like keys. Do not bother filling more than three, as the contents of the extra bottles will leak out before you can use them.
Head west through the dungeon corridor, and pick up three bottles on the ground around the armoured zombies. Attack three armoured zombies, and when a zombie dies, store the red mist by using a bottle on the mist that appears. Go through the door to the west. You see another cutscene: Arrav is in the room and reveals that while his zombie body is under the control of Zemouregal, his mind is free. He starts to tell of how someone could help him when his master summons him away.
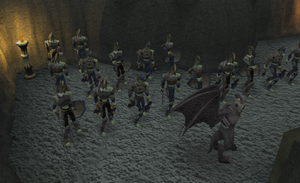
Head north up the corridor, kill three zombies to refill your bottles with red mist, and then go east and open the second door. Follow the corridor east to another balcony to the south. Choose the Look-over Balcony option again to view another cutscene.
You see below that Zemouregal has raised an army of armoured zombies. Zemouregal says this may be his last real chance to attack Varrock and claim the Shield of Arrav before the time comes to head north. Realising the gravity of the situation, return to Captain Rovin and tell him what you and Hartwin learned about the zombie army. Make sure you complete the cutscene and tell yourself to return to Captain Rovin before you leave the dungeon or you will have to return to re-view it.
Camdozaal
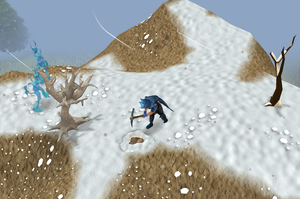
Items needed: A Pickaxe; optionally a dramen or lunar staff for faster using the fairy rings
Rovin asks you to speak with Thurgo, one of the surviving Imcando dwarves, to learn how to use the Shield of Arrav to defend Varrock. Travel to Thurgo's Peninsula, north of Mudskipper Point, either by using the Fairy Ring code AIQ or teleporting to Port Sarim using the lodestone network.
Talk to the old dwarf near his hut, about the Shield of Arrav. He suggests you find the great lost dwarven hall of Camdozaal and its Sacred Forge. He gives you a scrap of paper with the coordinates for Camdozaal on it.
If you do not have blurite ore yet, head down into the Asgarnian Ice Dungeon, located in the hill east of Thurgo's hut and mine one blurite ore from the ice-covered rocks in the dungeon.
Sacred Forge


Items needed: A spade, pickaxe, light source, and blurite ore; optionally a sextant, watch, chart, and redberry pie.
Make your way to the Ice Mountain, north of Falador and west of the Monastery, where you can teleport using a combat bracelet or you can walk south-west from the Edgeville lodestone. Once on the mountain, use your spade on the location of the coordinates (10 degrees, 31 minutes north; 17 degrees, 48 minutes east), which is just north-east of the white tree.
You dig through the snow and receive the message "You dig a hole in the snow. Under the snow, you find there is a lot of rubble." Continue to dig using the spade until you get the message "You'll need something better than a spade to get through the rubble." Now, use a pickaxe on the churned-up snow. You get the message, "You swing your pick at the rubble. You clear the rubble, revealing a hole in the ground." With a light source in your inventory, enter the hole. Down in the ruins of Camdozaal, talk to the dwarf, Ramarno.
Ramarno tells you who he is and explains how to use the Sacred Forge. If you brought a redberry pie with you, Ramarno will ask if he could have some. Give him the "legendary redberry pie" to receive 1,000 Smithing experience.
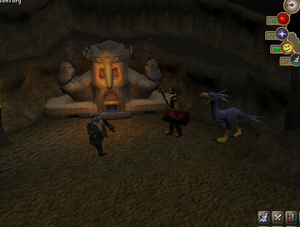
Use the blurite ore on the Sacred Forge, and then talk again to Ramarno.
You see a dreamlike cutscene: Images of Traiborn, Queen Ellamaria, Lord Rologarth, and the Wise Old Man appear and explain how to tap the power of the Shield of Arrav. Zemouregal then senses your presence and his image appears, taunting you that you are too late, as his army is already at the walls of Varrock.
-
You are too late!
Defending Varrock

Quickly return to Varrock, and head to the palace. Upon entering the palace grounds, you see a cutscene: Armoured zombies are attacking the palace and overrunning the guards. Avoid hitting the zombies, and run to the second floor of the north-west tower, and talk to Captain Rovin (on your way up, on the first floor, you see Arrav overseeing the zombies). Tell Rovin what you learned at the Sacred Forge. He tells you to check the library records and gives you the Shield of Arrav.
Climb down the stairs, go into the library, and talk to Reldo. He tells you about an old document that a zombie knocked to the floor and the old census. Against the north wall of the library, look for an open book on a lectern: It is the Varrock Census from the Year 160, nine years from the current year. Read the Varrock Census to find the names and occupations of the citizens of Varrock for the year 160.
Then, search the scrolls on the floor near the tipped-over desk to obtain the List of elders. The scrolls list the names of the city's first elders. Some names listed in the census match the seven names of the elders written on the scrolls. These, then, are the descendants of the first elders. Talk to the descendants with the Shield of Arrav in your inventory. The descendants are:
- King Roald, the King of Varrock.
- Aeonisig Raispher, the royal advisor to the King.
- Sir Prysin, one of King Roald's knights, from the Demon Slayer quest.
- Curator Haig Halen, the curator of the Varrock museum.
- Horvik the smith, owner of Horvik's Armour Shop.
-
King Roald
-
Aeonisig Raispher
-
Sir Prysin
-
Curator Haig Halen
Each of them will wield the Shield of Arrav, but none will be able to activate its magical properties. One of them, however, will tell you that they are not a blood descendant and was adopted into the family and the progeny of the family married into the Fitzharmon family; the person who reveals this is random for every player.

As soon as you learn about the Fitzharmon family, talk to Dimintheis, who is south-east of the eastern bank, in the most northern house of the gated-off area where Family Crest is started.
Dimintheis wields the shield, and it responds to him.
He is revealed to be a descendant of the founder of Varrock. In the cutscene that follows, Dimintheis uses the shield to kill the zombies throughout Varrock Palace. With his invasion of Varrock gone wrong, Zemouregal flees the scene with Sharathteerk and Arrav. After the cutscene, you find yourself next to Captain Rovin. Talk to Rovin to end the quest and receive your rewards.
Congratulations! Quest complete!
-
The Monk of Zamorak is freed!
-
The zombies approach Queen Ellamaria, only to be zapped by the Shield of Arrav shortly afterwards.
-
Zemouregal heads north.
Rewards
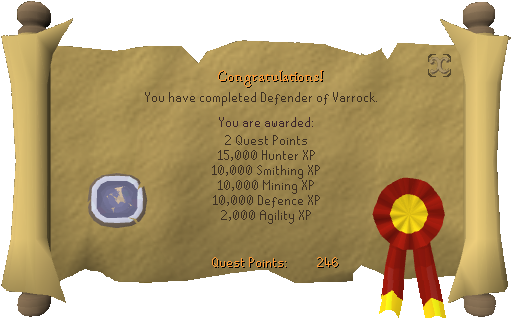
- 2 Quest points
- 15,000
 experience
 - 10,000
 experience
 - 10,000
 experience
 - 10,000
 experience
 - 2,000
 experience
 - Access to Chaos Temple Dungeon where you can kill Armoured zombies
- 5 Kudos in Varrock Museum and a 1,000 experience lamp from Historian Minas on the first floor of the Museum, right next to the stairs.
- 1,000
 experience for giving Ramarno a Redberry pie
 - 2 extra spins on the Squeal of Fortune
Music unlocked
- Undead Army - In the dungeon below the Chaos Temple
- The Ruins of Camdozaal - Under the Ice Mountain, in Camdozaal
- Dream Theatre - In the cutscene with The Sacred Forge
- Zombie Invasion - Varrock Palace during the zombie invasion
Required for completing
Completion of Defender of Varrock is required for the following:
Trivia
- On the day the quest was released, the spoilers read: "The spoilers are currently hidden away for safe-keeping; tomorrow the zombie threat should have diminished enough to release them."
- If you do not actually give away the shield and complete the quest, the Varrock Palace will remain "under attack." Keeping the palace under attack would allow you to have the surrounding yew trees to yourself, using a safespot between the first two yew trees from the west, where the armoured zombies cannot attack you from.
- Arrav is level 180 in the quest. However, you cannot attack him.
- This quest confirmed the helmeted zombie in the "Attack on Varrock" wallpaper is actually Arrav himself.
- During the zombies' attack on Varrock Palace, you may see the imprisoned Monk of Zamorak shout "Kill those guards!" "Let me out! I'm a bad guy too!" "Someone want to get me out of here?" "So are any of you zombies gonna break me out?" "Hey! Zombies, I'm on your side." "Haha, mash those guards" "Let me out, I'll help with the invasion!" or "Oi, Mr. Zombie, Can you let me out?"
- During the final cutscene, when Dimintheis uses the shield, you can see the Monk of Zamorak dancing and shouting "Hurray! Free at last!" But then when the zombies start dying he says "Erm..." After the scene, you can find him imprisoned again in his cell.
- When Dimintheis uses the shield, the lightning attack is similar to the attack that the sorceress uses from the Diablo video game series.
- If you enter Camdozaal without a light source, after a few seconds a swarm of biting insects will begin inflicting a constant loss of a single life point until you flee the cave, just like any other cave where you need a light source.
- There is a glitch after you complete the quest where you see two to three Hartwin's. When you talk to them, both of them will tell you to speak to Captain Rovin.
- After the quest, you can visit the Sacred Forge again, but Ramarno will not let you use it for Smithing and you cannot use a blurite for another vision.
- On the day of the release, a man from Ardougne named Clive appeared in Varrock Palace. He can be found in the room north of Sir Prysin.
- Several times in the quest, Zemouregal—as other Mahjarrat have said—states he is heading north.
- It is possible to keep Hartwin for the entire quest—and even after the quest, it is done by not speaking to him (when you are supposed to dismiss him after his work is done) after he gives you the Varrock teleport tablet. Having Hartwin accompany you does have some funny effects on cutscenes: for example, when crawling over the rubble to Camdozaal, Hartwin is just walking. However, after logging out after the quest is complete, Hartwin disappears.
- Surok Magis isn't at all bothered by the zombie invasion. In fact, he seems more furious that you foiled his plans than the fact that zombies are destroying his prison.
- During the quest, Zemouregal's right-hand man Sharathteerk says "Your cousin Lucien is close to finding it." This is a probable reference to the Stone of Jas/Staff of Armadyl.
- After the quest, in a F2P world, the trapdoor to the Chaos Temple Dungeon will still be open; however, you cannot enter it. If you examine it, it reads, "An open trapdoor."
- During the attack, Sir Prysin looks as he did before he was graphically updated.
- Before the release of Gunnar’s Ground, Romeo would instead tell the player to find Dimintheis, and therefore Romeo & Juliet was a requirement for this quest, until it was removed.
- If you started All Fired Up and got to the part of lighting the beacons at the time of the zombie invasion, if you try to light the beacons you will get a message stating, "Now is not the time to be messing with the beacons - there is a threat from the Wilderness and we're all on high alert."
- The wise old man in the furnace is the only one with a solid chathead instead of a ghostly one.
- After the wilderness graphical update, players weren't able to finish finding the trail to the base out in the wilderness as the trees were unable to be examined around the chaos altar, players would have to wait till jagex fixed this bug before going on in the quest.
Game and cultural references
- If you speak to the undead Arrav during the invasion, you can say "Talk to me, Arrav!" and "Don't ignore your mate, Arrav!". After he fails to respond, you will state "That normally gets people's attention." This is a reference to the Drunken Dwarf random event.
- In the Varrock Census, there is a man listed as "Phearthee Levalsyx" (Fear the level six) under the profession "mugger." This is a reference to the level 6 mugger near Aubury's Rune Shop, often famed for killing macros.
- Also listed in the Varrock Census is the student "Louisiana Jones" (Anna Jones), which is a reference to Indiana Jones.
- After seeing your vision in Camdozaal, the beacons will be lit in a red flame until the quest is done.
- Zemouregal's image and personality are reminiscent of Skeletor from "He-Man and the Master's of the Universe" animated series.
- If you search the book on the floor when you are looking for the scrap in Reldo's library, you will get a message in the chat screen, "These aren't the documents you're looking for." This is a reference to the Jedi mind tricks in the Star Wars films.
- Listed in the Varrock Census is a cart expert called Jeremy Clerksin. This is a possible reference to Jeremy Clarkson, the host for "Top Gear". Their profession of "Cart expert" seems to back this allusion up.
- After completing this quest, your Adventurer's Log will read, "Not a week goes by without Varrock becoming the target of some dark and malevolent force! I've pushed back the waves of zombies and defied Zemouregal."
- After completing the quest, if you talk to Juna, your character will say, "...The Shield of Arrav glowed with lightning, and Dimintheis used it to defeat the zombie army."
See also
| Mysteries of the Mahjarrat |
1. The Tale of the Muspah • 2. Missing My Mummy • 3. The Curse of Arrav • 4. The Temple at Senntisten • 5. Ritual of the Mahjarrat |
| Rise of Lucien |
1. Temple of Ikov • 2. While Guthix Sleeps • 3. Ritual of the Mahjarrat |
| Rise of Zaros |
1. The Dig Site • 2. Desert Treasure • (Devious Minds) • 3. The Temple at Senntisten • (Ritual of the Mahjarrat) |
| Arrav |
1. Shield of Arrav • 2. Defender of Varrock • 3. The Curse of Arrav • 4. Ritual of the Mahjarrat |
| Other quests |
Hazeel Cult • Fight Arena • Enakhra's Lament • The Firemaker's Curse |
| Related miniquests | |
| Related lores | |
fi:Defender of Varrock es:Defender Of Varrock nl:Defender of Varrock


