The Slug Menace
| File:The Slug Menace.png | |
| Release date | 20 September 2006 (Update) |
|---|---|
| Members only? | Yes |
| Quest series | Sea Slug quest series Temple Knight series |
| Official difficulty | Intermediate |
| Official length | Long |
| Developer | Chris LC |
Walkthrough
| Start point: | ||
| Members only: | Yes | |
| Official difficulty: | ||
| Description: | The small village of Witchaven was all but deserted when the Fishing Platform was built a short ways off the coast. Now, some of the inhabitants of the village have been acting somewhat strangely.... | |
| Length: | Long | |
| Requirements: |
| |
| Items required: |
Recommended:
| |
| Enemies to defeat: | Slug Prince (level 62), who drains prayer by several points with each attack and is immune to ranged or magic-based attacks. |


We Have A Mission For You...
Items: A Commorb.
With a Commorb in your inventory, head to Falador Park and speak with Sir Tiffy Cashien to inquire about any jobs that he might have.
- If you don't have your Commorb, Sir Tiffy Cashien will hand you a Commorb v2 (the upgraded version of the Commorb).
Along with his ramblings, he tells you about the village of Witchaven, which has had some rather strange goings-on recently. He tells you that since you have been instated into the Temple Knights, you are eligible for a new mission. He tells you to check in with the Temple Knights' local agent in Witchaven, Col. Jake O'Niall, with the password "In Falador, the geese fly backwards on Tuesday." Sir Tiffy also upgrades your Commorb to a Commorb v2.
Make your way to Witchaven.
- A reasonably fast way to get to Witchaven is to teleport to Ardougne and then walk east to the coastal town of Witchaven.
- Alternatively, you may use fairy ring code BLR to the Legend's Guild and then take a short walk south.
- The Ardougne cloak 1 teleport to the monastery gives you fairly close access as well.
Witchaven
Items: Commorb v2
Once in Withchaven, find Col. Jake O'Niall rocking in a chair, on the dock, in the north-east corner of town. Talking to the retired member of the Temple Knights reveals that some of the villagers have started acting strangely since about three weeks, especially Mayor Eustace Hobb. He also tells you that some of them are in a dazed and confused state.
If you have not already, ask O'Niall who the important people are in Witchaven. He points you to Mayor Hobb, Brother Maledict and Holgart, the fisherman, who helped you on the Sea Slug Quest. O'Niall also suggests that the others may also have some insight into what has been happening to their fellow-mates.
(Note: Make sure to finish talking to O'Naill about who to speak to, or they won't give you the right dialogue.)
Start off by talking to Mayor Hobb at his house. It is on the west side of town. Mayor Hobb tells you various things, one of which is about a certain shrine dedicated to Saradomin. As you start to leave the house, Savant stops you. She notes the mayor is acting a bit fishy and asks you to scan him. Inside the mayor's house, choose the scan option on the Commorb v2. She gets an odd reading - two life forms from the Mayor - but she is unsure what it means.

Next, head to the church — just south-east of the mayor — and speak with Brother Maledict. He tells you he is worried about his flock, who have begun to act a little bit strangely lately, emulating what O'Niall had told you.
Now, walk a little bit north by the shore, and talk to Holgart. He tells you that the mayor recently confiscated his boat and gave it to another man named Jeb. He also mentions that the Fishing Platform looks a mighty bit stranger and that you should go take a look.
Shrine of Saradomin

Items: Commorb v2, food and armour to survive a brief encounter with level 45 aggressive giant lobsters.
Report back to Col. Jake O'Niall, and tell him what you have found out so far. He suggests you take a good look at the shrine. Head to the western edge of the village — to the ruins — and climb down the old entrance to get into the Witchaven Dungeon, which houses the shrine.
Once you are in the dungeon, look to the minimap. On the east wall, look for a red section indicating a false wall. Choose the Push Wall option to open this section, and then enter the wall opening. You find yourself in a winding tunnel with aggressive giant lobsters.

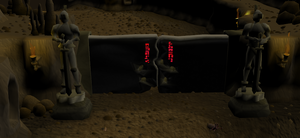
Make your way through the tunnel — or save some time and climb through the Agility shortcut, if possible — and head to the imposing doors blocking your way.
Warning: Do not try to open the doors or else a flash of light will spring from them, burning your hand for 50 life points.
Savant contacts you via the Commorb v2 to ask you to take a scan of the strange markings on the door. Choose the scan option on the Commorb v2. She says they look similar to some Saradomin glyphs she studied at the academy. She gives you a transcript of the runes to take to Jorral, who can translate them.
Before you go, grab the dead sea slug nearby. It will come in handy later. Savant contacts you about the slug you picked up and does a scan to analyse it.
Mahey'ish Medron
Items: Commorb v2, Door transcription. (Optional, use the Ardougne lodestone) Ardougne Teleport for faster travel.
Travel to Jorral at the Outpost, which is north-west of West Ardougne and south of the Tree Gnome Stronghold. Talk to him about translations. Savant pops up in the Commorb v2 and coaches you on how to get Jorral to translate the message. Eventually, Jorral takes a look at the text and says it refers to a great battle between the temple of Saradomin and an evil creature called Mahey'ish Medron, or as she more commonly called, the Mother Mallum.
After Jorral is done, Savant contacts you again to catch you up on what she has learned about Mother Mallum. Head back to Witchaven, and check in with O'Niall. He suggests you speak with Brother Maledict to see if he knows anything about Mallum.
Approach the church's door, and you see a brief cutscene of the mayor leaving the chapel. When you enter the church, the priest is wobbling around, looking rather ill and acting strangely. Talk to him about what is behind the imposing doors you found and he tells you he has a book that has information on how to keep Mother Mallum trapped, but someone has stolen the three pages pertaining to the shrine's history and it is imperative you recover them immediately.
History Lesson
Items: Commorb v2, 5 empty inventory spaces, Swamp paste, and a Dead sea slug.
- For the first page, enter the mayor's house and search his study desk to obtain the first page of Maledict's holy book.
- Talk to Ezekial Lovecraft — the owner of Lovecraft's Tackle fishing shop south of the dock — to get the second page of the holy book.
- To recover the last page, talk to O'Niall again. He too has the same nauseous look as the other villagers. He, strangely, does have the last page, which, unfortunately, has been ripped into three pieces.
- Try to use swamp paste on the fragments to glue the page back together, but Savant stops you. The oily tar would ruin the ancient parchment, she warns. Instead, she advises, to make sticky glue from a rendered slug, and she mentions that it can only be done by someone who is renowned in seafood cooking.
- Travel to the Fishing Platform by talking to Jeb, who is next to Holgart. Talk to Bailey in the small room on the south west corner of the platform. Hand him the dead slug you picked up earlier from the shrine, and in a few seconds, he gives you the sea slug glue you need. Finally, use the glue on the fragments, and a puzzle will pop up.
Note: If for whatever reason you have lost or dropped the dead sea slug, an infinite number spawn outside the door with the strange markings in the shrine. Be sure not to try to pick a live sea slug, however, because it will bite you, dealing 20-30 life points of damage.
Jigsaw

Move the three pieces of the page around using the controls over in the bottom-right corner of your screen:
- Use the arrows to move, rotate, and even flip over the fragments.
- Use the Show and Select buttons to choose which pieces to show and to move.
The easiest way to tell if you have got them all on the right side is that the correct side is lighter than the other. The image to the right gives you a general idea of how the fragments should fit together. The third piece may be out of view at the very bottom; select the third piece and click the up button several times to bring it in view.
When you put the pieces in their correct place, the puzzle fragments will close automatically, forming the last page.
Now talk to Jeb on the dock and have him take you back to Witchaven.
Imbuing
Items: Commorb v2, Chisel, Page 1 Page 2 and Page 3. 5+ rune essence or pure essence. An earth, water, fire, air and mind talisman, or their equivalent tiaras. Alternatively, a Wicked hood can be used as the talismans, as well as holding 5 pure essence.
(REMEMBER TO IMBUE THE RUNES AFTER YOU SHAPE THEM BEFORE MOVING TO THE NEXT ALTAR.)
It is possible to fail shaping an essence and break it. Be careful not to use a chisel on the essence or you get rune shards. It is also advised to shape your runes at each altar in case you fail to empower and break the blank rune.
Right click and choose the shape option from the three pages to create a blank rune.
- Page 1 to shape a blank earth rune
- Page 1 to shape a blank air rune
- Page 2 to shape a blank fire rune
- Page 2 to shape a blank water rune
- Page 3 to shape a blank mind rune
Take each of the blank runes to its associated altar, and use it on their respective altar: the blank earth rune on the earth altar, and so on. Take caution as to not click on the altar, as your essence may be crafted into runes. To prevent this, it is suggested to store the essence in a pouch.
Once complete, your inventory should contain special misshapen counterparts of the elemental runes.

Conspiracy
Items: Bring armour and food to fight a level 62 Slug Prince. Commorb v2, and the 5 runes that you created. Prepare for a fight where you can use only melee with the level 62 Slug Prince.
Remember to bring your Commorb v2.
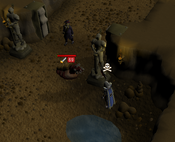
When ready, go back to the shrine and return to the imposing doors. Use each of the specially shaped runes you made on the doors to trigger a cutscene. You see that Mayor Hobb tricked you into opening the door so that Mother Mallum could escape. Following the cutscene, you must fight a level 62 slug prince. The prince is not difficult to kill, although you are unable to damage it with ranged or magic-based attacks; arrows and spells bounce right off of it.
After you kill the prince, you see another cutscene with Mother Mallum. She threatens to make you her new host, but Savant pops in via the Commorb v2 and teleports you safely to Falador Park. (If this teleport actually takes you to the entrance of the Mysterious Ruins, go back inside and you will be automatically thrown back into battle with the Slug Prince once more. After the battle Savant will teleport you to Falador Park safely). Talk to Sir Tiffy to be promoted to a Proselyte for your efforts.
Upgrading your old Initiate armour to Proselyte is recommended, since it offers a greater Prayer bonus.
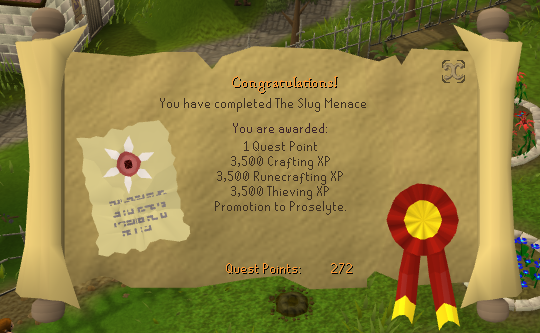
Congratulations! Quest complete!
Rewards

- 1 Quest Point
- 3500
 Experience
 - 3500
 Experience
 - 3500
 Experience
 - 2 extra spins on the Squeal of Fortune
- Promotion to Proselyte among the Temple Knights. This means you can buy and wear new Temple Knight armour with a greater Defence bonus than Initiate. You can buy each piece individually, or buy the armour pack which, when opened, gives you the plate, helm, and legs/skirt all at once. The pack is worth 25,000 coins.
File:Proselyte armour store.png
Music unlocked
Required for completing
Completion of The Slug Menace is required for the following:
- Kennith's Concerns
- The Ritual of the Mahjarrat
- Falador Tasks:
- Hard: "A Knight in the Darkness"
Trivia
- The Slug Menace title looks like Star Wars 1: The Phantom Menace.
- The character Col. Jake O'Niall is based on the character Col. Jack O'Neill from TV's Stargate SG-1.
- The quest is based very heavily on the story "Shadow over Innsmouth" by H.P. Lovecraft, where a struggling fishing community makes a deal with creatures known only as "The Deep Ones" who in turn for ensuring the prosperity of the village, require people as sacrifices. They also produce horrible frog-featured offspring with the villagers that eventually become fully developed Deep Ones and return to the seas. These creatures were practically immortal, and worshiped two demigods known as Father Dagon and Mother Hydra. The shopkeeper in Witchaven, Ezekial Lovecraft, is a nod towards the author. If you talk to him, he notes he has a relative named Howard, which was H.P. Lovecraft's first name. He also says, when asked what he does, that the Lovecrafts have always been bait sellers or writers.
- This is not the last quest of the Sea Slug saga. Sir Tiffy, among other things, places you in charge of the ongoing offence against Mother Mallum and states that he will be widening the intelligence network of the Temple Knights. You will have to "check back in a bit" for further briefing. On 1 July 2011 the concluding quest in the series, Salt in the Wound, was listed as the first of that month's updates in the Behind the Scenes post.
- During the battle with the Slug Prince, if you attempt to enter the room beyond the door, Mayor Hobb will say that you are "Unworthy" of Mother Mallum.
- Mayor Hobb used to always slide about his room rather than walking. This glitch has recently been fixed.
- During the Mother Mallum cutscene at the end of the quest you are unable to examine Mayor Hobb. He also doesn't appear as an NPC on the minimap.
- When meeting Col O'Niall, the player asks about Inter-Continental Exploding Fireballs and Surface-to-Air ballistas, of which are based on their real counterparts.
- When talking to Col. Jake O'Niall for the initiation of the mission, after calling him sir he replies: "Don't call me sir, I work for a living." This is a saying from enlisted soldiers in the military even though col. is the abbreviated form of colonel which is an officer and therefore he would be addressed as sir.
- When talking to Jorral, Savant tells you to say you work for Petmel Books. This may also be a reference to the book "Shadow over Innsmouth".
- At the end of the quest, when the player is about to be killed by Mother Mallum, they say "Savant, now would be a good time." This is a reference to Chekov's line in Star Trek 4: The Voyage Home.
- After you have glued the pieces of page 3 together, Jake will not recognise them and will give you 3 more pieces.
- After you complete the quest, if you venture into the area from where the Slug Queen appeared, you can see a wide red pool (which is quite similar to the Bandos Oo'glog pool) in an enclosed area.
- The track Slug a Bug Ball which is unlocked during this quest is most likely a reference to the Disney Song Ugly Bug Ball.
- The name "Col. O'Niall" could be a play on words meaning "Colonial."
- If you destroy your Commorb before talking to Col. O'Niall, you will address him as Colonal, even though you didn't know he was one.