Summer's End
| File:Summers End.png | |
| Release date | 15 September 2008 (Update) |
|---|---|
| Members only? | Yes |
| Quest series | Spirit of Summer |
| Official difficulty | Experienced |
| Official length | Short |
| Developer | Benny P, Jonathan S |
Summer's End is the sequel to the Spirit of Summer quest, which was released on 29 July 2008 and the first quest to be released in the Wilderness. The sequel quest was released on 13 September 2008 and continues the story of the Spirit Beast terrorizing Summer and her family in the Spirit Realm. Summer's End is generally regarded as one of the most difficult quests to complete due to the extremely high chance of dying at least once during the quest, along with Monkey Madness, Desert Treasure, Nomad's Requiem, The Void Stares Back, and While Guthix Sleeps. However, the player does not need to bring many expensive items, and if he/she dies, the items are easily reclaimable.
Walkthrough
| Start point: | ||
| Members only: | Yes | |
| Official difficulty: | ||
| Description: | None | |
| Length: | Short - Long | |
| Requirements: |
| |
| Items required: |
Recommended Items:
| |
| Enemies to defeat: | None |
Forewarning
This can be a rather difficult quest, depending on experience and the quality of the player's Internet connection.
Deposit all unneeded items in the bank, as armour and weapons will not help in this quest. If you die while fighting the beast, your gravestone will appear right under Summer, just north east of Varrock, near the wilderness wall. When you die you will keep your spade, tinderbox and ghostspeak amulet as well as your normal three other items, making for much less clicking at your gravesite when regathering supplies.
Protect from magic or any protection prayers will not work or help when fighting the spirit beast; the only time you need prayer is in the 3rd room when blessing the graves.

Background

Items needed: Jennica's ring, a Ghostspeak amulet, a pickaxe, Summoning pouches made from Blue charms, high-healing foods (Monkfish or better)
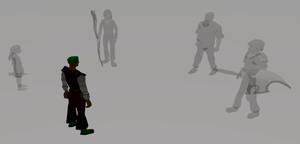
Talk to Summer, who will be near the Wilderness wall. Ask her what's happening, and she tells you to follow her. When you follow her through the Spiritual portal, instead of arriving in the Spirit Realm you appear in The Void that separates the real realm from the Spirit Realm. Erik Bonde, Summer's father, explains that the Spirit Beast is getting stronger and is breaking through the veil separating the two realms.
Preparing the mine

- Items needed: Jennica's ring, Ghostspeak amulet, Pickaxe (Toolbelt will work)
In order to trap the beast, you have to lure it into a mine. However, the mine entrance is closed in the Spirit Realm. You must destroy the mine entrance in the real realm so that the one in the Spirit Realm will open.
Return to the real world by operating Jennica's ring while standing on the portal. You must be wearing the ring to operate it. Travel north to the mine entrance (it is marked with a dungeon icon on the minimap).
You can optionally search the skeleton just inside the cave for a bronze pickaxe, a mithril hatchet, tinderbox and a spade in the normal realm. Doing so will make the skeleton in the Spirit Realm lootable and then looting it in the spirit realm will make the skeleton in the normal realm lootable and so on.
Collapse the cave in the real world before returning to the Spirit Realm the way you came.
Luring the beast
- Items needed: Jennica's ring, Ghostspeak amulet, Blue charm pouches
The next step is to find and lure the beast. In the Spirit Realm, the area immediately around the entrance to the cave the beast is patrolling in a circle. You may walk around the circle and wait and see the beast as it walks by. Since you previously used familiars made from gold, green, and crimson charms in the Spirit of Summer quest, the beast is "familiar" with any familiars made with them and so a new type of spirit is required. Therefore, one must lure the beast using any Blue charm familiar.
It is possible to lure the beast with just one familiar; however, if you fail to lure the beast and it consumes your familiar, it is easier to have more (up to 5) pouches on hand. It is best to stay as near the cave entrance as possible while being close to the beast's "patrol" route. It may help if you position yourself so that you are closer to the mine entrance than your familiar, as it is you entering the mine that counts.
Position yourself by walking a bit further away from the mine with your familiar following you, and then walking a bit back towards the entrance. Once the beast is focused onto the familiar or you, enter the mine. If the beast devours your familiar you must try again with another pouch. If the beast ignores your familiar it means that the beast was too far away. Position the familiar closer to the beast's route for the next attempt. Also, it's better to be too early than too late when entering the mine.
Before killing the beast

It is necessary to run to avoid the beast's attacks. The beast makes long-ranged attacks, similar to a catapult attack. An attack is not instantaneous, but takes a short time to reach its target point. When launched, the attack targets where you are standing and does not track you if you move. When the attack hits the ground, it splashes into several secondary attacks, which hit you if you are still nearby. These attacks can hit into the 300s, and mid-200s are common. You can be hit by several of the splashes at once--being hit by all of them at once is nearly a guaranteed death.
The key to survival and eventual victory is to avoid the beast's attacks. The earth shakes when the beast is unleashing its attack. You can thus avoid an attack by watching for this sign. Also, the attack makes a "whoosh" sound while in flight, which can alert you if you missed the shaking. As the beast is weakened, it attacks faster, the attacks splash into more secondary attacks, and the splashes travel farther.
You can run into any of the other rooms the beast is not in if you need to replenish your run energy or eat in peace. The beast can not attack you there. When the beast moves into a new room, you remain behind in the previous room. You can move on to the next room, but this is a good time to leave the cave and restock, if needed.
Run energy boosts such as the salt water spring in Oo'glog after completing As a First Resort... can be very helpful as running is very helpful in avoiding the beast's attacks. The Surefooted auras are useful here, as they recharge your energy fully whenever you come to a stop.
Remember that all the characters you meet during this quests are ghosts. Except for one occasion, you must wear the Ghostspeak amulet to communicate with them.
First room: The Fire
- Items needed: Jennica's ring, Ghostspeak amulet, Tinderbox, Food, multiple empty slots (at least 5 recommended), hatchet (highest you can use recommended)
- *Tip - When chopping Cursed willow logs cut them in the northern 3 roots. You wait for the beast to attack and then run to the nearest root. Repeat this process everytime the beast attacks. This should allow you to finish this part without taking any damage. Make sure you move as soon as the screen shakes/sound track goes or else you will take a lot of damage.(if you die your items will appear under Summer south of the wilderness wall)
Warning: This is Extremely Difficult to do if you do not have a high constitution level.


Once you've lured the beast into the cave, a cutscene ensues. Meranek Thanatos explains that he has discovered the beast has a weakness in its chest, where it stores the energy of the souls it devours. Logs cut from the cursed willow roots in the room burn with exceptional brightness and the beast mistakes the fire for souls. Meranek needs you to make the fire to distract the beast. When the beast is distracted, Meranek strikes.
You need to build 3 pyres, each pyre requiring 5 logs. Your job is to cut Cursed willow logs from the roots growing along the walls of the room and place them in any of the fire pits. Due to a recent update, you now have to right click to 'use' the logs on the fire pit; making this part of the quest very challenging. The beast attacks faster after each fire is lit. You can either build all the pyres, then light them all at once or light them one by one. Upon death, pyres that were lit are remembered, but stacks of logs which were not lit will be lost. Logs in your inventory will be kept. Each pyre you light, Meranek will attack the beast. *Note that it is possible to run using the minimap during the cutscenes of Meranek's fights. If you do so, do NOT light the other fires while the cutscene is playing. Fires lit while in cutscene WILL NOT count towards the 3 needed.
One strategy is to go to the northern 3 roots in the picture and wait there. After your screen shakes run to the next root immediately and chop until the beast attacks again. This gives you quick access to logs and the fire pits. You will not be hit if done correctly and can save you a lot of neccessary food.

When you have built and lit 3 pyres, Meranek will have attacked the beast three times. The beast moves into the second room, giving you an opportunity to restock and heal.
Note: The Inferno Adze is not recommended because it will burn some of the logs, thus wasting time. Also, your Inferno Adze will not be saved by the gravestone.
Second room: The Dark Core
- Items needed: Jennica's ring, Ghostspeak amulet, spade, food

As you enter the room, a cutscene plays. Jallek Lenkin knows how to damage the Spirit Beast more and needs your help. The dark core must be lured out from inside the Spirit Beast and trapped in a hole. When the beast goes to retrieve its core from the hole, Jallek attacks. He needs to attack it three times.
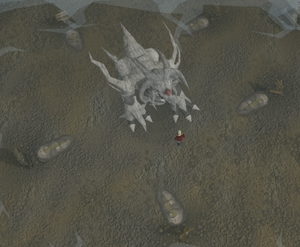
Run around avoiding attacks until the dark core comes out. The beast will stay relatively in the centre of the dirt mounds, so you can run around it repeatedly while it attacks you, staying on the trail of the mounds. The beast will stop attacking when it releases the core. You will also get a green message in your chatbox.
When the core is out, use your spade next to a patch of the soft soil to dig a hole. The core will head toward you if it is close enough. Otherwise, get nearer to it to get its attention. Put the hole between yourself and it, and it will fall in. If you take too long, the hole will collapse and must be dug again. When successful, a cutscene of Jallek's attack plays. Failure means the beast will come up and retrieve the core. A "checkpoint" is created after each cutscene, so if you die, the game will remember how many times the cutscene has been played.
One strategy here is to have the spade in your toolbelt, and run continuously around the circle of soft soil patches by clicking on them to dig. As the holes collapse after only a short while, you don't have to worry about stopping short. When the Dark Core is released, most of the time it will jump straight into the last hole you dug. The Surefooted Auras are especially useful here, because each time you stop to dig, the aura will top off your run energy.
If the core touches you, you will take a small amount of damage. Although Jallek warns you to avoid this, it is not necessary to bother. The damage pales in comparison to what you take from one of the beast's attacks. Each time after Jallek attacks, it takes longer for the dark core to come out, and the beast attacks faster, with more splashes, similar to the last room. When Jallek has attacked the beast three times, it moves into the third room. You can eat and restock.
Final room: Blessing the graves
- Items needed: Jennica's ring, Ghostspeak amulet, Food

In the final room, you will finally help destroy the beast. When you enter the room a cutscene plays, and the three spirits explain that this room has their graves. If the player blesses the graves at the right time, the spirits can hurt and destroy the beast.
There are five graves in the room. Each spirit will inhabit one grave at a time. Each also has its own colour: red, yellow, blue (Erik's soul is red, Jallek's soul is yellow and Meranek's soul is blue). Once the cutscene ends, you will see each coloured spirit fly to a grave. The beast then starts attacking. For each attack, the beast charges with a colour the same as one of the three spirits. If you bless the grave containing the spirit with the same colour as the attack being charged, the attack when made will rebound against the beast. Blessing a grave consumes prayer points, which may be replenished at the altar in the room.
Do this once for each of the three colours. After the beast attacks, the spirits may or may not change graves. The cursed nature of the ground in the cave means the spirits cannot stay in one grave long. A spirit can only cause the rebound once, so if you've already used the blue, you cannot use it again. The beast's attack hits the entire area in front of him, to avoid it, hide behind the beast.

It may be easiest to keep track of only one or two colours, hiding behind the beast to avoid his attack when he charges up a colour you are not watching for. Like the other rooms, each rebound becomes a "checkpoint" which the game will remember if you die or leave the area, however, you may wish to take note of which colours you've already rebounded.
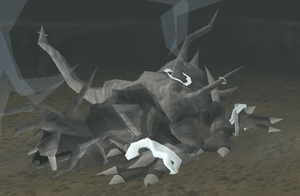
Once all three colours have rebounded an attack, the beast is destroyed. If you died and killed the beast at the same time, it will still count, just return to the third room to find Summer and the other spirits.
Finishing up

After the beast is destroyed, Summer will appear and tell you that her energy is feeling more powerful already. She is still a ghost, but she will still talk to you even if you are not wearing the Ghostspeak amulet. She tells you to speak to the elder spirits in the cave. Equip the Ghostspeak amulet (if you aren't wearing it), and speak to the spirits to hear their story.
Agree to leave the cave with them, and you will be transported out of it. Speak to them again to obtain the rewards.
Congratulations, quest complete!
Rewards
- 1 Quest point
- 1,500
 experience
 - 5,000
 experience
 - 5,000
 experience
 - 5,000
 experience
 - 10,000
 experience
 - 15,000
 experience
 - 2 extra spins on the Squeal of Fortune
- A Spirit shield and the ability to wield all Spirit shields
- An upgraded version of Jennica's ring which gives access to the new spirit portals
- Ability to fight the level 785 Corporeal Beast
- Ability to fight the level 129 Tormented Wraith
- Ability to fight the level 42 Ghostly warriors
Extra rewards
After completing this quest, all the Wilderness spiritual portals are opened. See the Spirit Realm article for more information on Spiritual portals. Also allows Wilderness Volcano teleport from the games necklace that will take you to Corporeal Beast.
You also gain access to the Rogue jewellery shop.
Music unlocked
Required for completing
Completion of Summer's End is required for the following:
Trivia
- On the day of release, the spoiler in the Quest Help stated: "The reward scroll is currently coiled up within the Dark Core..."
- The quest gets its name because Summer is finally able to rest with the beast's demise, thus ending her existence and also quite literally as the quest was released at the end of Summer.
- Upon the completion of this quest, one's Adventure's Log will read: "The spirit family is free. It was no easy task - the Spirit Beast was a hulking foe with a chip on its shoulder, and it required some daring."
- The Spirit Beast itself may be a reference to Bahamut from the Final Fantasy Games, a recurring boss with a devastating breath weapon that would ultimately need to be reflected back upon itself in order to defeat the boss.
no:Summer's End es:Summer's End nl:Summer's End fi:Summer's End