Shilo Village
| File:Shilo Village.png | |
| Release date | 27 January 2003 (Update) |
|---|---|
| Members only? | Yes |
| Quest series | Karamja series |
| Official difficulty | Experienced |
| Official length | Long |
| Developer | Tytn H |
Shilo Village is a quest in which the player lays a vengeful spirit, that is attacking Shilo Village, to rest. It is required in order to access the location, Shilo Village.
Walkthrough
| Start point: | ||
| Members only: | Yes | |
| Official difficulty: | ||
| Description: | New areas in the Southern part of Karamja Island have been discovered with a mysterious village.
Who knows what hidden treasures exist, and what dangers lurk to guard them? | |
| Length: | Long (40-60 minutes) | |
| Requirements: |
| |
| Items required: |
Can be bought from Jiminua's Jungle Store:
Recommended:
| |
| Enemies to defeat: | Nazastarool (First appears as a level 91 Zombie, second as a level 68 Skeleton, and lastly as a level 93 Ghost.) |
You can get to Shilo Village faster by using Fairy Ring code CKR or a Gnome Glider, if you have finished the appropriate quests, or even use a Spirit Graahk to teleport to the Hunting area, next to the aforementioned fairy ring, with level 57 Summoning.Another fast method would be to use juju teleport spiritbag, which can be bought from Grand Exchange.
To find important dungeons and areas in this quest, consult the map below:

The Witch Queen
To get to Mosol Rei from the fairy ring, head east until you hit the river. Look north or south for an agility shortcut log; cross it and head south. When you arrive at the waterfall facing east, leap across the stepping stones. If you fail it, you will automatically swim up to the opposite bank. Walk west until you see Mosol Rei. To get to Mosol Rei from the Gnome Glider, follow the instructions above starting from "head south".

Speak to Mosol Rei, who adamantly instructs you to run for your life. When you ask for a reason, he says that the village has been overrun by zombies, who are being commanded by the queen of the dead, Rashiliyia. Offer to help and Mosol Rei will direct you to Trufitus, an elder of the Tai Bwo Wannai village. After you agree, he hands you a Wampum belt to take to Trufitus.
Once at the village, use the belt on Trufitus. He will tell you that things look very bleak. The key to breaking Rashiliya's spell may be found in the temple of Ah Za Rhoon, but there is almost no clue for finding it. Say that you will look for the temple, and once you affirm your intent to search, gather every information on the temple, that you can, from him. You find that the name "Ah Za Rhoon" translates to "magnificence floating on water", indicating that the temple may be found on an island. You must choose conversation options that include declaring your intention to search for the Temple, and Trufitus will hold the Wampum belt until you return. Unless he holds the belt, you will "not know what you are looking for" once you reach the temple site.
The Temple of Ah Za Rhoon
The island closest to Karamja is to the east of it, so you may start your search there. Go east to the river, across the log near the gnome glider, and south along the river until you reach a mound of earth.
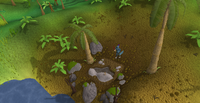
Use your spade on it to find a fissure. Light your torch and use it on the fissure to illuminate it. (Don't use an expensive light source, as you will lose it!) Add a rope to the fissure, securing it to the lip. Search the fissure again to climb down into the temple below — 32 agility required.
After a prolonged time, the earth forms back over the entrance. You may use your spade on the mound to find that your light source and rope are in place.
|
|
After entering the dungeon, you'll encounter some aggressive Level 61 - 73 Undead ones, although it is not a multicombat area. If you do kill the ones that look like zombies, a cloud of Poison Gas will hit you for some damage.
Optional: If you have a chisel with you (toolbelt works), you can retrieve a Stone-plaque from the Strange looking stone near the round pond, which can be sold to Yanni Salika after the quest for 100 gold.
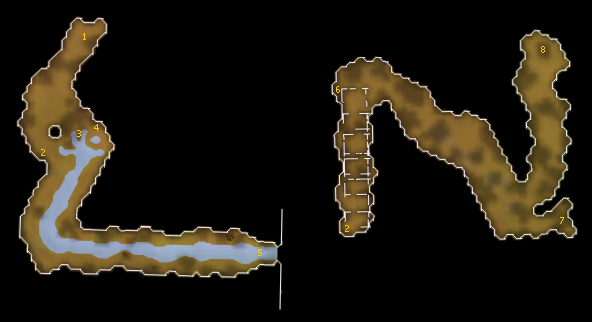
In this first area, the water appears to form an arm and hand, with the fingers encircling a round pond. Look around the wall, west of the 'hand of water' and the smashed table, for a 'cave-in'. Search the 'cave-in' and crawl through.

In this second cavern, which is "N" shaped, look for some loose rocks at the top of the first leg of the "N". Search them, carefully, to get a tattered scroll. You may fail and get hit for around 60 lifepoints, but continue until you obtain the scroll. After crossing the diagonal arm of the cavern, in a small room, you'll find some sacks that you can search for a crumpled scroll. At the very end of the last arm of the cavern, "look-at", then "search" the gallows to get Zadimus' corpse. If you don't "look-at" first, you will be hit 60's consecutively by a green gas.
To leave the dungeon, you may use a teleport. If you do not have a way to teleport, go back into the first cave. Find the smashed table and craft it into a raft, then take use it to exit the dungeon. Sometimes, you get the message that there isn't enough wood left. In this case, you can continue through the first cave, along the route of the water, to find some waterfall rocks that you can search to exit. But if you fall exiting through the waterfall you can take a lot of damage.
Scrolls from Ah Za Rhoon
The red tinted Tattered scroll is about Rashilia's son, Bervirius:
| “ |
Bervirius, son of King Dathalas, was killed in battle. His devout mother Rashiliya was so heartbroken that she swore fealty to Zamorak if he would return her son to her. Bervirius returned as an undead creature and terrorized the King and Queen. Many guards died fighting the undead Bervirius. Eventually the undead Bervirius was set on fire and soon only the bones remained. His remains were taken far to the South, and then towards the setting sun to a tomb that is surrounded by and level with the sea. This is the only known way to contain the spirits of witches and the undead. |
” |
The green Crumpled scroll is about Rashiliya. Not exactly the smartest way to phrase a request to Zamorak, and you might guess that her son created rather a few undead as the casualties piled up. Better have a sharp sword at hand. His mother's story didn't end well, either:
| “ |
Rashiliya's rage went unchecked. She killed without mercy for revenge of her son's life. Like a spectre through the night she entered houses and one by one quietly strangled life from the occupants. It is said that only a handful survived, protected by necklace wards to keep the Witch Queen at bay. |
” |
The Proper Burial
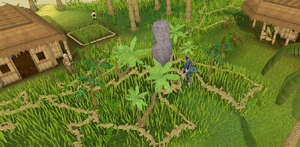
Read the scrolls, then show all the three items obtained in the temple to Trufitus by using each one on him. Trufitus says that the corpse must be buried on sacred ground, one of which is located in their backyard, next to Trufitus' house. Go to the tribal statue west of Trufitus' house and bury the corpse. Zadimus' spirit appears and he tells you that he has the key. Zadimus hands you a bone shard before departing. The shard, upon inspecting, reads "I am the key, but only kin may approach her."
Take the bone shard back to Trufitus and he'll tell you to look for Bervirius's tomb, as he is amongst Rashiliya's kin, and that you may find a clue regarding the queen's whereabouts.
Many players do not have the option to climb down the "well stacked rocks" in the next part of the quest. This is because Trufitus has not told them to look for the tomb. Read both scrolls, inspect the bones, then show your items to Trufitus, and don't leave until he's suggested that there might be something useful in the tomb. Ask: "I need help with Bervirius"
Bloodkin
- 1 - Entrance
- 2 - Rock slide
- 3 - Dolmen
You now need to go to the Tomb of Bervirius. From Tai Bwo Wannai, head south-west to Cairn isle. You need to climb up the rock slide and cross the bridge to reach Cairn Isle. You can fall and take a lot of damage, so be patient and bring food. Once you're at the other side, climb down the well stacked rocks to the north. You may fail a few times, taking damage, but keep trying.

You find yourself in another dungeon, though this one is much smaller and has a tomb-like feel. Go to the dolmen in the south end of the cavern and search it to get a sword pommel, a locating crystal and Bervirius notes.
- If your inventory is full when you try to pick up the notes, you will need some Charcoal and Papyrus to make another copy.
Exit the tomb, by climbing up the rocks to the east, and go back to Trufitus. Read the scrolls, then show him everything. He says that you need to make yourself a necklace to be protected from Rashiliya's powers.
- If you attempt to create the necklace before reading all three scrolls in Bervirius's Notes, and both scrolls you received in Ah Za Rhoon, you may receive the message 'You're not really sure how this would fit together. Perhaps you need some instructions?'
Use a chisel on the sword pommel to make ivory beads. The toolbelt chisel will not work for this. Now, use a bronze bar on an anvil to make bronze wire; there is an anvil just north of the village. Finally, use the wire on the beads to make the beads of the dead necklace. You're now ready to take on the Witch Queen.
Scrolls from Bervirius's Tomb
The Bervirius notes add more insights, and come in 3 sections. The Tattered Yellow papyrus:
| “ |
"...and rest like your mother who is silent in the peace of her tomb far to the north of Ah Za Rhoon. Near the sea, and under the hills deep in the underground to watch all of nature from the darkness of her final resting place." |
” |
That's a useful clue, and may make one think of the Fairy ring south of Musa Point.
The Decayed White papyrus reveals the meaning of the beads:
| “ |
"...Rashiliya did so love objects of beauty. Her tomb was adorned with crystals that glowed brightly when near to each other." |
” |
The Crusty Orange papyrus finishes the explanation:
| “ |
"...the sphere is activated when power of a spiritual nature is expended on it, this can be very draining to the body." |
” |
Skeletal
Go north, beyond the temple of Ah Za Rhoon, or just use the Fairy Ring network (code DKP) to zip to the north shore, near Tiadeche of Tai Bwo Wannai. Traveling through the Fairy Rings will take you through Zanaris, which has a bank, where you can load up on any food, ammunition, runes, or potions. You may store the scrolls, in case you need extra inventory space, but be sure to keep a chisel, the bone shard and the Beads of the dead necklace.
-
Rashiliya's tomb on the world map.
-
The hidden doors.
Search for a set of double doors hidden in the foliage. They seem to be locked, although you remember what Zadimus had said about having the key. Use your chisel on the bone shard to make a bone key, and go through the doors, wearing the necklace, to enter Rashiliyia's Tomb.
- You must be carrying 3 regular bones or you will not be able to enter the skeletal doors inside the dungeon. If you need bones, there are some Shipyard Workers a little bit south, you may also kill the undead skeletons for bones.
If you do not have the Beads of the Dead necklace on, when you enter the dungeon, Rashiliya's ghost will appear and attack you once, dealing low damage. She will then send three Undead Ones to attack you as well, and disappear. Just kill these like you normally would, avoid their poisonous gas, and, with the Beads of the dead necklace equipped, proceed through the ancient gate.
|
|
You'll find Undead Ones all throughout the dungeon in a multicombat area - more will be summoned if you pick up the coins, which turn to dust. Your challenge now is to find the right door. A number of dummy doors exist, which will lead you back outside. The one you're looking for will be very distinctive, something you'd expect from a Witch Queen necromancer. It would be best to turn on your Protect from Melee prayer while running in the area.
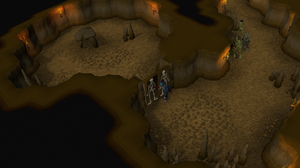
Running past the undead, go through the ancient gates and down the rock slope, head south-west, until you find some doors with skeletons embedded in them. They seem to have receptacles for bones. Use 3 regular bones on these doors. Be careful not to bury the bones by mistake! Ensure you are wearing the beads of the dead, prepare for battle, then search the Dolmen.
Disastrous!
You will be attacked by Nazastarool, a level 91 zombie, along with 3 other minions of a similar level. After you defeat him, he'll turn into a level 68 skeleton. After you defeat him, he'll once again change, this time into a level 93 ghost. Once you've defeated the ghost, you'll get the corpse of Rashiliyia.

Battle notes and tips:
- The "Crumble Undead" spell does not work against any of the three forms.
- Using a halberd works well when fighting all three forms of Nazastarool, with the ability to melee him from a safe distance. Just be sure to reposition yourself around the rocks after finishing off each form, because the next form will spawn beside you close enough to attack back.
- If you die when you're fighting or if you log out during battle, you need not fight all the three forms, but only the forms you haven't yet defeated
- Between each form, a dialogue starts. In extremis, perform some other action, like burying spare bones you brought, or inspecting your quest log, and the next incarnation will not immediately appear, giving you time to heal, leave, etc.
When you take the corpse, NEVER drop it! Rashiliyia's spirit will thank you for releasing her and you will need to go back to her tomb and kill all 3 of the forms again.
To leave, simply return to where you entered. It is also entirely safe to teleport out with a tai bwo wannai teleport scroll - or climb the rocks to the ancient gate. Ensure you are wearing the beads of the dead before activating the ancient gate to avoid facing two more undead ones. Remember to use your key on the door to exit. (If you try to exit without using the key, you get a little humorous dialogue: "Oh no, I'm going to be stuck in here forever!" "How will I ever get out!" "I'm too young to die!")
The Famous Final Scene
Show the corpse to Trufitus. He'll tell you to think - perhaps there's a clue in the items you have? There are a couple, actually. You know Rashiliya wishes to be reunited with her son, that the Cairn Island dolmen is ideally placed for containing the spirits of witches and undead, and that Rashiliya was a witch.
Go back to the Tomb of Bervirius on Cairn Isle. Remove the 'Beads of the dead' amulet. Retrace the path to the dolmen, and use the corpse on it. Rashiliya will thank you for letting her rest in peace, saying that Zamorak tricked her, and returned her son as an undead creature. She goes on:
"...My hatred and bitterness corrupted me. I tried to destroy all life... Now I am released... And am grateful to contemplate eternal rest..."
She finally disappears, and gives you a reward.
Rewards
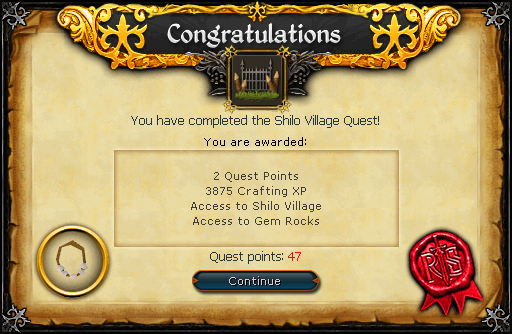
- 2 Quest points
- 3875
 Experience
 - Access to Shilo Village cart service , for a fare of 10gp to go to and from Brimhaven.
- Access to Shilo Village. After completing the quest, you can sell every item you got during the quest to Yanni Salika in Shilo Village for a fair profit (2,000 coins).
- Access to Gem rocks
- 2 extra spins on the Squeal of Fortune
Required for completing
Completion of Shilo Village (quest) is required for the following:
Trivia
- The quest was first mentioned as a "Recent News" article on RuneScape's main page (18 October 2002), and was known as "The Zombie Queen Quest" in a mention on an article on 11 January 2003.
- When you craft the sword pommel into the ivory beads there appears to be three of them, but when you craft it into the Beads of the dead necklace, it has five beads.
- Before you start the quest, the Adventurer's Log says "I also need to defeat a level 86 monster." but you need to defeat two higher level monsters. This has not yet been fixed.
- It has been tested however, that if you lose the bone key after going into Rashiliya's tomb that you can get another one by re-obtaining the Zadimus corpse, re-burying it, and re-obtaining the bone shard. You won't have the re-examine the bone lock to carve the bone shard into a key again.
- After the quest, you can sell the items you obtained during it to Yanni Salika the antiques dealer in Shilo Village. He will sell the bone key and beads of the dead back to you for a small profit.
- Upon the completion of this quest, one's Adventurer's Log will read: "I rediscovered the lost temple of Ah Za Rhoon on Karamja and laid the zombie queen Rashiliyia to rest, in turn easing Shilo Village's undead problem."
- From Rashiliyia's tomb, you can see the Mogre Camp from Recipe for Disaster and examine the coral there (which you cannot normally do) to receive an examine text of "Pollution is rapidly destroying coral reefs."
