Fish Flingers
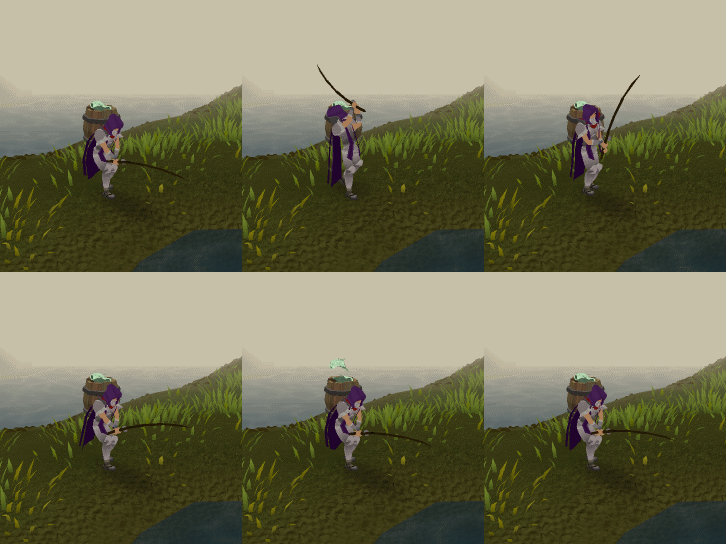
Fish Flingers is a members only Distraction and Diversion (D&D) that was released on 23 March 2010 that is based on the Fishing skill. There are no level or quest requirements to play Fish Flingers, and no required items as they are all provided.
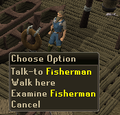
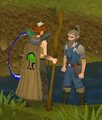
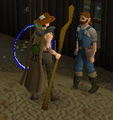
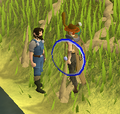
In many major fishing spots around RuneScape, players will notice fishermen standing around, with a Distraction and Diversion sign on the minimap. When these NPCs are talked to, they will offer to send the player to the waiting area, allow the player to claim 2 tickets for Fish Flingers a day or trade in rewards.
Fish Flingers takes place on Isla Anglerine, where during a 10 minute competition, players select different baits, tackles and weights to catch a variety of fish. Based on the player's ability to efficiently catch the most and heaviest of fish, points are awarded to the player. Sometimes the player even obtains medals and awards. After the competition ends, players are rewarded with fishing experience and tokens to buy a variety of rewards from a fisherman.
It is important to note that the player's fishing level has no impact on the competition. All players, regardless of fishing ability compete equally. However, once a score has been awarded, the fishing experience you earn does vary according to your fishing level. The experience awarded is very good - usually significantly exceeding the amount of experience you would have earned fishing normally for the same time period.
Fish Flingers received an improvement update on 6 June 2012 and another one on 24 July's patch notes.
Requirements
An entry ticket is required to enter a game of Fish Flingers. The fishermen keep count meaning players do not hold or keep the tickets. Fishermen award the player 2 new tickets each day, and players may find additional tickets at random during a competition, and tickets while fishing "on the surface" at regular fishing spots, tickets may also be found while fishing in Living Rock Caverns. Players may claim tickets the following day if the player currently has less than ten tickets; if the player has nine tickets, only one ticket will be claimed. Therefore the maximum number of competitions a player can compete in on a regular basis is 2 per day plus the number of tickets found, with a maximum of ten competitions per day plus tickets found.
Other than entry tickets, there are no requirements. There is no fishing level requirement and no required items. Players may bring or wear whatever items they like. Familiars will no longer appear on the island, and timers will be paused while players are playing Fish Flingers. <references/>
Aim of the Activity
There are three main aims of Fish Flingers. Players can compete against each other for the highest score, play for maximum fishing experience, or play for maximum reward tokens. At the end of a competition, players earn a score, experience based on that score, tokens based on the number of fish caught divided by 4 (not to be confused with entry tickets) and possibly awards and medals.
Depending on the player's fishing level, a maximum of roughly 20,000 fishing experience will be awarded. This goal is popular because this amount of fishing experience is often more than what a player can receive by fishing for 10 minutes.
Players can use their earned tokens and medals to pay for the rewards from a fisherman. See the rewards section below for more details. Some of the rewards including the XP boosting Fishing outfit.
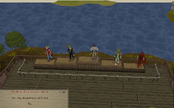
At the end of the game the top five scoring players stand on a podium. For the really competitive fishermen, there is an official competition world (89) where, if you stand on the podium at the end, you have beaten some of the best Fish Flingers in RuneScape.
Note that strategies for each of the purposes is slightly different. In addition, to play for more experience, medals, and rewards, players are better off in large groups. That way players can help each other and share information. However, it is easier to get on the first place podium in a competition with fewer players.
Playing the Game
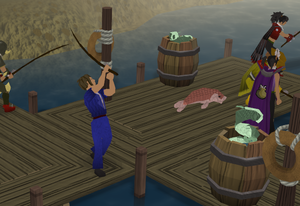
Official Worlds
The official world for Fish Flingers is World 89.
Competition Times
Competitions start about every 20 minutes, with 10 minutes being competition time and 10 minutes being waiting time, but over time this may change due to lag on a world. The timer resets as soon as a new game starts. The event starts at approximately the same time on every world, but may differ by a few minutes due to lag, as mentioned above, one world being laggier than another. If the start of the game is missed, players usually must wait the full time for the next start.
To determine the time until the next competition just go to any fisherman or talk to the Fisherman's wife outside the Fishing guild. Another option is if the player has a Tackle box. There is a right click option that will tell the player the time until the next game.
Entering the Competition

In order to enter the competition, players need to talk to one of the fishermen who can teleport you there. Players can be teleported to the waiting area on Isla Anglerine between 5 minutes prior to, and the start of, the next competition, by talking to any of them. The fishermen are located in several specific places near popular fishing spots. If you choose to remain in the waiting area after your previous competition, there is no need to re-teleport, and no 5 minute cutoff. Note: teleports of all kinds are disabled in the waiting area, you must leave via the portal to exit the area. Other magic spells are likewise disabled, as are prayers/curses, and the spellbook and prayer tabs are not visible or selectable.
Fishermen can be found at the following locations:
- Inside the Fishing Guild
- Catherby beach
- Southern part of Living Rock Caverns
- Shilo Village
- Piscatoris Fishing Colony
- Barbarian Village
- North-west of Lumbridge
- South-east of Lumbridge Swamp
- South-west of Draynor Village
- Burthorpe
- At the docks south of Burgh de Rott
- On the shores of the Barbarian Outpost
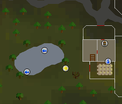
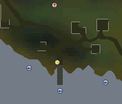
The gallery at the bottom of the page shows the locations of fisherman in more details.
Asking for Clues
The Fisherman can give every player one clue per game, each player has their own clue. Players are recommended to ask for one from the fisherman before being teleported to the waiting area or inside the waiting area on Isla Anglerine. Players may only ask for a clue 4 minutes prior to competition beginning. If one asks between 5 and 4 minutes, the fisherman replies "We're still tidying from the last competition. Give me a minute and I'll have that hint for you."
These clues are used to find the 100% rating for a fish. A good strategy is to share clues with a group of people (using a friends chat might be helpful), in order to maximise each player's chances of discovering a perfect combination.
The fisherman will give a clue consisting of three pieces of information: the type of fish, the place to find the fish, and either the bait, hook, or distance of the fish. The type of fish is irrelevant, and can be ignored. Examples of how to interpret the clues can be found below.
Bait clues
| Bait clue | Colour | Correct bait |
|---|---|---|
| Wriggling creatures | Red | |
| Brown | ||
| Leaping insects | ||
| Green | ||
| Fluttering creatures | ||
| Grey | ||
| Shellfish | ||
| Red |
Hook clues
Examples:
- You’ll find drift herring at the docks. That species is fairly normal and doesn’t need a special hook. A normal hook should catch them just fine.
- Explanation: Use a standard hook to catch herring at the docks.
- You'll find thunder trout at the river. That species has a small mouth, so you'll need to take that into account when choosing your hook.
- Explanation: Use a slim hook to catch trout at the river.
- You'll find drift herring at the docks. That species tends to nibble its food, so a double hook will help to catch them.
- Explanation: Use a double hook to catch herring at the docks.
- You'll find jubilant salmon at the lake. That species has a wide mouth, so you'll need to take that into account when choosing your hook.
- Explanation: Use a large hook to catch salmon at the lake.
- You'll find spined herring at the river. They're clever and can spot metal a mile off. You´d better think carefully about what type of hook you use.
- Explanation: Use a wooden or bone hook to catch herring at the river.
Distance clues
Examples:
- You'll find skipping cod at the lake. They've been spotted close to the shore, so you won't need much weight on your line to reach them.
- Explanation: Range 1 or 2 (close)
- You'll find crested cod at the docks. They've been seen a fair distance from the shore, but not too far. You'll need to attach a few weights to your line to reach them.
- Explanation: Range 3 or 4 (medium)
- You'll find gentle trout at the lake. They've been sighted far from the shore, so attach lots of weights to your line to reach them.
- Explanation: Range 5 or 6, (far)
Gameplay
When the game begins, run from the waiting area to any of the four fishing locations, select a bait, hook and weight on the control panel and hit "Cast" or click on a barrel. The details are described below.
Places to Fish
When you are transported to the island, you arrive in the waiting area (the square in the map). When the game begins, you run to one of the four locations (lake, beach, river or dock - there are two docks which are identical) and start fishing.
Relative to the starting area:
- Lake - north
- River - north east
- Beach - far north east
- Docks - one east, one west
There are six type of fish that can be caught:
- Bass
- Cod
- Herring
- Pike
- Salmon
- Trout
The types of fish rotate to different locations each competition. Two locations will have one type of fish, while the other two locations will each have two types of fish. Click the "Ratings" button on the Status Panel for the locations of all six species. Players will have to fish at each location in order to catch one fish from each type.
As of an update on 24 July 2012, the Ratings Button is also now available prior to the start of the competition, so that players can view in advance which locations have two types of fish (and therefore 2 different tackle combinations), and to plan their strategy.
Player Controls
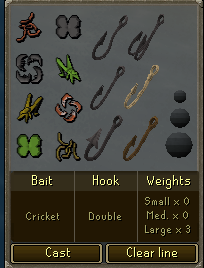
When the competition begins, a control panel will appear in place of your inventory. To compete, you should aim to fish with 100% rating by mixing and matching bait, hooks, and weights for the particular fish you are catching at that location.
You need to find the correct bait out of 8 choices, the correct hook out of 6 choices, and the correct combinations of weight to control the range out of six choices. To do this, players select options from the control panel by clicking on the pictures. Players can only select one hook and bait at a time but any given combination of the three weights.
Status Panel
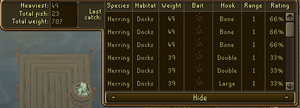
When the competition begins, a status panel will appear at the top of the screen. The status panel shows the history of all the catches from that game including the tackle used for each, and the rating of that catch. Player can choose to hide all but the most recent catch.
There is also a bar showing the depletion of a location. When this bar hits 100%, the location would gain one depletion level (the number is shown next to the bar), and fish would be caught at a slower rate. However, it is usually not worth the time to try and figure out the tackle for another type of fish unless medals are needed.
The depletion rate depends on the number of players in the game. Solo games' depletion increases the fastest - at around 3.3% per fish caught at depletion level zero. At level one and up, it is 10% per fish caught.
Rating
Each of the choices (bait, hooks, and weights) accounts for one third of the total rating when chosen correctly. An incorrect choice scores 0%, a almost correct choice matches score 16% and a correct choice scores 33%.
The easiest strategy to follow is to start fishing with the first bait, hook and weight and then work through all options of bait, hooks and weights until you have reached 100%. When you have the correct bait your rating must be 33%, but the rating is possible to reach higher than 33%, as the hooks and weights used is correct, or close to correct.
After finding the first correct combination, finding the optimum tackle for other fish becomes much easier because each bait, each hook, and each range is used only once. Many players keep note of what baits/hooks/ranges were used in order to better choose the next combination. Players could also click "Ratings" in the Fish Flingers panel to see the tackle(s) discovered.
Tips and strategies for finding the optimum tackles quickly are discussed in greater detail in the tactics section below.
Big Fish
When a player continues fishing a certain type of fish on a 100% rating they will have a chance to attract and hook a big fish. A notification will appear in the chatbox when a player has hooked a big fish. This only occurs if there are other players in the same competition. "Competitions" with a single player do not produce Big Fish opportunities. Big fish also do not spawn if there is already a big fish in the water nearby.
It is not possible to catch and take in this fish alone. When the player has hooked a big fish, nearby players will also get a message in their chatbox and can help to catch the fish. Players may assist others in catching their big fish as many times as they like (but are only rewarded for the first 6 assists).
You can see when a Big fish has appeared by bubbling water somewhere close to you or another player that has hooked one. Assisting other players catching a big fish can be done by clicking the bubbling water.
A message will appear above the bubbling water a big fish is in, stating how many players are assisting in catching the big fish and the percentage they are done in doing so.
When a big fish is caught, all players working on it will be credited for its weight, which is generally about 220kg to 250kg. It is beneficial to wait a few moments before joining in helping to catch the big fish, as the player would be able to catch a couple more small fish first and still be fully credited for the big fish.
It should be noted that if the original fisher discards the big fish, all other helping players would still be credited the weight; this could be useful for some smaller teams. If players re-cast to release the big fish, or clear their line when they have hooked a big fish, they have zero chance of catching a big fish for the next minute.
The bait, hook and distance do not matter when catching a big fish. A player is limited in a single game to catching three big fish which they hooked themselves. A a player will also only receive credit for the first six big fish assists in a single competition.
Strategy
Because it is important to get the rating to 100% as fast as possible, there are a few tactics players can use to speed up the search process.
No two species will use the same bait, hook or weight as another in the same match, so if the first species is "standard, worms, 1" none of the other five will use those choices. This may speed up your combination finding if you can remember what you have already used.
- Share your own clue and tackle combination with a group of people (using a friends chat might be helpful), in order to reduce the time for finding a perfect combination.
Finding the correct hook
Hook Close Matches
|
Hook List (Rows = Similars) | |||||
|---|---|---|---|---|---|
|
No. |
Image |
Type |
No. |
Image |
Type |
| 1 |
Standard |
2 |
Slim | ||
| 3 |
Large |
4 |
Double | ||
| 5 |
Bone |
6 |
Wood | ||
Hook Tactics
The first part of the tackle players have to find is the hook because they can find the correct one in a maximum of three tries. Players have 3 sets (slim and standard, large and double, wood and bone), and start with one of the hooks out of these sets. First players are going to change their hook into a hook from another set. For example, if they chose standard they change their hook to anything except slim. Players also get hints and tips to get the right hook.
There are five possible changes each with a different conclusion:
| Change in rating | Correct hook | Example solution (Standard -> Large) |
|---|---|---|
| Raises 33% | The new hook | Large |
| Raises 16% | Similar to new hook | Double |
| Stays the same | Set not tried | Wood or Bone |
| Lowers 16% | Similar to old hook | Slim |
| Lowers 33% | The old hook | Standard |
Finding the correct bait
Bait Close Matches
Bait Tactics
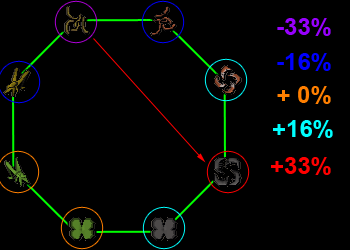
Players should find the correct bait after they found the correct hook. If players use the correct tactics, it is possible to determine the correct bait in three tries, although this is a little more difficult than finding the correct hook. Players can represent the eight different bait types as corners of an octagon where bait types on adjacent corners have a similarity (colour or shape). The fastest way to look for the correct bait is to change the first bait type to a bait type three or four corners away.
There are five possible changes:
| Change in rating | Correct bait | Example solution (Maggots -> Crayfish) |
|---|---|---|
| Raises 33% | The new bait | Crayfish |
| Raises 16% | Similar to new bait | Shrimp or Grey Moth |
| Stays the same | Not similar to old nor new bait | Locust or Green Moth |
| Lowers 16% | Similar to old bait | Worms or Cricket |
| Lowers 33% | The old bait | Maggots |
Finding the correct weight
Weight Tactics
When players have found the correct hook and the correct bait first, their rating should be at 66%, 83% or 100%. If their rating is not 100%, they still have to find the correct weight. Weights 1 above or below the correct weight will add 16% to the rating and the correct weight will add 33% to the rating.
To find the right weight players can best start with the medium weight, because it permits to vary to different weights the easiest, it will cover weight 1,2 and 3 (because if weight 1 or 3 is correct you will see 16% rating and 33% if 2 is correct) and can be changed to 4,5 or 6 easily. If weight 1,2 or 3 all aren't right, click the small weight as well so your total weight is 4. Now you can see which of the weights is right by looking at the rating. If it hits 33% weight 4 is correct, if it hits 16% weight 5 is right, and 0% means weight 6 is right.
Or, the player could simply try them one by one to avoid losing track - fish are caught fairly quickly, and players could easily mess up without a simple pattern.
83% Tactics
At any point if players get a rating of 83% they do not have to do the whole procedure described above again. Two of the three are already correct and the last is similar to the correct type.
Change bait and then hook to similar:
| Change in rating | Explanation |
|---|---|
| Raises to 100% | Tackle found |
| Lowers to 66% | The old tackle is correct |
After doing this only the range can be wrong.
Finding more 100% fish
When players have their first fish at 100%, they can then continue to look for other locations to fish. No characteristics you are currently on (bait/hook/weight) are correct for any of the other five fish. This makes the search for more 100%'s faster than the first one. After doing all spots for one fish, players will have to look for spots where there are two types of fish. This can be either of the four spots (beach, dock, lake or river). The easiest way to find which locations have two fish, click on the ratings tab, where the name of the fish and its location is displayed. For the fifth fish there are only four possible bait types, two possible hooks and two possible weight combinations left. This makes it much easier to find the correct bait for that and the last fish.
Heaviest fish
Once players have found the perfect tackle for a fish (100%), the last digit for the weight in the fish they catch will always be the same. This is helpful in determining which fish type is the heaviest in the competition.
If a fish's weight ends with a 9, it can be the heaviest (which has a maximum weight of 199) or the lightest (which has a maximum weight of 179).
The way to determine the type of weight of a fish is simple; after getting 100% for the species, click the "Ratings" button on the Status Panel and a table will pop up. It will display all of the fish, their locations, and for those you've gotten 100%: the tackle combination used, and type of weight of the fish. Use this chart to determine if the fish whose weight ends in a 9 after reaching 100% is heaviest or lightest.
| final digit | species | max weight |
|---|---|---|
| 9 | heaviest or lightest | 199 (H) or 179 (L) |
| 5 or 0 | heavy species | 195 |
| 1 | average | 191 |
| 2 or 7 | average | 187 |
| 3 | light | 183 |
Note: The heaviest species does not have a chance getting weight 29 or 39 (at 100% rating); while the lightest species does not have a chance getting weight 189 and 199.
Scoring
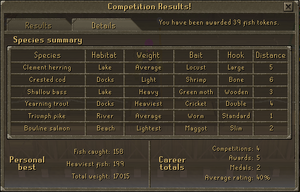
After 10 minutes of gameplay, each player is given a score based on the number of fish caught, total weight caught and several other factors. Based on this score, players receive fishing experience, reward tokens and medals.The interface at the end of the competition allows players to see the breakdown of their score and see the correct tackle combinations for each of the six fish.
If a player did well enough, they might even finish by standing on one of the five podiums in the game lobby.
Score Formula
To calculate the player's score, and a number of criteria are taken into account, including number of fish caught, number of big fish caught and assisted, total weight of fish caught, heaviest caught and number of perfect tackle combinations. The formula as currently known is:
Y = A + B + C + D + E + F, where:
A = (70 = 1) (80 = 2) (90 = 3) (110 = 4) (130 = 5) (Max 5 points)
B = Big fish catches * 2 (Max 6 points)
C = Big fish assisted (Max 6 points)
D = Total weight / 500 (Max 20 points)
E = Heaviest weight / 60 (Max 3 points)
F = Perfects tackle discovered + (1 x perfect tackle medals earned)
Y = Total points (Max 48 points)
Note: All points ranging from A to F are rounded down.
Perfect Tackle
The following table shows the score received by finding perfect tackles.
| Number of Perfect Tackles Found | Score |
| 0 | 0 |
| 1 | 1 |
| 2 | 2 |
| 3 | 4 |
| 4 | 5 |
| 5 | 6 |
| 6 | 8 |
Tokens
For every four fish caught in the competition, one Fishing Token is awarded. In addition, as of an update on 24 July 2012, 1 token is also awarded for:
- Each big fish that is caught (up to 3),
- Every 2 big fish assists (up to 6),
- Every 2 perfect tackle combos discovered (up to 6).
Players can have a maximum of 2000 tokens at any time.
Medals
Medals are given for the following achievements:
- Junior Angler: Find the perfect tackle for three species.
- Master Angler: Find the perfect tackle for all six species.
- Whopper: Catch 3 big fish.
- Team Player: Assist in catching at least 6 big fish.
Best Results
Best results are listed for the following achievements:
- Heaviest fish caught
- Most fish caught
- Heaviest catch total
If multiple people achieve the same score for a Best Result (for example, multiple people have a heaviest catch of 199, which is rather common), they will all be given the listing of Best Result. The score board will show that you were the winner for that result, even if you tied for it.
Winning Podium
The winner and the four players with the next highest scores are placed on the podium at the end of the game. They can stay until they decide to get down. Emotes are commonly used on the podium.
Rewards
Fishing experience
Reason: This previous table is outdated after the 24 July 2012 improvement update, feel free to put your value here) |
Players automatically gain Fishing experience after the competition is over, based on the score.
| Maximum fishing experience | |||||||||||||
|---|---|---|---|---|---|---|---|---|---|---|---|---|---|
| Level | XP | Level | XP | Level | XP | Level | XP | Level | XP | ||||
| 20 | 40 | 60 | 9,697 | 80 | 18,247 | ||||||||
| 1 | 162 | 21 | 41 | 61 | 14,171 | 81 | 18,182 | ||||||
| 2 | 22 | 42 | 62 | 14,171 | 82 | 16,176 | |||||||
| 3 | 23 | 43 | 63 | 13,068 | 83 | 18,873 | |||||||
| 4 | 24 | 44 | 64 | 15,242 | 84 | 19,175 | |||||||
| 5 | 25 | 45 | 65 | 13,662 | 85 | 19,575 | |||||||
| 6 | 26 | 46 | 66 | 15,554 | 86 | 19,746 | |||||||
| 7 | 27 | 47 | 67 | 87 | 19,999 | ||||||||
| 8 | 28 | 48 | 68 | 88 | 20,506 | ||||||||
| 9 | 29 | 49 | 8,136 | 69 | 89 | 20,720 | |||||||
| 10 | 30 | 50 | 7,783 | 70 | 16,281 | 90 | 20, 936 | ||||||
| 11 | 31 | 51 | 7,910 | 71 | 91 | 21,150 | |||||||
| 12 | 32 | 52 | 8,550 | 72 | 14,982 | 92 | 21,365 | ||||||
| 13 | 33 | 53 | 8,489 | 73 | 93 | 21,114 | |||||||
| 14 | 34 | 54 | 8,686 | 74 | 94 | 20,540 | |||||||
| 15 | 35 | 55 | 8,684 | 75 | 17,714 | 95 | 21,375 | ||||||
| 17 | 37 | 56 | 9,361 | 76 | 17,538 | 96 | 21904 | ||||||
| 17 | 37 | 57 | 9,222 | 77 | 17,820 | 97 | |||||||
| 18 | 38 | 58 | 9,567 | 78 | 98 | 22,694 | |||||||
| 19 | 39 | 59 | 9,776 | 79 | 17,504 | 99 | |||||||
Fishing Outfit
In exchange for tokens, players can buy portions of the Fishing Outfit from any Fisherman.
| Image | Name | Tokens | Experience boost |
|---|---|---|---|
| Fishing hat | 140 | 1% | |
| Fishing jacket | 140 | 1% | |
| Fishing waders | 140 | 1% | |
| Fishing boots | 140 | 1% |
- Each piece of the fishing outfit provides a 1% experience boost when Fishing. When all four pieces are worn an extra 1% boost is applied and so the total experience boost is raised to +5%.
- Multiple fishing outfits may be purchased, and outfits may be stored either in the tackle box (below) or the Armour case of a Player Owned House (or both).
Tackle Boxes
In exchange for tokens and with sufficient medals, players can buy or upgrade a tackle box from any Fisherman.
A tackle box is used to store fishing equipment (Fishing rod, harpoon, etc., although with the release of the Toolbelt on 6 December 2011, this functionality is redundant and seldom used), fishing bait (fishing bait, feathers, etc.) and other items (Fist of Guthix Fishing gloves, cooking gauntlets), it will also store a full set of the Fishing outfit, and, as of an update on 24 July 2012, it will also store a Fishing urn, provided that it is fired, runed, and empty.
Tackle boxes may be upgraded using medals and tokens to hold more items. Each level of tackle box must be owned before the next higher level becomes available for purchase, and you must have the current tackle box in your inventory to be able to upgrade, or the fisherman will tell you to get yours from the bank.
| Picture | Tackle Box | Tool Slots | Bait Slots (bait per slot) | Glove Slots | Raw Fish Slots | Tokens used<ref>Tokens are expended on purchase of an item</ref> | Medals required<ref>Medals are cumulative and retained on purchase of an item
</ref> |
|---|---|---|---|---|---|---|---|
| Beginner's tackle box | 1 | 1 (150) | 0 | 6 | 110 | 20 | |
| Basic tackle box | 2 | 1 (250) | 0 | 12 | 230 | 50 | |
| Standard tackle box | 3 | 2 (400) | 0 | 18 | 470 | 110 | |
| Professional's tackle box | 4 | 3 (650) | 1 | 24 | 900 | 230 | |
| Champion's tackle box | 5 | 3 (1000) | 2 | 30 | 1860 | 500 |
<references/>
Raw Fish
In exchange for tokens, players can buy noted raw fish from any Fisherman. They offer raw lobsters, swordfish, and sharks as a reward. The type of fish that can be bought is related to the fishing level of the player.
Additional information
Losing connection or logging out
If a player loses their connection or logs out while the competition is still running, when their connection is re-established or they log in again, they appear inside the game with the catches window clear, but the tackles, catches, etc. are valid. However, logging out and attempting to change worlds during a competition that has already started will result in the player being removed from the competition without the return of their entry ticket.
Fish names
The names of the six fish all have different prefixes in front of their names depending on the locations in which they are found. The prefixes given are as follows in the table. Note the names have no effect on the gameplay.
| Lake | River | Beach | Docks | |
| Bass | Shallow | Turbulent | Cove | Tumult |
| Cod | Skipping | Darter | King | Crested |
| Pike | Spotted | Triumph | Finder's | Lingering |
| Trout | Gentle | Thunder | Oval | Yearning |
| Salmon | Jubilant | Curtsey | Bowline | Flattery |
| Herring | Clement | Spined | Coral | Drift |
Music
Some music tracks will be unlocked during this D&D, all of which are on the island.
- Stillwater, in the waiting area.
- Saltwater, on the docks, west and east of the waiting area.
- Freshwater, anywhere north of the waiting area, river, lake and beach.
Gallery
Fisherman locations
Minimaps
-
Near the shop in the Fishing Guild.
-
Catherby Beach.
-
Gunnarsgrunn, Northeast of Security Stronghold entrance.
-
Piscatoris Fishing Colony, north west corner.
-
Shilo Village, south side of river.
-
Draynor Village
-
Lumbridge Swamp, south of the Graveyard.
-
West of Farmer Fred's house in Lumbridge
-
At the lake in Taverley, just south of Burthorpe.
-
South of the bank in Burgh De Rott.
Fishermen
-
The fisherman inside Fishing Guild.
-
The fisherman at Catherby Beach.
-
The fisherman at Gunnarsgrunn.
-
The fisherman in the Piscatoris fishing colony.
-
The fisherman in Shilo Village.
-
The fisherman in Draynor Village.
-
The fisherman in Lumbridge Swamp.
-
The fisherman in Lumbridge Forest.
-
The fisherman in Taverley.
-
The fisherman in Burgh De Rott.
Others
-
Players fishing on the beach.
-
The podium.
-
Just missed the game.
-
An Ibis on the winners podium.
Trivia
- On the day of release, the Fishing Guild received a graphics update.
- Part of the track that the coal trucks run on can be seen from the southern end of the eastern docks.
- The name of the D&D is a play on the words "fish fingers", also known as fishsticks. The "Flingers" in Fish Flingers refers to the way the fish in this D&D are "flung" out of the water. There is a way to fling fish forward if the player stands in the right spot on the docks. This is the second time in a fishing activity where players can see the fish come out of the water, preceded by Barbarian Fishing.
- The crickets and locusts used as bait in Fish Flingers are brown and green respectively; in real life, crickets could be green, brown or black while locusts are usually yellow. The ravenous locust summoning familiar is also yellow.
Glitches
- Previously, there was a glitch that your normal inventory will come up instead of the Tackle Box Menu if you try and withdraw from a familiar. It could be fixed by logging out and back in. This glitch has been eliminated as familiars are no longer allowed in the waiting or game areas.
- When calling your pet from the podium after a game of Fish Flingers, it used to have the blue flame effect of familiars and would wander around on its own until it is called again. The call button on the Follower Details interface did not work, you had to use the right-click option "Call follower". The wandering glitch did not work with cats. This glitch has been eliminated as familiars are no longer allowed in the waiting or game areas.
- If a player is wearing a skillcape within the lobby area, you are still able to do the emote even though it says you are unable to perform them.
- There used to be a glitch where if your character wore only Fishing Waders, your body would separate from your legs when doing an emote. This glitch was later fixed by a patch two weeks after the Fish Flingers improvements update.
- There was previously a glitch when the game started before the warning timer at the top of the screen counted down to 00:00. You could tell that this was going to occur if the countdown timer read 2:00 and the chatbox gave the 1 minute warning. The chatbox was always the correct warning. This still occurs rarely.
- There was a glitch where if you didn't call your pet down from the podium, it would stay there even if you exited and then called your pet. It could be fixed by logging out and back in. This glitch has been eliminated as familiars are no longer allowed in the waiting or game areas.
- There was previously a glitch which often caused the clue given between 5 minutes and 4 minutes prior to competition to usually be incorrect, and changed at the 4 minute mark, so it was recommended to wait until closer to the beginning of the competition before asking for the clue. This has been fixed by only allowing a hint after the 4 minute mark, as of a 24 July 2012 update.
References

