The Firemaker's Curse
| |
| Release date | 11 January 2012 (Update) |
|---|---|
| Members only? | Yes |
| Quest series | Return of Zaros |
| Official difficulty | Master |
| Official length | Long |
| Developer | Ana S |
The Firemaker's Curse is a members only quest developed by Mod Ana and was the first quest to be released in 2012. It is based in lore, providing new information about the downfall of Zaros and the rise of Zamorak.
Official description
| “ | Join the firemakers on their journey through a cave system, searching for The Firemaker’s Guide: a great book of secrets written by the most powerful firemaker in recorded history. Finding the book is one problem; getting out alive is another. | ” |
Walkthrough
| Start point: | |
| Members only: | Yes |
| Official difficulty: | |
| Description: | None |
| Length: | Long |
| Requirements: |
Since the skill requirements are needed to start the quest they can not be boosted. |
| Items required: |
|
| Enemies to defeat: |
|
Preparing and gearing up
It may be handy for you to change your graphical settings so that your lighting detail is set to low.
Armour has no effect in the quest, so leave it behind to save weight and instead wear weight-reducing gear like a Spottier cape and Boots of lightness, or Wicked robes. Wearing at least one teleport-capable item is worthwhile, to allow teleporting to a bank to re-equip. An emergency teleport (one-click teleport) is not necessary as this is a safe quest.
Have four empty slots in inventory, to hold items you get and need during the quest: one for the pitch can, one for the compiled journal (all individual journals found in the cave are merged into one, so only one slot is needed), and two for the fire powders (one puzzle provides three different powders, but only two are actually needed).
Use the remaining slots to hold items to help you in the quest. Although the quest is safe, the ability to heal is crucial in getting through the quest. You can take a lot of damage in several rooms, and you are always rescued when health reaches 0, instead of dying, but you still have to redo the room. Items with high healing abilities are best, such as an Enhanced Excalibur, Saradomin brews, Rocktails. If taking Saradomin brews, restore potions are not necessary.
Healing familiars can also help in the final battle. Having a familiar out in the puzzle-solving rooms can make the puzzle harder to solve, as the familiar will often stand in a place where you want to move to (so that left clicking there causes you to interact with the familiar rather than moving, wasting valuable time). For most players, it is likely you will have to leave the cave several times to resupply, so one option is to bring the healing familiar only when you gear up for the final battle with Char.
A way to restore run energy may also be useful, since the final battle may require a lot of running.
For the final battle, you will also need a fast weapon. Fast ranged weapons like knives and darts are best, to be able to hit Char outside of her melee attack, although claws and the vine weapon are also possibilities for players who can take potentially a lot of damage from Char's melee attacks and then heal rapidly. The metal of the weapon does not matter, as damage you inflict depends instead on how many fires you have lit. One viable option is to use Karil's crossbow, as it is almost as fast as knives but longer ranged, allowing the player to engage Char outside of her melee attack more easily.
One last preparation is to turn off Auto Retaliate. This prevents the player from automatically running near or up to Char when the player may not want to.

Meeting the seven firemakers
To start this quest one must travel to the starting location south of Eagles' Peak, talking to Phoenix. The fastest ways to achieve this would be by using the Spirit tree system at the Gnome Stronghold and running south then west to the starting location. Using the Gnome glider system and also running south and west, or using the Eagle transport system to Eagle's Peak and running south to the start location would also be quick. Using Ardougne Teleport would also be relatively quick, as a player would need to run north and west to reach the starting location. You could also use a Phoenix Lair teleport scroll. Another method would be to use the fairy ring teleport (AKQ) to Piscatoris Hunter area and run south.
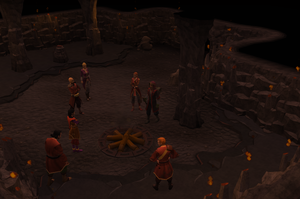
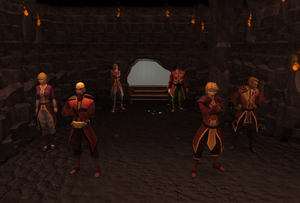
Once you arrive, talking to any of the Firemakers will begin the quest. A cut-scene will ensue where you will be introduced to Emmett, Flint, Isis, Lina, Phoenix, Sera, and Twig. They will explain to you their belief of finding long lost Firemaking knowledge in the caves next to the entrance they are surrounding, that came to them in a dream. They will ask you to protect them as they go through the caves. You will agree and formally begin the quest.
Note: after starting the quest there are two identical looking cave entrances quite close by. If you teleport out during the quest it is easy, depending on which way you come back, to go to the wrong cave entrance (the exit) and find you can not enter the cave. You need to go to the south entrance which has the quest symbol next to it on the mini map.
Inside the caves
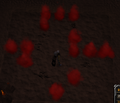
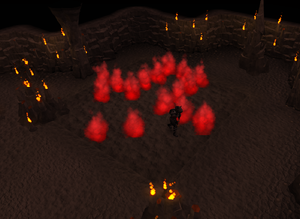
Upon entering the caves you will enter a room with several red fires, Flint will give you a pitch can which allows you to create fires in front of you without logs, granting 2 experience points for each fire made. However, unlike regular fires you cannot stand on or walk over these fires. Also they light out faster than normal fire. Your first order of business is to light fires so that you create an arrow out of fire pointing out of the cave, once this is done, a cut-scene will occur where the characters will join you in the middle of the room, and the ground will begin to shake, and everyone will fall through the floor into the next room.
| Fire puzzle solution 1 |
|---|
|

Second room
- Turning your lighting detail to 'low' may help you better see the environment.
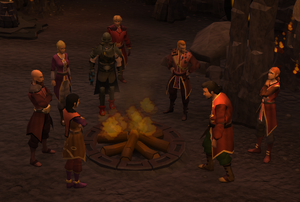
The second room will be dark, so you will have to light the logs next to you to illuminate everything. The Firemakers will lament being trapped, and scared of some monster attacking them. In the centre of the room is Firemaking journal: Chapter 1, and after taking it you will have Firemaking journal compilation (1) in your inventory. After doing so, another cut-scene will occur with a spirit, Char, confronting you and the group and again turning off the lights, once you relight the fire you will see that Phoenix has been killed, as Emmett becomes possessed. The spirit says this is part of her game, and she will allow you to pass through to the next camp, but you must identify who she has possessed to prevent any more deaths. Now continue down the open tunnel.
Third room
The third room contains yet more red fires, in another pattern that is in the journal. The journal contains guide images to complete the shapes as you advance through caves. Complete the pattern to trigger another event where Char will begin dropping large boulders around the room whilst dimming the lights, avoid the boulders as they fall or you will be hit for around +100 damage, and collect them and add them to the rock pile at the East end of the room to create a pile you can climb on to the next exit. Char will be dimming the lights, so you have limited time to do this.
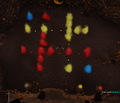
| Fire puzzle solution 2 |
|---|
|
Fourth room
Now you will be in the fourth room and you need to light the fire to illuminate everything again. The Firemakers will rejoin you. You can grab the Firemaking journal: Chapter 2 in the middle of the room, which will turn your journal compilation into Firemaking journal compilation (2). This will trigger another set of dialogue where you can get more information out of Char by going through various dialogue options. You can then pick a Firemaker who you think has been possessed, and tie them to a pillar. If you pick correctly, when Char next dims the lights no one will die. The first person to be possessed is Twig, which he gives away by both his exhausted stance and not being cowardly any more. Click on the pillar closest to the fire and choose Twig to tie up. Relight the fire and proceed to the next room. If you decide incorrectly Flint will be killed.
Fifth room
- You need to move as fast as possible, This puzzle burns out very fast and takes many trial and error attempts. It is advised to pick a strategy to do it in a circular motion then continue that circular strategy to continue lighting fires until they are all lit.
The fifth room contains two different coloured fires, red and yellow, arranged in the pattern of a fire, with the red on the outside layer and yellow on the inside, the room also contains Red powder and Yellow powder which will allow you to change your fire's colours. Start by lighting the yellow fires, and mind that the fire in the top left part needs to be lit from the square next to it to prevent getting trapped. One viable strategy is to light the top right yellow node from below, then light the left node from the right, then the right node from the left. Run out of the inner yellow circle and make a fire from the red section, then add red powder and "create fire here". From there, fill out the bottom right, then the left, then the two top left using "create fire here". Fill out the fire completely on both the inside and outside, the painting shown in the Firemaker's Journal isn't complete. In order to do the red fire that is very close to the wall you need to select the "light fire here" option on your fire making can.
Upon completing this puzzle, Char will summon a wall of fire. Run for the gaps in the wall so you do not take damage. After surviving two different walls of fire from random directions (could be two different directions), proceed to the next room.
Sixth room
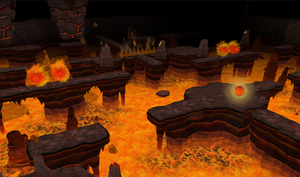
(The lights dim after a short time, dealing 50-100 damage every few seconds. Lighting the fires postpones this effect.)
If you come close to dying in this room, you will be rescued by the firemakers and restored to full health. If this happens, any activated pillars will remain activated, however all lit fires will be extinguished.
The sixth room is an agility-labyrinth puzzle. You need to push pillars and light fires to guide your way through. You must jump between pillars immediately after the small burst of lava has splashed or you will be hit for 50-200 damage.
- Go to the west, jumping as far as you can, light the patch there and push the pillar. It will show you that the pit to the far east can now be lit.
- Go to the east pit. Light it and push that pillar.
- Then, head towards the west pit again, but just before reaching the pit, go north and jump to the pillar that has appeared in the centre. Push the pillar there.
- Go to the east to light that pit and push the pillar there.
- Go back towards the centre pillar and continue to the pit to the west of that. Light it, and push the pillar. There are two large stones that come down from the ceiling if the player does not run fast enough under them.
- Push the pillar on the platform east of it. After that, you get access to the last line of fire pits. There are weak floors on some parts, so make sure you don't stand on any ledges that don't have ground below them.
- Go to the north-western pit, light it and push the pillar, and then the way is free to go to the exit in the north-east corner of the room.
There are small cut-scenes of what happens when pushing a pillar, which makes it quite clear what to do next, so following that usually helps out a lot. Note that you can be hit high amounts of damage, so be prepared to lose a lot of health.
Seventh room
In the seventh room there is the Firemaking journal: chapter 3, which will turn your journal into Firemaking journal compilation (3). After picking it up, you will have another conversation with Char, and you will again have to decide who is possessed. The second person possessed is Sera which is made clear by her failure to mention Ignatius Vulcan even once during the time in the room, and the fact that she says she has been a firemaker since she was a child, in addition to suddenly not being very irritable at all. Tie her up to the pillar, and move to the next room. If you decide incorrectly Isis will be killed.
Eighth room
In room eight all you need is red and yellow, you just have to follow the colour and match them up, the tricky part being that on opposite sides there is the opposite colour. Here's what you need to do: on the red side if there is a yellow fire, lay a yellow fire next to it; the same goes for the yellow side with the red fire.
After finishing the pattern, you will be immediately accosted by a large, complete line of flame, due to Char's regaining strength. You must run to either side and stand against the walls in order to let the fires slip past while you hide in the small gap. Afterwards, the tunnel opens up again.
| Fire puzzle solution 3 |
|---|
|
Ninth room
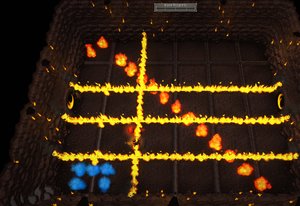
In the ninth room, you'll see a grid like the pattern puzzle shown to you. You must survive in the room until the bar at the top of the screen is filled. On the walls are nodes which will create temporary walls of flame that will help you survive, but prevent your own movement across them. Char will put you through a "tutorial" of sorts, demonstrating the various flames she will send at you, but since she's feeling a bit cruel, you can still take damage during this time.
- Red balls will drift slowly towards you and hit you for light damage if they get somewhat close
- White balls move a bit faster and will explode for moderate damage should they catch up to you.
- Orange balls can set any line they touch on fire, same as your own walls, but if you happen to be standing on the line, it'll hurt you when it goes up.
- Blue balls will lazily float about, creating a trail of flames that will constantly damage you if you stand on them.
All balls of flame eventually vanish if they haven't hit you directly, but orange and blue balls will leave behind the same type of fires that blue flames leave; orange balls leaving an "X" pattern that stretches across the entire board originating at the time they vanished, and blue balls leaving a 3x3 grid where they went out.
The balls will spawn in four waves, with each wave containing more of them at the same time than the previous one.
The idea here is to use the flame walls you set to prevent the balls from reaching you. However, if you aren't fast enough, or are on the wrong side of a node when you light it up, you may accidentally trap the ball on the same side as you.
A few general tips are as follows: you should stay near the middle of the walls most of the time since the balls always spawn at four corners between the walls and the centre of the room, and they will not hesitate to go off if you're on top of the spawn, and you do not want to be surrounded. Balls that are on top of a line when it is set off will become stuck in that wall, except for orange balls since they're usually the ones that set the wall down in the first place. Try to avoid the orange flame's walls, since they'll end up trapping you if you're at the short end of the room when they set fires, and always be aware of when the wave nears the end as the residual flames they drop when they leave spawn immediately. When you're hiding behind a wall, lure the balls over to one side, then create a wall perpendicular to the one you are using to block them so that when the first wall goes out, you'll still have something protecting you. Lastly, the balls that try to chase you will still hurt you even if they're behind a wall, if they get close enough.
A method of healing can be useful for this puzzle, allowing mistakes to be made without the risk of failing the puzzle and needing to restart.
Tenth room
Room Ten is another party room where the rest of the Firemakers will rejoin you. Take the Firemaking journal compilation (4) and you will again have to decide who is possessed. The person possessed this time is Twig again.(He gives it away when he says that he was born with the name Twig but Twig is actually the nickname he gave himself which he mentions if you spoke to him before entering the cave for the first time.). If you decide incorrectly Lina will be killed.
Eleventh room
You may want to make your screen size smaller to make this next part easier if you are playing in full screen format.
This time, the pattern is in the shape of a torch. You won't need yellow at all, just complete the blue surrounding it and patch the red all around the pattern. But before you finish, take note of the fire pit nearby. Instead of throwing firewalls at you, Char dims the screen.
Immediately light the fire pit in order to avoid taking too much damage. Then take a torch from the pile, and proceed down the tunnel.
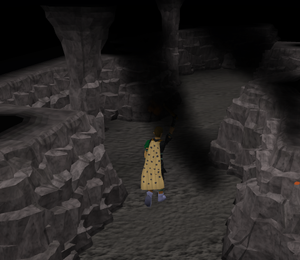
You'll be forced to walk the entire way. During this time, dark tendrils will claw their way out of all sides of your screen. This is why smaller screen formats are recommended, since if you use wide-screen, it will be near impossible to make out some of the tendrils against the pitch black of the area outside of the walls. You have to ward them off by left clicking them close to the edge of the screen. Failing to shake one of them off in time will result in moderate damage. Don't forget to keep walking while this is happening, and escape through the open door as soon as possible. Despite this option being safer, it is possible to simply walk the entire path taking hits. With a lot of food a player can survive the entire path.
| Fire puzzle solution 4 |
|---|
|
Twelfth room

After lighting the fire quickly, take the fifth journal.. The person possessed this time is Emmett. During the interviews, you'll notice that Emmett is suspiciously level-headed when you talk to him, as opposed to earlier, when he lit himself on fire just by talking about flames, making it a dead give-away. He also stops mentioning the fact that everybody keeps accusing him of being possessed. If you decide incorrectly Twig will be killed.
Char will warn you to prepare yourself, so don't be lazy. Head back to the surface to resupply on food, and to take a fast hitting weapon with you, like knives or claws. It doesn't matter what type of metal you use, since you will only require speed. Don't bother with armour, use weight reducing gear to conserve energy and bring a few energy potions just in case.
| The answers to the fire puzzles: |
|---|
Solution gallery |
Char
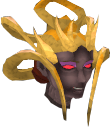
This is a safe battle, as you are expelled from the battle arena instead of dying, with Char taunting you. (If this happens, both your stats and Char's are restored to full, so you will have to start the fight over when you are ready.)
Take the last journal. In the last room you will meet Char, she is standing in a somewhat lowered part in the cave. Now is the time to get some food, energy potions (about 2) and weight-reducing clothing. Summer pies are possibly the most ideal choice in terms of food, as they heal 220 lp per pie and restore 50% run energy. Since no armour has any effect, it's best to be as light as possible, because the battle involves lots of running. Alternatively, the salt-water spring at Oo'glog may be used to provide unlimited run energy for about 15-20 minutes. It is possible that the battle can take over 15 minutes. Note that the combat bonus of you armour can help you kill Char faster.
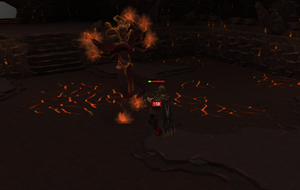
Your damage is calculated by how many fires have been lit using your pitch can multiplied by 101. For example, if you have 7 fires lit then you will hit 707 lp damage on Char. If you have 10 or more fires lit you can deal in excess of 1000 lp damage per hit. It works well to set up as many of the fires as you can to accelerate the fight, and to set up fires in the northern end and keep Char to the south in order to avoid her stamping them out, however be careful to move away before she reaches you. In addition all fires made before the fight starts will disappear once the fight has begun. Capturing a spark in one of your fires will give various advantages (such as higher damage and healing) but is not necessary. One fast way to light multiple fires is to use the "Light Fire here" option and repatedly light fires in a row from east to west.
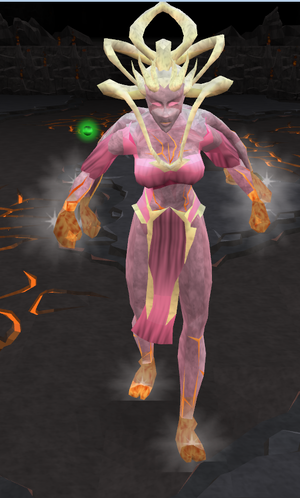
Occasionally, Char will glow white. During this time she will be invulnerable, and will cause heavy damage upon you should you be within melee range. You can lure her beneath the waterfalls when she is like this, although sometimes she will revert before you reach them. When she comes near the water, she will revert to her normal, vulnerable self. It is only worth luring her to the water if she begins glowing when near the water. Otherwise, it is recommended that you merely avoid trying to fight her at this point and run around the room lighting fires ready for when she becomes vulnerable again. If you have your audio turned on, you can hear when Char switches to her rage even when she is not in your field of view.
Warning: Char has been known to commonly hit for 700-800 damage when enraged, and possibly as high as 990, thus killing the player in one hit. As such, it is imperative to avoid her at all costs.
When Char is at half health, fire walls, similar to those experienced in earlier chambers, will periodically appear and sweep across the room. A wall typically has 2 gaps where you can pass through to avoid damage from the wall of fire. Also, going to the edge of the room will often avoid a wall of fire, even though it visually seems that the fire reaches to the room's edge. (It is not known if this is a bug, which may be removed at some time, or a deliberate feature.) If you get hit by a wall of fire, you will suffer in the region of 200-400 damage.
Ranged is one of the best methods to use in the fight, as Char will only attack with melee. Fast weapons like knives or darts are particularly good. Swift gloves can increase damage, giving a chance of throwing two knives/darts instead of one. Using long range style (especially with knives/darts) is helpful here, as it makes staying out of Char's melee range much easier.
Magic is not as effective as ranged, nor is Char affected by the bind effect of ancient Magic Ice spells or bind spells from the Normal Spellbook (bind, entangle or snare). The special attack of the vine whip can also be useful, as the vines it summons deal continuous damage to her as long as you have fires lit.
Another extremely useful item to bring would be Dragon claws, which when used do four hits on Char which can reduce her health significantly if each hit is successful. Coupled with special restore potions it can be extremely useful throughout the fight, and since there is not really any other use for your special attack it's one of the best weapons to bring. A useful way to hit Char with them is to run straight at her and use the special attack and you may get off without being hit, but if you are the damage that you will do more then makes up for the little damage that you would receive. Merely eat a shark or two after you use both special attacks and continue to run around and light fires.
Yet another method exists for players with a high defence and ranged levels (90+ recommended, but lower levels like 80+ can also work). After starting the fight, lure Char to the waterfall. She moves slower than you run so you should not take much, if any, damage during this time. Once she reaches the waterfall, run in a circle around the room, lighting as many fires as possible without compromising speed. Do this till you have 10 or more fires lit and return to the waterfall. Simply equip a fast hitting weapon like knives/darts and watch as you deal in excess of 1000 damage per hit. There is no need to worry about her rage as the waterfall instantly negates it. When your fires start burning out, simply repeat the process. At 99 range, you can burn her down to 0 LP before she starts spawning fire walls, resulting in a painless, foodless kill. If you have 92 Prayer, using Soul Split during this process will allow you to stay under the waterfall as long as you wish. As knives are quick, you will easily replenish your LP to full health. This is easily one of the most quick and effective ways of defeating Char, possibly without using any other supplies.
You cannot set up a Dwarf multicannon for the last boss fight, as you will receive a message stating that the cavern might cave in.
Summoning familiars can be used when fighting Char. A healing familiar such as a Unicorn stallion or Bunyip may be helpful, or a beast of burden such as a Terrorbird or War Tortoise to hold extra food. A Terrorbird can also replenish run energy with Tireless Run scrolls.
Finishing
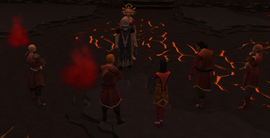
Once Char has been defeated, she laments her defeat. The firemakers, who somehow become free, join the player, who can speak to Char again and gain some final information about Char and Zaros. Speaking to Char after this gains no more information, and the player should exit the room through the nearby tunnel. This brings the player and the firemakers to surface, at a cave entrance to the north of the one used to start the quest. Speak to any of the firemakers to end the quest and get the rewards.
Rewards
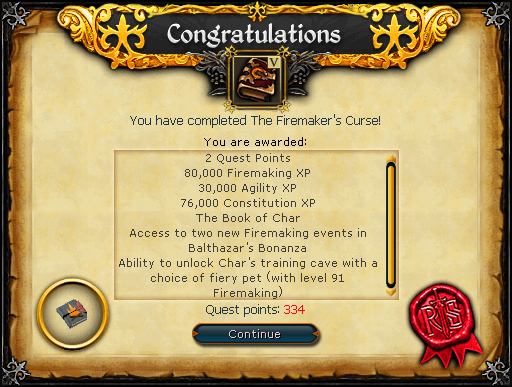
- 2 Quest points
- 80,000
 experience
 - 30,000
 experience
 - 76,000
 experience
 - The Book of Char, when activated on the off-hand slot provided it is wielded, causes fiery orbs to spin around the player, simultaneously igniting any log the player walks/runs over.
- Access to two new events and a new Firemaker's costume in Balthazar Beauregard's Big Top Bonanza.
- Access to Char's training cave that can be repeated weekly. Also, you can pick up one of the four fire creatures: Warming Flame, Twisted Firestarter, Glowing Ember, and Searing Flame (with 91 Firemaking) flying in the room as a pet. (You can only have one at a time, due to an update by Jagex.)
- 2 extra spins on the Squeal of Fortune.
Music
Transcript
Trivia
- A guaranteed content poll was held on the RuneScape forums to choose the personality of a female character involved in the quest. The winner was Sera, a self-professed jealous rival of Ignatius Vulcan, whose goal in life is to create a blaze that will trump those of Vulcan himself.
- The original Firemaking requirement for this quest was level 90, but this was lowered to 74 in the week before launch. This was announced by Mod Mark and the January 2012 BTS was changed to reflect the new requirement. The requirement for additional rewards was raised to 91 Firemaking.
- After completing the quest, the Adventurer's Log will read: I guided the firemakers through Char's caves and managed to recover her ancient Firemaking secrets.
- The Twisted Firestarter is a reference to the song Firestarter by The Prodigy. It references the lyrics, "I'm a fire starter, twisted fire starter."
- This quest was originally released as grandmaster, but was changed soon after to master.
- Just like the God birds, You can have all the Fire Creatures by putting them one at a time in your POH (Player-Owned-House).
- Unlike other quests, when you reach all of the requirements, the skill unlock list will say you have reached one of the requirements for Firemakers Curse, instead of you have all the skill requirements for Firemakers Curse.
| Mysteries of the Mahjarrat |
1. The Tale of the Muspah • 2. Missing My Mummy • 3. The Curse of Arrav • 4. The Temple at Senntisten • 5. Ritual of the Mahjarrat |
| Rise of Lucien |
1. Temple of Ikov • 2. While Guthix Sleeps • 3. Ritual of the Mahjarrat |
| Rise of Zaros |
1. The Dig Site • 2. Desert Treasure • (Devious Minds) • 3. The Temple at Senntisten • (Ritual of the Mahjarrat) |
| Arrav |
1. Shield of Arrav • 2. Defender of Varrock • 3. The Curse of Arrav • 4. Ritual of the Mahjarrat |
| Other quests |
Hazeel Cult • Fight Arena • Enakhra's Lament • The Firemaker's Curse |
| Related miniquests | |
| Related lores | |

