Elemental Workshop III
| File:Elemental Workshop III.png | |
| Also called? | EW3 |
|---|---|
| Release date | 25 May 2010 (Update) |
| Members only? | Yes |
| Quest series | Elemental Workshop (#3) |
| Official difficulty | Intermediate |
| Official length | Medium |
| Developer | Dylan C |
Official description
| “ | A number of restored texts have been made available in the Seers' Village chapel, and one stands apart from the others. In a book embossed with a curious pattern, the story of Vitruvius is continued, as he attempts to bring his assistant to life using the mysterious properties of the 'body'.
There are lessons to be learned from this new book, as you put Vitruvius's theories into practice again in the Elemental Workshop. Only those with the ability to unravel the most devious puzzles may, perhaps, be able to unlock the workshop's latest secret... |
” |
Walkthrough
| Start point: | ||
| Members only: | Yes | |
| Official difficulty: | ||
| Description: | None | |
| Length: | Long | |
| Requirements: |
(All skills can be boosted) | |
| Items required: |
Recommended:
| |
| Enemies to defeat: |
|
Start
- Search the bookcase in the Seers' Village chapel (south of the "seer's" house) to receive a ragged book. Read the book.
- You will need the ragged book along with the battered key. Once ready, search the odd looking wall in the house with the anvil, climb down the stairs revealed.
- In the workshop, try to mine 3 elemental rocks in the western area and an Earth elemental will pop out. Kill it and it will drop an elemental ore. You will need one elemental and four coal ore to make one elemental bar.
- If you have not brought a piece of clay, mine some clay in the north-western area.
- Now use the clay on a water source to make soft clay. There is a sink to the north.
- Use the soft clay on the ragged book to make a key mould (Must read book before doing this or it will not work.).
- Turn your elemental ores into elemental bars. Do this in the furnace in the south room as done in the previous quests. If it says it is too cold to use then get a stone bowl found in one of the crates on the first floor (the floor with the all the elementals; the crate also varies for each player), fill it up with lava from the lava trough at the south end of the Fire Elemental room, and use the bowl of lava onto the furnace. If you still get the message saying that the furnace is too cold to accept your elemental ore, then you should go in to the Air Elemental room and pull the lever where the giant machine to the south of the room is, so air pumps through to the furnace; then you can try again.
- Use only ONE of the bars on the furnace with the key mould (Use soft clay with the ragged book to obtain) in your inventory to make a ragged elemental key.
- Go down one floor and prime the remaining two elemental bars, see primed bar on how to do this. Do not make Elemental mind bars from the primed bars!
Solve the sliding puzzle
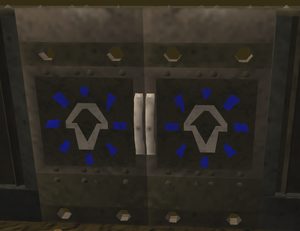
- Go down to the third floor. Use the ragged elemental key to unlock the Body door.
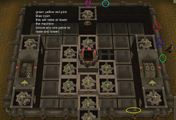
- You will enter a large room with a sliding puzzle below, and a small 'Body' room in front of you.
- Proceed down the steps south of the Body door.
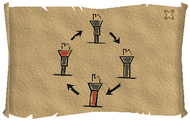
- The purpose of the mechanism is to "charge" the body room to make one body bar. Ultimately players must lower the central tower, spin it, and raise it again. This process is depicted on a diagram scroll that can be found in a crate in the north-west corner of the lower level. (If players have already clicked the room magnifying glass - see note below - , remember that "up" is west and north is to the right.)
The Mechanism
Note: When on this floor, a magnifying glass icon appears in the upper left part of the view. Clicking this icon toggles between the normal view and a bird's-eye view of the area. The zoomed-out view shows all of the puzzle and makes it easier to move between the levers, but the view cannot be rotated.
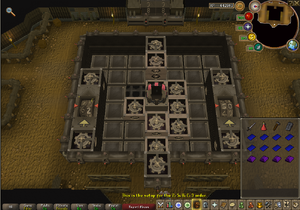
The puzzle mechanism is in the form of a large square area with levers located on each side of the square.
There are six initial blocks, or gears, inside the puzzle. There is also a hole. There is a tower in the centre, and there are two mechanisms (counters) lying on two sides of the puzzle. There is a moving drive gear occupying a tile on the bottom-centre of the puzzle.
| Pulling a lever on the side of the puzzle will slide any pieces the lever is perpendicular to in the direction of the hole: | 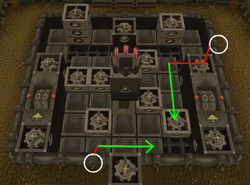 |
The objective of the puzzle is to form a line of gears from the drive gear to other points in the puzzle.
There is a counter on one side of the room (the top in overhead view) showing how many moves are left. Each successful lever pull (a pull that moves one or more tiles) will decrease the counter. When the counter reaches 0, no more pieces can be moved and the puzzle can be reset by pulling the reset lever next to the counter. An undo lever is also provided; however, it has an undo-memory of one move.
Notes:
- After finishing a puzzle section, any unlocked progress (extra moves or lowered towers) will not be lost if the reset lever is pressed.
- Pulling the undo lever will only undo the last move made; the move counter will not return the lost move. However, the next move will not turn the counter.
- Pulling a lever that does not move anything does not count as a move.
- The gears always reset to the same position when the reset lever is pressed.
- EXCEPTION: Multi-level gears that have been unlocked will reset to their lowered, unlocked, position (first seen when they were unlocked)
- Logging out will not reset the puzzle.
- In each puzzle section, there is more than one way to move the puzzle pieces into position.
- SUGGESTION: Setting the machine up for the "Raise Tower" solution before the "Spin Tower" solution will make it easier to switch between the two. (the empty space should be in, or very near, the north-west quadrant, which is upper right in the example screenshots)
Puzzle solution, without puzzle moves
Please see the next section if you wish to complete the puzzle with the exact moves supplied.
Change your view to overhead view by clicking the magnifying glass icon on the top left of the screen.
- The first part of the puzzle requires a connection between the driving block in the bottom-centre and the terminal just above the right number counter.
- Once connected, a cutscene showing a two-layered cog being lowered will be played. The screen will then become normal.
- For the second part, for "bonus moves", the two-layered cog can be linked with the terminal just below the right number counter and with several layered-cogs up to the driving block. This provides for a 50 move maximum. At this point, resetting is recommended—this will bring the move counter back to 50 while allowing manipulation of the unlocked two-layered cog.
- The third part requires a similar connection with the terminal just above the left-hand number counter: connect the two-layered cog with that terminal, and connect that with one-layered cogs reaching all the way to the driving block. When finished, this unlocks the three-layered cog.
- In the fourth part of the puzzle, connect the three-layered cog to the terminal just below the left hand counter to two one-layered cogs and the driving block in order to "break" the counter and provide effectively infinite turns.
- For the fifth part, connect the driving block to the top-centre terminal. The top-centre terminal must be adjacent to the three-layered cog in order for this to work. This will cause the central tower to lower.
- For the sixth part, connect the appropriate cogs with terminals around the central tower and with the driving block: a one-layer cog on the left and right side, the three-layer cog above the central tower, and the two-layer cog below the central tower. The middle tower will now be spinning.
- Finally, raise the tower to enable you to create a body bar by repeating the connections of the fifth part: move the 3 layer tall block one square away from the tower and connect it to the tower with a 1 layer cog.
- Go upstairs and follow the steps in the "Create body bars" section to create a body bar, then repeat the connections in step five and six to create another body bar.
Make the body body
- With a ragged book (Book of the Elemental Body), two body bars, and a hammer, use a workbench on the first-level basement to smith the Body body.
Congratulations, quest complete!
Rewards
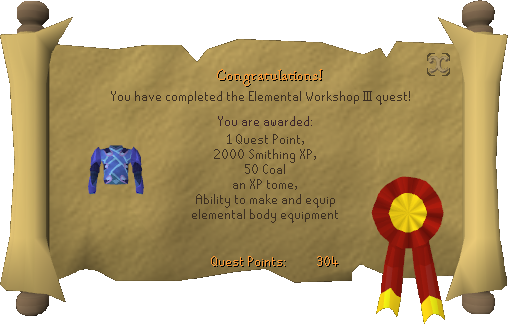
- 1 Quest point
- 2000
 experience
 - 50 Coal (noted)
- Book of knowledge; it contains 4 charges all together, 2 for Defence and 2 for Smithing. 4250 experience and 3250 experience each charge, respectively.
- Ability to smith elemental, mind and body bodies, along with body helms and shields.
- 2 squeal of fortune spins.
Tips
- Should the player need to return to the top level of the workshop, the quickest way is to exit to the lobby and re-enter the game.
- If a player wishes to prime more bars to make more body equipment, he/she can pull levers in this order to quickly lower, charge, and raise the tower: 2, 4, B, C, 3 (if he has a solid line of gears on the right and a space on the left; if the position is flipped, then 6, 4, B, C, 5 does the trick). This should also help if a player logged out and logged back in.
- With the new "Body Book" you can also make 2 other kinds of Elemental Body with two ordinary Elemental Bars OR two Elemental Mind Bars.
- Should the message, "You hear the crunching of gears, the counter gets stuck around 62 moves" appear, don't let it unsettle you. Simply resume from where you were in the sequence of levers and if you didn't lose track, you will eventually complete the puzzle correctly. The message is merely a distraction, nothing more.
Music unlocked
Gallery
-
A method to prime one bar in four moves. (Order of, yellow one, yellow two, red one, red two).
-
Diagram scroll - found in the the Scroll crate in the north-west corner of the puzzle level.
-
Diagram scroll glitch - of course if you have only this, it does not help much.
Required for completing
Completion of Elemental Workshop III is required for the following:
Trivia
- When the quest first came out the spoiler reads: The spoilers for this quest have been accidentally transferred into a primed metal bar. Once we manage to reverse the machine's polarity and modulate its frequency, we should be able to bring you the details.
- Alongside Mourning's End Part II, this quest is infamous to many players as having one of the hardest puzzles in the game.
- When completing the puzzle using the method listed, neither lever 7 (bottom right) or lever 1 (bottom left) are used.
- If you have a Zamorak chick out while doing the puzzle, it will walk around the room freely without following you.
- After the quest ends, upon receipt of the rewards, the message "While reading the instructions from the book you find a certificate for 50 coal" appears. Interestingly enough, the term "certificate" is Runescape Classic's term for what is now called a "note".Template:Elemental Workshop
pt:Oficina elemental III fi:Elemental Workshop III nl:Elemental Workshop III
