Battle of the Monastery
Jump to navigation
Jump to search
| Conflict | |
|---|---|
| War of 164 | |
| Date | |
| Late year 164 of the Fifth Age | |
| Place | |
| Asgarnia Monastery of Saradomin | |
| Outcome | |
| Defeat of Monastery dwellers, beginning of open conflict between Kinshra and Asgarnia, capture of Kara-Meir and Gar'rth | |
| Combatants | |
| Monks, various Asgarnian commanders | Kinshra, Chaos Dwarves |
| Commanders | |
| Abbot Langley, Kara-Meir, Squire Theodore, Gar'rth, Doric, Ebenezer | Lord Sulla, Thorbarkin, Jerrod |
| Strength | |
| Several hundred Monks, approx. 10 trained soldiers | Approximately 50 Kinshra soldiers, approximately 50 Chaos Dwarves, several Chaos Dwarf Mortars and Dwarf multicannons |
| Casualties | |
| Unknown number of Monks | Unknown number of Kinsha |
| Next battle | |
| Taverley Massacre | |

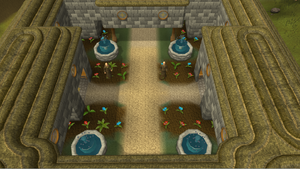
The Battle of the Monastery is a battle depicted in the first RuneScape novel, Betrayal at Falador. The battle was the first open military conflict in the War of 164, and ended in favour of the Kinshraand their allies.
The following events occurred:
- The protagonists arrive
- The monks attempt to convert Gar'rth, but fail
- The Kinshra move their plans to the monastery
- They meet up with the werewolf (later discovered to be named Jerrod) and team up
- The chaos dwarves build a wall crumbling cannon
- The Kinshra launch their attack
- Kara-meir, Gar'rth, Squire Theodore, The Alchemist (Ebenezer), Castimir, and Doric hide in a bedroom
- They go outside
- Kinshra foot soldiers arrive and are killed
- Jerrod tries to capture Gar'rth
- Kara gives Theodore her Adamant Longsword and he starts fighting
- Jerrod grabs the sword and throws it to Sulla
- Kara and Gar'rth are still in the monastery
- The monks start to flee
- Jerrod throws Castimir's rune pouches into a fire
- Castimir picks up some runes lying around
- The alchemist lights an unlit wall crumbling cannon ball that was accidentally fired
- Castimir uses snare on Jerrod
- Alchemist puts the ball under Jerrod, waiting for it to blow up, killing Jerrod
- The protagonists flee to Edgeville and Falador
- Sulla saves Jerrod from the blow
- The alchemist gives Castimir a sack of runes for the return for Gar'rth and Kara
- Kara is tried to be recruited to Zamorakism By an emissary of Zamorak
- The Kinshra find her, Sulla tortures her
- She is tied to a support beam, Gar'rth is forced to transform but refuses to kill her
- Black Knights throw rock debris impatiently.
- The protagonists return and ambush the Kinshra
- Kara thinks of a plan to get free.
- They get free and fight
- They capture a black knight to tell Sir Amik of the plans
- The Kinshra leave
Trivia
- The Battle of the Monastery seems to resemble the Siege of Jasna Góra Monastery, Poland by the Swedes in 1655, however the defenders were victorious in that battle.