Nadir

| |
| Release date | 24 April 2012 (Update) |
|---|---|
| Members? | Yes |
| Developer | Mod Giragast |
Nadir is a Fremennik Saga that was released as part of the second batch. It is started by finding a damaged device on Daemonheim floors 18-22. You play as Moia, the Mahjarrat Lucien's daughter, on a quest to investigate strange occurances at the Ritual stone and to find the Mahjarrat Bilrach in the depths of Daemonheim.
Official Description
| “ | Play as Moia - a Mahjarrat half-breed - as she tries to prove her worth to her commander, Lucien. Tasked with hunting a lost Mahjarrat, her journey takes her to Daemonheim and beneath, culminating in events that pave the way for the final chapter in the Daemonheim story to be told. | ” |
Walkthrough
| Start point: | |
| Members only: | Yes |
| Official difficulty: | |
| Description: | None |
| Length: | Medium |
| Requirements: |
|
| Items required: | None |
| Enemies to defeat: |
|
Note that during this saga, holding down the space bar and double clicking appears to skip almost all cutscenes. It is also possible to skip through cutscenes faster than above by opening up a quest journal in your quests tab if the icon is available. It is unknown if this is a bug or not.

Finding the memory fragment

The memory fragment required to start this saga is a damaged device. It will appear randomly on the first half of the furnished floors (18-22). The device does not appear as a red dot on the minimap. Pick up the device and it will disappear. After obtaining the device the player will receive a message in the chatbox stating to start the memory the player must talk to Skaldrun.
The Ritual Site

The saga begins 500 years ago when Moia, Lucien's daughter, summons Lucien and Zemouregal to the ritual site. You find out that the ritual marker has scratches on it, and there are cart tracks in the snow showing evidence that someone has attempted to move it. Zemouregal and Lucien then ask you to inspect the area while they discuss who could have done this. Once they are done Lucien will call for you, hand you a device to communicate with him, and order you to find Bilrach and inform on his current condition.
Daemonheim

You arrive at Daemonheim, 1 year ago. Exploring Daemonheim causes chat boxes to appear but is not required for completion of the unabridged saga. Attempting to access Daemonheim other than by the southerns steps also should cause a chatbox to appear. Upon arriving at the steps, you see a cutscene in which a Sentry greets a merchant who delivered two large crates and murdered his assistants. After a brief exchange as to what the crates hold the sentry leaves. You must interrogate the mind of the merchant and probe his memories. Finding all of his hidden memories is required for the unabridged version of the saga.
The saga is saved every time you finished a floor.
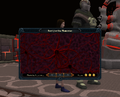
To find the memories you must hover over their hidden location, then click to plant the probe. There are 3 stages of the cursor, indicating how close you are to finding the memories: slowly flashing, indicating you are not near the memory; a quicker flashing, indicating you are near but not on top of the memory; and a rapid flashing, indicating that you have found the memory. Sound effects can make it easier to detect when you hover over a memory. If you click on a memory at the second speed, you will only partially capture the memory and will not be able to complete the unabridged of the saga. Later on in the saga, this will also affect your ability to answer questions correctly as the correct options will only appear when you have located the memory exactly. This will cause soldiers and necromancers suspicious of Moia to attack.
After placing all three probes, whether you collected the memories or not, you will kill the merchant and use his body as a disguise.
The frozen floors


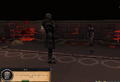
After arriving on the frozen floors, you will see several soldiers being commanded by Captain Toma to get a mage. As you approach you realize you better not go through there to reveal yourself, however the captain sees through your disguise and you must probe his memories and take his form. It is the same process as it was probing the merchant's memories on the surface. Failure to completely extract all three memories will prevent you from correctly answering questions on the next floor.
Continue onward through the dungeon, leaving the frozen floors for the furnished floors.
The furnished floors

You will start in a room with three doors. Open the door in the north first, and you will see it's a dead end. Walk in it until you get a message and then go back again.

In the next three rooms you will be asked questions by Captain Toma's soldiers. If you had not correctly probed Captain Toma's mind on the frozen floors, you may not be able to answer these questions. Answering all questions correctly is required to complete the unabridged saga. In addition, if you answer any incorrectly you will have to fight a few extra soldiers later in the dungeon.
Enter the door to the South. You will be approached by a soldier who wants to accompany you on the next patrol.
Answer him with "Got something to get off your chest, soldier? Be my guest".
Move south into the next room and enter the west door. Here, a mage will ask you about the status of his transfer.
Answer with: "Ask me later, Druf. I have no time for you right now".
Now enter the south door and you will be asked by another soldier if you're ready to start the daily training.
Answer by saying "Tell them to wait there, and no practice until I return".
Continue your travel by going through the east door. If you haven't answered all questions right, you might have to kill a few soldiers in this room. If not, just move on to the east and then in the next room to the south. In the room you will enter now there are two doors you can enter. Open the room in the east and walk in it until you get a message, then head back and go through the south door.

In this room you will encounter a Necrolord who turns out to be Lord Yudura. You will have to place the probes in his mind, as well. Again, completely probing all three memories is required to complete the unabridged saga.
After you have finished probing his memories, Yudura will attack you. Use your special attack and finish him (ignore any zombies spawned, they will disappear after killing Yudura). You will take on the form of Yudura and call Lucien about the progress.
Move on to the south and you will reach the next checkpoint, entering the occult floors.
The occult floors


This floor will start in a room with two doors. Enter the door in the east. In this room you will find little pools of water on the ground, leading from one door to another. Enter the east room, where you'll discover dead troops that have drowned, and a strange portal in the wall. You will have a cutscene when trying to leave the room, where you hear voices coming from the portal.
Now leave that room and enter the south door. A necrolord will approach you, asking what to do about his unruly slaves.
Reply with the instruction "cut off their hands".
Move on to the next room in the south and enter the west door in the next room. Another necrolord approaches you, wanting to know what to do about a different necrolord using his slaves.
Tell him "kill him, or I will kill you".
Moving on through the west door, you will find yourself in a room with two portals. Approaching them will result in drawing power from both and discovering valuable properties that Moia can use to get stronger.
Now enter the south door and find yourself in another room where a necrolord will ask if you have the body of a soldier needed.
Tell him "his body is on the floor above. Fetch it yourself, I am busy".

Continuing through the dungeon, the next room contains a Hooved mage, which will move to the next room as soon as you enter its room. Follow it into the next room. It will discover you aren't who you appear, and you will have to kill her with your own magic.
You have three types of spells to cast: fire, water and earth. Fire spells are the fastest and can slow attack rates, but are also the weakest, rarely hitting over 100 - they are also the least accurate. Water spells can slow down approaching enemies, have moderate damage and have a moderate attack rate. Earth spells are the most powerful (up to 318), but they have no special abilities and the attack rate is very slow, making it more suitable for hit-and-run, particularly because of their high accuracy. It is possible to peek out behind a corner, use a fire spell and quickly switch to Earth, then run away again in one attack cycle (though this risks a melee mob following you).
You will also have a portal magic bar in place of your special bar. The portal magic constantly decreases, and you need to use the portals to recover health and your magic. As your portal magic decreases, so does the power and accuracy of your magic spells. If your special bar falls to 0%, you will switch back to using your dagger, and you need to recharge at the closest portal to regain the ability to use your magic. Using a portal restores your health and portal magic to 100%, but only if you stay on the portal until you get the message "You drain the portal for so long that it imbues you with an additional health boost". Being interrupted by combat or clicking away from the portal will dramatically reduce it's benefits. All portals are one-time use.
After defeating the hooved mage, drain the portal in this room and enter the next door. This room contains two rangers and five soldiers you have to kill. Once they are killed, move on to the next room and reach your next checkpoint, the warped floors.
The warped floors
Note that if the special bar falls to 0% at any time, the player is disqualified from receiving the unabridged rewards. Players must keep the special bar above 0% at all times for the full reward.
If players fail to keep the bar above 0%, leaving and restarting from the last checkpoint will still allow full completion, so long as the bar is kept above 0% following the restart.

You will appear in the warped floors. There is a portal in the room you are in, but it is best not to drain it yet, as you will need to fight some strong enemies in the next room. Clear the room of the two rangers and three warriors. It is best to use the Earth attack here, as it will likely one shot the enemies. Utilize safespots and try and trap enemies to avoid being overwhelmed. Once done or in need of health or portal magic, go back to the room you came in to drain the portal. Proceed into the next room, in which a warrior will instruct a mage and ranger to retreat, and he locks the door. Use your magic to get rid of the locked door and proceed as usual.
In this room, there's three warriors, a mage and ranger. The mage uses wind blast, which can easily and accurately hit over 100 damage, so watch your life points, espeically if the ranger is also attacking you. There's a portal not far from the warrior closest from where you just came in. Once cleared, go into the next room, in which two warriors and two hellhounds will attempt to stop you. Clear them off before breaking the lock and continuing into the next room.
In that room, there are two portals, a ranger, mage and 3 warriors. One of the warriors will say that the behemoths and stalkers have abandoned them. It's recommended to trap the foes apart, allowing you to deal with them in smaller numbers. If you left the portal in the previous room intact, you can return there when needed to restore your energy, rather than trying to use the portals in the same room as the soldiers.


Kill them and keep on moving until you reach a cutscene. Moia will walk the next two rooms, finding corpses, drained portals and collapsed wooden debris. Once you reach the end of the second room, walk and you'll find the ritual marker and Bilrach, who is rambling incoherently.
You then communicate with Lucien, with a choice of how to reveal Bilrach's presence to Lucien. You can choose to tell him Bilrach is alive and dangerous, alive and not a danger, dead, or that he wasn't there. If you choose the latter, Lucien will be angry and threaten to kill you when he next sees you. Choosing the other options will result in Lucien requesting to bring Bilrach to him.
Bilrach will then straighten and speak directly to Moia, revealing that he knows Moia is a half Mahjarrat, and he is willing to teach her secrets about portal magic if she will accompany him. All conversation options must be followed in order to reach the ending, it is recommended to select them in reverse order (five, four, three and so on) so as not to lose track of which ones have been followed already. You then have four options, your choice influencing the ending.
- Moia states that she will inform the other Mahjarrat about Daemonheim, and they will destroy it. Bilrach then knocks out Moia.
- Moia states that she will take Daemonheim for herself, and tries to take Bilrach's identity by looking at his memories. Looking at his memories knocks Moia out. Bilrach then levitates and takes her along.
- Moia follows Bilrach to the bottom of Daemonheim with the intent of betraying him and taking all the power for herself.
- Moia follows Bilrach to the bottom of Daemonheim under co-operation.
-
 Getting knocked out by Bilrach when trying to inform the other Mahjarrat.
 -
 Ending 2 - Viewing Bilrach's memories.
 -
 Ending 2 - Getting levitated by Bilrach after looking at his memories.


100%
Getting 100% completion, required to obtain the unabridged rewards, requires that you complete the following:
- Completely collect Hearthen's, Toma's, and Yudura's memories.
- Answer all of Toma's men and the Necrolords correctly.
- Do not run out of portal power at any time.
Rewards
Abridged
An abridged book, which when read, gives
- 3750
 experience
 - 375 Dungeoneering tokens
Unabridged
Together, with the above rewards, an unabridged book, which when read, gives
- 21,670 experience
- 2,167 Dungeoneering tokens
- 11,660
 or 37,080
  experience
Re-playability
The saga is always re-playable, and each time will reward up to 2,674 Dungeoneering tokens for the first play, 2139 for the second, 1604 for the third, and 1069 for the fourth in a day. This day is reset at 00:00 GMT.
Transcript
Trivia
- If you don't have the required dungeoneering level to complete the unabridged saga, when Moia meets Bilrach, the saga will instead end. The player will receive the abridged book.
- With the release of this saga, it is possible to unlock Occulo and Torqueo music tracks even if you do not have the level normally required.
- Nadir means "the lowest (or deepest) point", this title was given probably because Moia, as Bilrach said, reached the last floor of Daemonheim.
- Normally, if Moia's portal energy is allowed to drain to 0%, it would change back to the special attack bar at 0%. However, when nearing Bilrach's room, it would convert to special attack bar with how much energy you have left before, although this is of little importance as there are no more enemies to fight.
- The Captain says "I will return for you, Freya. I wish I could say when. I know I have been absent for some time, but my duties here are too heavy to abandon." This is most likely a direct reference to Final Fantasy IX's Sir "Iron-Tail" Fratley's last words to Freya.
- While looking at the end of the saga's description at the "Start saga" menu, there is the sentence: "Stay a while, and listen..." This could be a reference to Deckard Cain's famous sentence in the original "Diablo" game.
| Sagas |
Three's Company • Vengeance • Thok It To 'Em • Nadir • Thok Your Block Off |
| Memory Fragments |
Bearskin • Collection of Swords • Scribbled Notes • Damaged device • Rock and twine bundle |