Monkey Madness
- This article is about the quest. For the music track of the same name, see Monkey Madness (music track).
- REDIRECT Template:Redirect to disambig
| File:Monkey Madness.png | |
| Also called? | MM |
|---|---|
| Release date | 6 December 2004 (Update) |
| Members only? | Yes |
| Quest series | Gnome |
| Official difficulty | Master |
| Official length | Very long |
| Developer | Rahul V |
Monkey Madness is a quest installment in the gnomish storyline. The majority of the quest is set on Ape Atoll, an island inhabited by civilised but unfriendly and high-level monkeys. Among the rewards is the much-coveted ability to use the dragon scimitar, driving the popularity of completing the quest.
Official Description
| “ | The King of the Northern Gnomes, Narnode Shareen, is once again in need of your help. He recently decided to send an envoy of his Royal Guard, the 10th squad, to oversee the decommissioning of the Gnome owned ship-building facilities on the eastern coast of Karamja.
It has been quite some time since the 10th squad were dispatched and they have been deemed missing in action. It will be up to you, should you decide to help, to find out what fate befell the 10th squad and if possible, track them down. If only it were so simple. Sinister forces have begun to spread through the Gnome hierarchy and threaten to unleash an unknown terror upon the world. Far across the land, the fires of vengeance are being stoked once again. Can you unravel the mystery behind the deception? Can you separate the truth from the lies? Can you decide for yourself what is real and what is not? |
” |
Walkthrough
| Start point: | ||
| Members only: | Yes | |
| Official difficulty: | ||
| Description: | None | |
| Length: | Very long (Up to 8 hours may be needed) | |
| Requirements: |
| |
| Items required: |
Recommended:
| |
| Enemies to defeat: | Jungle demon (level 195) |
Pre-Quest Notes
Monkey Madness is a very hard, confusing quest and takes a long time to complete even for the experienced Runescape players. Be sure to read the guide carefully and be prepared to lose a lot of lifepoints throughout the quest. It is recommended to have a cheap but effective weapon like Abyssal Whip.
Ape Atoll is a very dangerous area to all players. At any point when traveling to the island, bring the following items:
- Antipoison or a similar method of curing poison; several creatures on Ape Atoll, some of which can be difficult to spot, are highly poisonous, and are aggressive regardless of combat level.
- Food; as mentioned above, high-healing food is important. There is a garden west of the prison which contains a banana tree, but watch out for the monkey's aunt.
- At least one prayer potion. There is an altar on the island that can be used to recharge prayer as necessary, though it is guarded by powerful Monkey Guards and a small, extremely poisonous spider. Nonetheless there are points in the quest in which prayer potions are very helpful, if not necessary.
An emergency teleport; in case you need to quickly flee, such as the ectophial or a teletab. In addition, teleports to locations such as the Grand Tree (or the locations of gnome gliders or spirit trees) are helpful. During this quest if you wish to restock on food or other supplies it is suggested that you wear a ring of duelling during your journey on Ape Atoll, this is because of the bank at the Duel Arena and the gnome glider fairly close by. Also, an altar is located near the bank at the Duel Arena, which can be used to recharge your prayer points.
Remember that while a player is in human form, every creature on Ape Atoll will be aggressive. This is perhaps most annoying not with the high-level creatures, but with the common low-level creatures. For example, the level 1 spiders found all over RuneScape are also found here, and will now attack and interrupt players trying to perform mundane tasks such as searching crates or working through dialogues.
Monkey Madness
Inventory: Prayer-Boosting Equipment, 12-16 doses of Anti-poison, 12-16 doses of Prayer potion, 12 pieces of food (Monkfish or better), One-click teleport (Lumbridge or Varrock teletab), and optionally 200k coins (if players want Glough to solve the puzzle instead of them). (Throughout the quest, always restock potions and food when possible.) Initially, players can pick up these things from the bank just after talking to the king at the start.
Talk to King Narnode. He tells the player to investigate Glough's old shipyard and gives the player a Gnome royal seal.
Ascend the tree (visiting the bank, if required) and take a Gnome glider to Karamja (Gandius on the pilot's map). Go to the shipyard, going north following the coast, and talk with G.L.O. Caranock, a gnome who is located in the building in the southern area of the shipyard, by the fence. He acts suspiciously. Players must have the seal to enter the shipyard.
Return via glider to the king. The king gives the player Narnode's orders to talk to Daero.
Talk to Daero, the new head tree guardian, on the first floor of the Grand Tree near Blurberry's Bar (level 1, east side). Make sure you ask him all the questions about the mission, the 10th Squad, and Caranock, in order, before finally selecting the 'leave...' option. He blindfolds players and takes them to an underground hangar, where they must solve a Reinitialization puzzle.

Talk to Daero and begin the puzzle by clicking on the panel to the south-east. (See the solution to the right.) Avoid logging out or teleporting, as the puzzle resets, forcing the player to start again. See the puzzle box guide for help solving sliding puzzles. If you're having trouble with seeing all the pieces, try changing the display mode under graphics options. Also with the graphics being messed up, if you look in a crate beside the reinitialization puzzle, you can find a copy of the completed puzzle that also has the glitches so you will be able to see the completed puzzle with the bugged pieces you see in-game.
To easily solve the puzzle start by solving the top most row, then the next row, then the next row, then you want to solve the square area to the left by rotating the puzzle pieces counter-clockwise, then complete the rest of the puzzle. Alternatively, you can pay 200,000 coins to Glough; this option leaves the puzzle with a single piece out of place.
You can use the Teleportation device at the southern end of the hangar to return to the Gnome Stronghold. Glough is located south-east of the ramp in a tree house near the Grand Tree. After paying him, talk to Daero on the first floor of the Grand Tree for transport back to the glider hangar.
There may be a glitch that allows the puzzle to not be able to be solved manually for some players. This has yet to be confirmed. A solution may be that the player should switch the bottom and middle tile on the left-most column, which look very much alike.
Regardless of whether you solved the puzzle yourself or paid the traitor Glough, you're now ready to go to Ape Atoll. First talk to Daero, then talk to Waydar. Waydar reminds players to stock up on food and anti-poison, then flies them to Crash Island. On Crash Island, ask Lumdo to sail to Ape Atoll. He refuses, so talk to Waydar, then talk to Lumdo again. After a short cutscene, Lumdo sails the player to Ape Atoll.
Welcome to the Jungle, we've got fun and games
Once on the Atoll, travel west along the south coast until you reach the fishing spot (sharks) and then head north into the valley. Be wary of aggressive level 37 jungle snakes, level 61 scorpions, and level 52 jungle spiders, all of which are poisonous and attack players regardless of level. Alternatively travel north from the landing point until you reach an impassable ridge and follow that west to the entrance valley.
Activate Protect from Missiles upon entering the valley and run north. Players will take a great deal of damage from multiple volleys of arrows, possibly poisoning them, if protect from missiles is not activated. Eventually players lose consciousness. Even if they have Protect from Missiles prayer on.

Players awake in a cell guarded by gorillas Trefaji and Aberab. If players go within one square of the jail bars when either of the prison guards are near, they will punch the player, dealing up to 200 life points damage. Note that this does not count as melee damage, and therefore is not blocked by Protect from Melee.
The gorillas patrol their route through the corridor twice, then switch off. Take the time to see their pattern. As soon as the patrolling gorilla turns to walk back up the path towards the other gorilla, pick the lock and run behind him. Be careful not to run ahead of him. As soon as he is in the guard room to the north-west, run out of the jail (before they switch off) and hide in the tall grass along the northern wall of the jail. If players struggle to get out of the jail, they can have a friend (who has already completed the quest) equip a monkey greegree and block both gorillas in the guard room. It only stops the gorillas for a small amount of time, though. They reset their positions if they are blocked for too long, so act quickly. The friend can also block them in the south-west area where they turn around. Again, it only works momentarily.
Do not talk to any monkeys (except for Hafuba). Doing so returns players to the jail. Find Karam, the ninja-like assassin of the 10th squad. Go east of the jail to the jungle grass between the temple and the jail. Players may see only his shadow, but can click on it to talk to him. Karam is not very informative, but he lets players know he is ready to help them.
Find Sergeant Garkor, the 10th squad leader. To reach him, travel south, against the western wall of the temple, while staying in the grass. The archer monkeys do not fire at players hiding in the grass. However, there is an open stretch of ground at the south-western corner of the temple, so players must switch on Protect from Missiles past the temple archway. Travel east along the southern wall of the temple. King Awowogei's throne room is south of the temple. Go south along its eastern wall to Garkor and speak to him.
Garkor tells the player to find Zooknock, the 10th squad mage, to have the player turned into a monkey. Now, players must reach the building with the open U shape. It is east of the general store and west of the mini summoning obelisk. To enter, it is recommended that players use the southern door. From Garkor, run diagonally south west from the north face of the throne room.
Note: Do not run into the Elder Guard as he will send you back to prison.
Open the door and go inside. When inside this house, players must stay on the dark brown ground around the perimeter of the room or be sent back to jail. If players have difficulty telling the difference between the light and dark ground (due to shadows and the subtle difference in colour), the minimum graphics setting has a much more defined difference in colour. Inside the house, there is a level 1 spider that is extremely poisonous. Ignore it or kill it quickly, but do not let the combat bring you onto the light ground. If players need some food, the south-western crates contain bananas, which heal 20 life points. If the sleeping monkey guard catches players, he summons his comrades to send them back to prison.
Step east and north, staying on the dark brown ground, to search the stacked crates on the light brown ground. The crate is full of Monkey dentures, so players can take more than one set. Search the south-easternmost crate to crawl down into the basement. Players may fall and take up to 300 life points damage. Players may search the crates here, too, to find bananas. Search the crates in the north-west part of this basement to find one that is full of M'amulet moulds. Players may take more than one.
Teleport out or, if you have enough supplies, it's best to go back the way you came. (Be warned that if you do go back up via the climbing rope then you will come out directly in sight of the monkey in the area you entered the basement from and you will be put back into the prison)If you brought a Ring Of Duelling with you, you can teleport to the Duel Arena, where you may restore health, prayer points, use the bank, and use the nearby gnome glider to return to Ape Atoll.
Once you have obtained all the required components to make the Monkeyspeak Amulet, talk to Garkor, and he will give you permission to ask Zooknock to make you a Monkeyspeak amulet.
Making the Monkeyspeak Amulet

Inventory: One-click teleport (in case of emergency, and a teleport out at finish), Monkey dentures, M'amulet mould, a Gold bar, a Ball of wool, food (Monkfish or better), 1 or 2 prayer potions (with monkrobes and holy symbol the tunnels takes about 350 prayer points) and about 5 energy potions (depends on your weight and agility), 1 super antipoison. If players reach Zooknock with multiple sets of Monkeyspeak amulet components, he still only helps players make one amulet, so there's no reason to bring more than one set of components. Make sure you have all of the items for the enchanted bar, otherwise you will have to run through the Ape Atoll Dungeon more times than is necessary.
The creatures in the dungeon have high Strength and can hit quite accurately, so do not underestimate them. Run boosts are highly recommended.
Go to the Grand Tree and speak with Daero on the first level to return to the hangar. Speak to Waydar to return to Crash Island. Speak to Lumdo to return to Ape Atoll. Travel west from the boat to the dungeon entrance. Players should familiarise themselves with the map. Turn off auto-retaliate and turn on Protect from Melee. Enter the dungeon.
Run east, then turn north. The passage winds for quite a distance. The roof of the passage keeps collapsing on the player's head and doing damage. Do not wait under the bridges for the rocks to fall; it wastes too much prayer. There are also monsters and traps, all of which can poison players. Keep life points, prayer, and run energy as high as possible without wasting food or potions.
Players may also rest at certain points in between zombie monkeys to regenerate energy. Zooknock is at the end of the tunnel. Speak to him. After a long conversation (in which Zooknock wonders where he's heard Waydar's name before), use the gold bar, monkey dentures, and m'amulet mould on him. He gives the player an Enchanted bar and returns the M'amulet mould.
Teleport out and restock. (a good way to restock while staying reasonably close to Ape Atoll is teleporting with a ring of duelling to mobilising armies to bank, then using the spirit tree to Gnome Stronghold.
Inventory: One-click teleport (Lumbridge or Varrock teletab, not runes), Enchanted bar, and M'amulet mould. A Ball of wool is optional, as players can string the amulet at a bank.
Return to Ape Atoll and run north up the valley to be placed in the jail cell again. Remember to use Protect from Missiles. Escape the cell as before.
Travel east towards the temple. The door is along its western wall. Use Protect from Melee and enter the temple. Descend the trapdoor along the eastern wall of the temple. The Ape guards will block the way to the trapdoor. If so, players can make the guards chase them until a path is clear. Be warned: these guards are high levelled and may surround you, preventing non-magical escape. An easy way to get to the trap door is to go upstairs in the temple where there are very few guards. There will be a ladder leading back downstairs right next to the trapdoor.
In the basement are two flaming pits and lots of zombie monkeys, so do not turn off protect from melee. Use the enchanted bar with either pit to make the amulet. Teleport out. Use a Ball of wool on the unstrung amulet to complete the Monkeyspeak amulet. You now have the ability to speak with monkeys. Do not do so yet, as without a greegree, you will be thrown into jail.
Making the Greegree
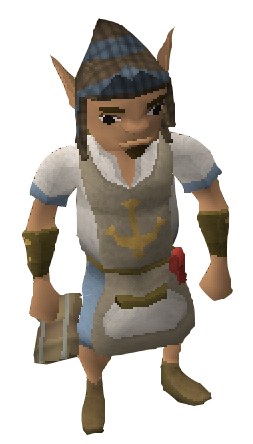
Inventory: 12-16 doses of Anti-poison, 12-16 doses of Prayer potion, 12 pieces of food (Swordfish or better), one-click teleport (Lumbridge or Varrock teletab), 6 bananas, and the Monkeyspeak amulet.
Return to Ape Atoll to be placed in the jail cell again. Escape. This time, travel west to the banana garden after reaching safety of the jungle grass. The banana garden is between the two buildings west of the jail. There is an entrance corridor at its north-east corner.
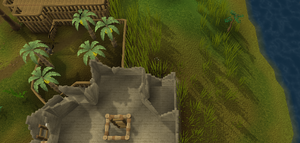
The Monkey's Aunt patrols a loop. Only enter the banana garden when the monkey's aunt exits the southern gate. When she returns (or is about to return) to the garden through the western gate, run into the corridor to the north-east so that the aunt doesn't see you. If she does, Ninja Monkeys will come to imprison you. HINT: If she has already noticed you and the ninjas have appeared, you can quickly log off to avoid being imprisoned.
Wear the Monkeyspeak amulet and talk to the monkey child. Players need to talk to the child several times before telling him that they are his uncle. The monkey child tells the player that he is supposed to collect 20 bananas in exchange for a toy. Players offer to collect the 20 bananas if they can "borrow" the toy. When players give the child the 5 bananas they have, it is enough, because the child cannot count.
Go into the corridor and wait for the aunt to make another patrol through the garden, then return to the child and ask for the toy. If he cries, wait for him to stop (or log out and log back in). The toy is a Monkey talisman. If players lose the monkey talisman, they can receive it from him again.
Teleport out and restock for the dungeon.
Inventory: 1 (or more) dose of Anti-poison, 1-2 doses of Prayer potion, 12 (or more) doses of Energy potion (if not using Salt-water spring), one-click teleport (Lumbridge or Varrock teletab), Monkey talisman, and Monkey bones (if you get bones from a monkey on Karamja, it will save time later, as you need a "Monkey Greegree" not a ninja/gorilla/zombie one) or a monkey corpse (must be from a Karamjan monkey). (Note: Bringing more than one set of monkey bones is recommended, as you may accidentally bury the bones.) The rest should be food (sharks or better). At this point, players may also choose to take a second set of monkeyspeak amulet components (dentures, gold bar, mould) and the monkeyspeak amulet to use the Drop trick on Zooknock. Remember to use protect from melee and wear prayer-extending gear.
Return to Ape Atoll (make sure that you have karamjan monkey bones, others will not work) and travel through the dungeon to Zooknock. Give the monkey bones (or corpse) and talisman to Zooknock. Be careful not to bury the bones. Zooknock enchants the talisman and returns it (now a monkey greegree) with the warning that its magic is limited. It does not work anywhere but on Ape Atoll, and the player cannot attack anything while using it.
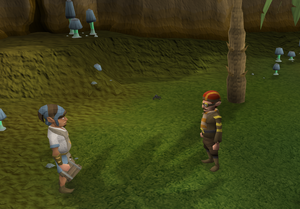
A cutscene will play, in which Gnome Liaison Officer Caranock and Flight Officer Waydar will be seen conspiring in the banana plantation of the island. They will attempt to kill the 10th Squad so that King Narnode will invade the human kingdoms.
If they brought the components, players can now use the drop trick on Zooknock for the Monkeyspeak amulet. Drop the amulet and begin by talking to him and telling him it's been lost. Give him the components. He returns the mould and another enchanted bar. Pick up the original amulet. Teleport out.
The Monkey Alliance

Inventory: 4 doses of antipoison, 4 pieces of food (Swordfish or better), 2 one-click teleports (at least one of which to Ardougne), monkeyspeak amulet, and Monkey greegree. The anti-poison and food probably are not necessary, but players should have them if they need them. Players may also bring along the enchanted bar and m'amulet mould, if they used the drop trick on Zooknock.
Return to Ape Atoll. Wear the amulet and wield the greegree to become a monkey. If your greegree is a zombie one make sure you change it into a regular one. In this form, players are not approached or attacked by any NPCs. They may still be damaged by traps, poison, or the Ape Atoll Agility Course, but are safe from most other threats.
Travel north-west as usual, but this time players need not use prayer and can pass through the town gate unharmed. Go to Garkor (south of the temple) and speak to him. He wants the player to pretend to be a Karamjan envoy seeking an alliance with the king. Speak to an Elder Guard outside the king's throne room to seek an audience with the king. The guard sends the player to ask Kruk, the captain of the guard. Kruk is on a hill east of the town gate.
Travel west of the town gate, climb the hill from the south-west, go to the highest point on that hill, climb the ladder and walk across the bridge and down the other side. Speak to Kruk. He takes the player to King Awowogei. Speak to King Awowogei and ask for an alliance. He asks the player to rescue a monkey from the Ardougne Zoo.
Players must ask the guard directly south of the throne to let them leave the throne room. Players may choose this time to craft an additional monkeyspeak amulet, if they brought an enchanted bar and m'amulet mould with them. If so, go to the temple basement and craft the amulet, continuing to wield the greegree.
If you brought runes to teleport you need to go to a safe place, unequip the greegree, and teleport to Ardougne. You cannot use normal teleport spells while holding a greegree, but tele-tabs and wielded items with teleports like the Ardougne Cloak will still work. Use any method you can to get to Ardougne. WARNING: When you teleport, the greegree will unequip, if it does, and if your inventory is full, the greegree will be dropped where you land from the teleport. You should remember to wield all possible items and pick up the greegree before you proceed.
Enter the Ardougne Zoo and wield the greegree again. Notice that the magic works someplace other than Ape Atoll, despite what Zooknock said. Speak to the Monkey Minder, who puts the player in the monkey cage. Speak to any monkey to take it into inventory. Unequip the greegree and speak to the Monkey Minder. The Monkey Minder ignores any players who don't unequip the greegree first. The Monkey Minder frees the player from the cage.
You must now return to Ape Atoll with the monkey in your backpack. Do not teleport or use a seed pod with the monkey in inventory or he will run off. Walk or run to the Grand Tree. Any method of teleportation other than the fairy rings, including the spirit tree, results in the monkey escaping the player's inventory. Return to Ape Atoll via Gnome Glider (contact Daero, the brown hooded gnome with a green leaf at the bar).

Equip the greegree and walk to King Awowogei. Speak to the Elder guard and ask for an audience with King Awowogei, then speak to the king. The monkey is automatically freed from the player's inventory. Exit the throne room and speak to Garkor. A cutscene will play, that was overheard by Waymottin and Bunkwicket. Waydar and Caranock have convinced Awowogei to kill the 10th Squad so that King Narnode will invade the human kingdom. They also mention Glough's "pet".
The Final Battle
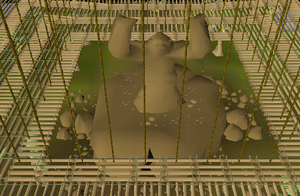
Speak to Garkor again. He tells players to prepare for the final battle. Players must not rub the 10th squad sigil he gives them until they are ready. Doing so teleports them to the final battle. When the sigil is rubbed, it will start to shake. Within five seconds, the player will be teleported.
If players lose the sigil, they can talk to Garkor. He sends them to the dungeon to talk to Waymottin, one of Gnome sappers with Zooknock. Players can use the drop trick on Waymottin to obtain multiple sigils, doing away with potentially multiple journeys to the dungeon.
Unequip the greegree and teleport to a bank if you need to. Stock up with your chosen combat gear. It does not matter where you operate the sigil, so feel free to teleport off Ape Atoll. Once you are ready, wear and operate the sigil.
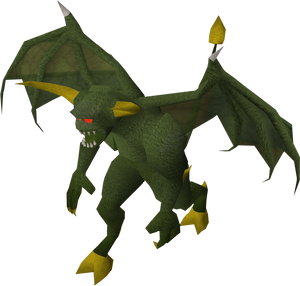
The jungle demon is a formidable foe, hitting up to 320. The demon uses magic if players are out of range of its melee. If players get too close, then it attacks with both magic and melee. Its melee can hit over a square like Halberds. The surviving 10th squad helps with the fight, although they typically hit less than 10 life points damage. Also, if you can do the give thanks emote, the demon cannot attack you. While doing this, a glitch may occur where you can fight while doing the emote.
Before the fight:
- Players should make sure their life points and prayer points are at their maximum. Using the +20 prayer bonus at the Monastery can be beneficial.
- It is highly recommended players preform the drop trick and acquire more than one 10th squad sigil as without another, it is virtually impossible to return to a gravestone upon death during the battle.
- Players should make sure their inventory matches the combat style they are going to use. Include a one-click teleport for an emergency and a dose or two of anti-poison.
- While fighting, players should closely monitor their life points and make sure to keep them as high as possible without wasting food. Dropping below 320 makes players vulnerable to dying with a single hit.
- To begin the battle, activate Protect from Magic (as the magic attacks of the demon are quite powerful) and wear the 10th squad sigil. Be aware that the sigil is worn in the neck slot, so players need to equip whatever amulet or symbol they want after arriving at the battle. After 10 seconds, the player will teleport to the battle (you don't need to be in Ape Atoll to use the teleport).
The easiest Method:
- Letting the 10th squad do most of the killing is the easiest method, but takes a considerable amount of time. Just make sure not to let them kill the demon on their own, as the demon will regenerate if you do not help fight it.
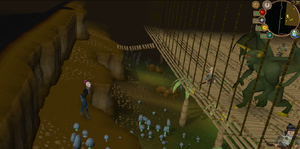
Where to stand while the gnomes attack the demon. - There is a border that goes around the combat platform. To the west there is a bridge that leads to this border. The demon does not attack players, with either melee or magic, if they are on this border. Please note that the demon will still be able to attack you with magic if you stand on the bridge leading to the border, and if auto retaliate is on, the character will run to the demon and will be vulnerable to both of its attack styles. Stay at the wall so the demon will not be able to reach you even with magic, and walk a little to south, because the gnomes only stay on the south-west part of the map.
- Angle the camera correctly to see the demon's life points. When the gnomes have almost killed the demon, drink a super attack and super strength potion, and run in to finish him off, using all available special attacks.
- Simply letting the gnomes kill the demon does not work because it can heal itself.
- Wear any armour, preferably the highest dragonhide possible.
- The best weapon for this method is a Dragon Dagger. Make sure the special attack is on and auto-retaliate is off before teleporting.
- A weapon other than the Dragon Dagger also works. For example, Ranged Pures can use Diamond bolts (e) or Dragon bolts (e).
- When you get teleported, the demon is a little far from you, that gives time to look around the map using the square hole in the middle of the arena to slow the demon (This forces him to walk around it using a somewhat slow animation. This should not be attempted without Protect from Magic active.)
- When you are teleported, you cannot be attacked with melee by the demon. So, another method is to wear magic resistant armour or protect from magic and stand still while ranging or maging the demon. No food will be required, but 2-3 prayer potions are necessary to avoid running out of prayer.
Cannon method:
- For this method you need a Dwarf multicannon and around 60 cannonballs (it can be killed with less but its better to bring a lot if your range level is low), armour with melee defence (rune works and is cheap), as well as high healing food and prayer restore potions. (This can work for people with low range levels eg. 20)
- Make sure you have auto-retaliate turned off and turn on protect from magic. Go to the west next to the bridge, set up your cannon and load the cannonballs. Once your cannon is firing away cross the bridge to the border and wait for the demon to be killed. It can be killed in around 5 good shots and shouldn't take long.
Ranged combat:
- Wear armour, such as dragonhide, which gives the best ranged attack bonus.
- Wear a Holy or Unholy symbol, instead of a range-boosting amulet, to increase the time the player can use Protect from Magic or Melee. Players are advised that waiting for the Gnomes to Red bar the demon will take longer, it would be more wise to attack as well to speed it up. A close eye should be kept on their prayer points so that they do not run out.
- To kill this demon easily, players should be at least Level 61 Ranged (to enable use of a Rune crossbow), although it is not very difficult for a player with 40 Ranged if using the method described above, and is possible, although very time consuming for pures. Use Mithril or better bolts. Emerald bolts (e) are effective for poisoning the demon, and Diamond bolts (e) are good for penetrating its defences. Zanik's crossbow can also be used as an alternative for players that do not have 61 Ranged.
- Include 1-8 doses of Prayer potion (depending of the player's ranged and prayer levels) in inventory.
- Use the safespots on the bridge and border to prevent the demon from using melee and Protect from Magic to take little to no damage.

Melee combat (not recommended):
- Wear rune or better armour, and use Protect from Magic. Warning: Players with level 60 defence wearing Full Rune set easily takes 250 or more damage per hit, so watch your lifepoints if using melee.
- Wield the strongest weapon possible. Darklight's special attack may be useful for lowering the stats of the demon, but neither silverlight nor darklight are strong enough to be effective at dealing damage unless you have no access to rune or dragon weaponry.
- Wear a Holy or Unholy symbol, instead of a melee-boosting amulet, to make Protect from Magic prayer last longer if you are unsure of your prayer points and potions. (For their bonuses, they make good respective defensive and offensive neckwear)
- Using Protect from Magic is essential.
- Include 3-15 doses of Prayer potion (depending on the player's Strength and Attack level) and as much food (sharks or better) as possible in inventory.

Magic combat:
- The magic method isn't a recommended strategy to defeat the Jungle Demon; unless you have a decent Magic and Defence level of around 50+. With these stats, Mystic Robes (Elemental Armour is also a safe option if you can't afford the Mystic Robes, however a high magic level is strongly recommended for this replacement) and Protect from Magic on while using the safe spot, the Jungle Demon's Magic attack will barely be able to harm you. A decent amount of spell casts (around 150 to be safe) are needed however as the Demon has a high magic resistance.
- Wear a Broodoo shield.
- Wear a holy or unholy symbol, instead of a magic-boosting amulet, to make Protect from Magic or Melee last longer.
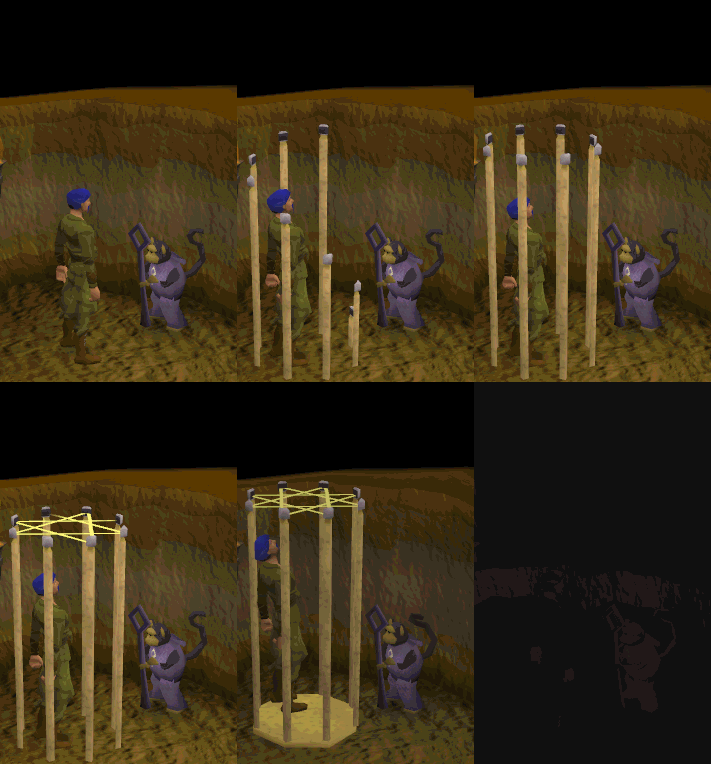
If you die you should choose to keep 10th squad sigil, so you can teleport back to demon and pick up your items. Once the Demon is dead, talk to Garkor, then to Zooknock. Zooknock offers to teleport the player out of the arena. If players accept, the teleport is to the jungle on Ape Atoll, so be sure to have the anti-poison recommended previously. If players decline the offer and stay, they are free to explore. However Zooknock leaves, meaning that the other gnomes are the player's teleport out. In the base of the statue is a rack which players can enter and speak to Bonzara. He offers to teleport the player out of the arena at the end of the conversation. However, the teleport puts players in the jungle on Ape Atoll, so be sure to have the anti-poison recommended previously.
Speak to King Narnode in the Grand Tree to finish the quest. Speak to Daero after the quest to get an experience reward, the 10th squad training programme. Players have a choice as to what experience they want. The experience for the first two skills is 35,000 experience and for the second two, 20,000 experience. Defence and Attack are one set of two skills. Strength and constitution are the other. Pure players should be careful when speaking to him after the quest, by not choosing any of the programme rewards. Even when you choose the Strength and Stamina option, you will still receive Defence experience which could potentially ruin your pure. It is possible to talk to Daero to travel back to the Crash Island without getting experience.
Congratulations, quest complete!
Rewards
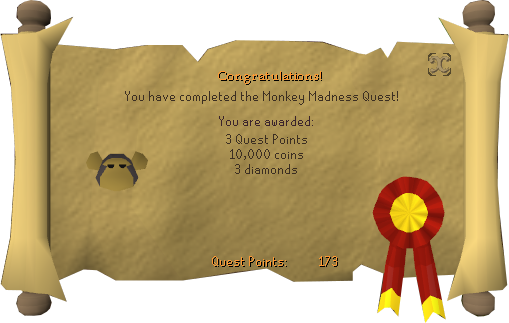
- By speaking to the King and Daero after the quest, a total of 110,000 experience, (note:1 defence pures should not do this as you will either receive 35,000 defence xp or 20,000 xp) with the choice to focus 35,000 in your chosen pair and 20,000 in the other. The choices are Strength and Constitution or Attack and Defence.
- 3 Quest Points
- 10,000 coins
- 3 Cut diamonds
- The ability to use the Dragon scimitar
- Ability to create greegrees to transform into different monkeys. Bring the bones of the type of monkey desired and a monkey talisman to Zooknock in his tunnel.
- The ability to use the Ape Atoll Agility Course
- Access to Ape Atoll
- 2 extra spins on the Squeal of Fortune
Music Unlocked
Required For Completing
Completion of Monkey Madness is required for the following:
- Do No Evil
- Recipe for Disaster/Freeing King Awowogei
- Ardougne Tasks:
- Hard: "Get Your Stinking Hands Off Me"
Trivia
- If you speak to Zeke in Zeke's Superior Scimitars in Al Kharid and ask him "Can you sell me a Dragon Scimitar?" he will say "You're going to be a monkey's uncle before you will ever hold a dragon scimitar!" and if you have finished the quest your character will respond "Hmmm, funny you should say that...". As shown in step "Making the Greegree", when you talk to the monkey child you must say you are his uncle to go any further. Also, if you climb the bamboo ladder in the Monkey Child's house, his real uncle is upstairs. This is a joke added by Jagex intentionally.
- Upon the completion of this quest, one's Adventurer's Log will read: "During a mission to Ape Atoll I uncovered a plot against humankind. With the help of the 10th Squad, I’ve put an end to Glough’s scheme."
- When you're delivering the monkey it may say "In the Jungle The Mighty Jungle" as a reference to the classic Tokens song The Lion Sleeps Tonight.
- After creating the monkey greegree, you can buy a new talisman from the general store (1,000 coins) and return it to the monkey child. It will say: "Thank you uncle." "I love you!"
- This is the only quest that progresses in 'chapters'. The chapter's openings are in the style of Henry Fielding and Charles Dickens.
- This quest doesn't change the language for genders, so female players are referred to as him, he, and uncle.
- If you have any bananas in your backpack after rescuing the monkey from Ardougne zoo, the monkey will eat them.
- When offering the alliance to King Awowogei, his advisor says "never trust a northern monkey", a reference to the supposed hatred between Scotland and England. Scottish people being the northern monkeys, and English being southern softies.
- This quest bears similarities to the 1968 film, Planet of the Apes.
de:Total Banane no:Monkey Madness es:Monkey Madness nl:Monkey Madness fi:Monkey Madness