Taverley Dungeon
| File:Inside Taverley Dungeon.png | |
| Kingdom | Asgarnia |
|---|---|
| Members Area | Yes |
| Main Music | Courage |
| Levels | 1 |
| Strongest Monster | Black Dragon |
| Quests | Scorpion Catcher, Heroes' Quest, Wanted!, Druidic Ritual and The Void Stares Back |
| Inhabitants/Race | Various, mostly Zamorakians |
| Multicombat? | in some areas |
 Click the map to view a larger version (opens on a new page). | |

The Taverley Dungeon is the fourth largest dungeon in RuneScape, surpassed only by Brimhaven Dungeon, the Chaos Tunnels and the God Wars Dungeon. There are many monsters, ranging from low to high combat levels, with the stronger ones located deeper in the dungeon. There are several poisonous monsters within the dungeon, so bringing Anti-poison potions and super anti-poison potions are recommended. Dragons are found in the central and very deepest parts of the dungeon, so bringing dragonfire defence such as Anti-dragon shields is recommended for players venturing in these areas.
The dungeon has the entrances of two Resource dungeons in it. These require 55 and 60 minimum Dungeoneering levels to enter for the hellhound resource dungeon and blue dragons resource dungeon respectively. The Blue dragon chamber of the dungeon and the resource dungeon accessed from this chamber are the only locations where Blue dragon scales spawn. These are an important, expensive ingredient used in Herblore.
Since the Taverley Dungeon was the only members-only dungeon when members was released, it was often called the members dungeon.


Location
The entrance to the dungeon is found due south of Taverley and west of Falador. After the update Troll Warzone, it is fairly close to a bank, directly south of the dock past the bridge by the wheat patch. (the boat carries to Daemonheim and from there to Al Kharid or back to Taverley).
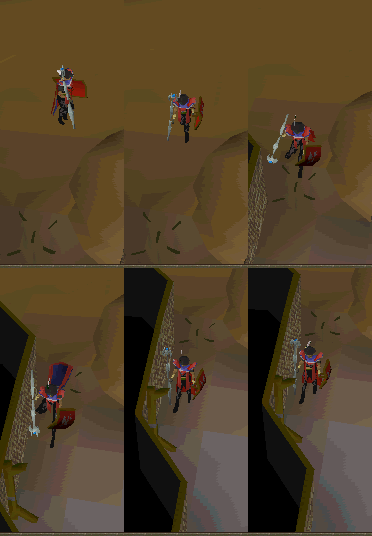
The Water Obelisk on Water Obelisk Island can only be reached by traversing the dungeon. Water Obelisk Island is just off the coast near Catherby. There is a one-way Mithril grapple shortcut from the island to the shore which requires 36 Agility, 39 Ranged and 22 Strength.
The Dusty Key

The Dusty key is required to access the deeper areas of the dungeon. To obtain it, go through the dungeon headed south to The Kinshra's (Black Knight) headquarters. Go into the narrow eastern passageway, kill the Jailer (level 47), get the Jail key he drops, use it to open the door of the jail cell and talk to the prisoner Velrak the Explorer to get the key. (Players will not get the dusty key if asking for a reward. If this is done, talk to Velrak again and choose the other conversation branch.) Note: You can use the drop trick to get more than one key at once, in one visit. Simply drop the first key Velrak gives you and talk to him again immediately.
Although supposedly freed, Velrak does not leave his cell. If the dusty key is lost, another one can be obtained by simply repeating the above actions.
The dusty key is not tradeable, but it can be purchased in the Legend's Guild shop. A dusty key always spawns deep in the dungeon near the lava eel fishing area. Since this is in the area behind the gate, most players who do not already have a copy of the key cannot reach this area to take this spawn. (Players with level 70 Agility can get the key by using the shortcut to the blue dragon area and going south to the lava eel area.)
A Tour of the Dungeon
- The entrance/exit ladder is the only way into the dungeon.
- Near the ladder are two very useful shortcuts. If you have the levels to use them there is no need to bring the dusty key.
- The level 70 agility shortcut goes directly to the chamber containing Blue Dragons, Baby Blue Dragons, Blue dragon scale, and a Dungeoneering Resource Dungeon. (See Taverley Dungeon resource dungeon for more details on what it contains.)
- The level 80 shortcut goes to the Poison spider area deep in the dungeon.
- If taking these shortcuts, beware of the Poison spiders and Blue Dragons, as they are aggressive.
- The corridor north of the ladder contains many aggressive Skeletons.
- Two Suits of Armour stand before the door to the room with the Cauldron of Thunder. They come to life and attack players who attempt to pass the door. Players can fight the suits, or just keep clicking on the door to pass through it. The Cauldron of Thunder was used in the old version of the Druidic Ritual quest.
- The north-eastern area contains Ghosts and Giant bats. Players rarely train on these monsters because of their poor drops.
- The north-eastern-most chamber contains Chaos druids. They are popular targets because they frequently drop herbs.
- A few Black Knights patrol the corridor south from the druids, where Lesser demons can be seen through some stalagmites.
- A more decorated room contains many aggressive Magic axes.
- The corridor south of the axe room contains Poison Scorpions. They are indeed poisonous and are aggressive to players under level 41. From this area, players can go south or cross a bridge to the west.
- On the south route is a chamber of Hill giants, which many players like to train on. The ones here are more remote than the giants in Edgeville Dungeon or by the Observatory, so fewer players come here.
- South of the giants is the Black Knight (or Kinshra) headquarters. It is swarming with black knights and also contains their leader, Lord Daquarius, as well as the Jailer and his prisoner, Velrak the Explorer.
- On the west route crossing the bridge by the scorpions, many Chaos dwarves inhabit these regions.
- The lesser demons are north of the dwarves. They guard the door to the blue dragon chamber, which must be opened using the dusty key. If planning to use the door, consider turning off auto-retaliate here so that time wont be wasted responding to the demons' attacks.
- The next chamber contains blue dragons, baby blue dragons and several spawns of blue dragon scales, which are used in making Antifire potions. This is a favourite spot for dragon slaying, so there is sometimes considerable competition for the dragons.
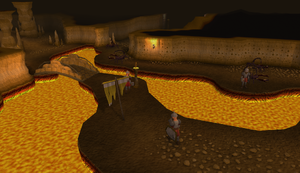
- The corridor to the south has a lesser Summoning Obelisk where summoning points can be recharged. Down the corridor are three fishing spots for Lava eels. The eels can only be caught during and after the Heroes' Quest and require the use of an Oily fishing rod and Bait. Three baby blue dragons roam the area here and may bother players attempting to fish. Apart from players doing the Heroes' Quest, lava eels are rarely fished. The place is remote, and the food value of the eels is matched by fish found in more convenient places.
- The next corridor swings north and a chamber of Black demons soon opens up. This can be considered to be the start of the deep, dangerous part of the dungeon.
- North of the demons are several corridors and rooms infested with Poison spiders. One room has a false wall that can be pushed through, and contains one Kharidian scorpion, which players must catch during the Scorpion Catcher quest.
- The Hellhound chamber is north of the spiders. Players on hellhound Slayer assignments are often found here. There are some safe spots in the area where the hellhounds can be safely ranged or maged.
- Some aggressive Monks of Zamorak have their own special chamber west of the spiders.
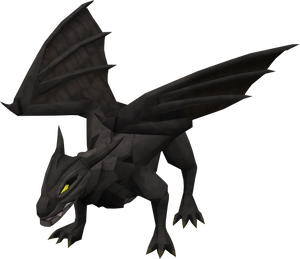
- The Black dragons are found north of the monks. Some players come here to fight them, while others just dodge them on their way to the Fire Obelisk or Water Obelisk. When using the Fire Obelisk, try to put the obelisk between you and any dragon trying to attack so that you can safely use it.
- The ladder leads up to the Water Obelisk on Water Obelisk Island. There are no monsters on the island, so the obelisk is easy to use. There is a one-way Mithril grapple shortcut from the island to the shoreline near Catherby that requires 36 Agility, 39 Ranged and 22 Strength. If planning to use the shortcut, consider carrying two grapples, since grapples can break when used. If you don't use the shortcut, teleport away, as making your way back through the dungeon is very time consuming.
Monsters

- Baby Blue Dragon
- Black demon
- Black dragon
- Black Knight
- Blue dragon
- Chaos druid
- Chaos Dwarf
- Ghost
- Giant bat
- Hellhound
- Hill giant
- Jailer
- Kharidian scorpion
- Lesser demon
- Magic axe
- Monk of Zamorak
- Poison spider
- Poison Scorpion
- Skeleton
- Suit of Armour
NPCs

Trivia
- When standing in the Chaos Druid area, the dungeon from Witch's House with the lvl 109 Experiment No.2 can be seen.
- When Jagex released the HD update on 1 July 2008, the Black demon area of the dungeon was a multicombat zone. This has since been fixed.
- The dusty key spawn over near the lava Eel fishing spots cannot be telegrabbed from the Chaos Dwarf area because it is too far away.
- Before February 1, 2011, only members could unlock the music track Courage. Free players may now unlock it from the northwest corner of the Forinthry Dungeon.
- A graphical glitch causes the Lava eel fishing spots to float in the dungeon.
- Resting where the Poison Scorpions are causes you to have a small black circle at your face. It has not been fixed.