Legacy of Seergaze
| File:Legacy of Seergaze.png | |
| Also called? | LoS |
|---|---|
| Release date | 22 April 2008 (Update) |
| Members only? | Yes |
| Quest series | Myreque |
| Official difficulty | Experienced |
| Official length | Long |
| Developer | Tytn H |
- "LoS" redirects here. For the realm, see Land of Snow.
Legacy of Seergaze is the fourth quest in the Myreque quest series, where you must press further into Morytania to further aid the Myreque in their rebellion against the Vampyres. You will craft a weapon capable of defeating the Vyrewatch that oppose the citizens of Meiyerditch and discover the secrets of the Columbarium.
Official description
| “ | Mercenaries make their way into the rotten swamps of Morytania from Paterdomus to the front-lines at Burgh de Rott. The Vyrewatch continue to draw blood tithes from the pitiful citizens of Meiyerditch, the great ghetto-city of the Sanguinesti region, its weakened citizens growing fewer in number every day. The vampires are getting more tithes from somewhere, but how long before House Drakan settles its eye upon Misthalin and the lands to the west?
What new efforts can the Myreque make in this struggle? A rumour drifts through the hard-bitten mercenaries assembled near Paterdomus: something suspicious is happening in the main temple, something odd even for the border of Morytania and Misthalin... What's more, Drezel has made a curious discovery beneath the well in the Paterdomus basement - something that harkens back to Morytania's bloody and terrible past. And what of the mysterious Safalaan? Surely he has more adventurous tasks for an enthusiastic, young and recently-promoted private of the Myreque. What new secrets are to be discovered in Morytania? Can the Myreque strike back against the dreaded Vyrewatch? |
” |
Walkthrough
| Start point: | ||
| Members only: | Yes | |
| Official difficulty: | ||
| Description: | None | |
| Length: | Long | |
| Requirements: |
| |
| Items required: |
'Items obtained during quest :
Toolbelt can be used. Recommended :
| |
| Enemies to defeat: |
|
At Paterdomus
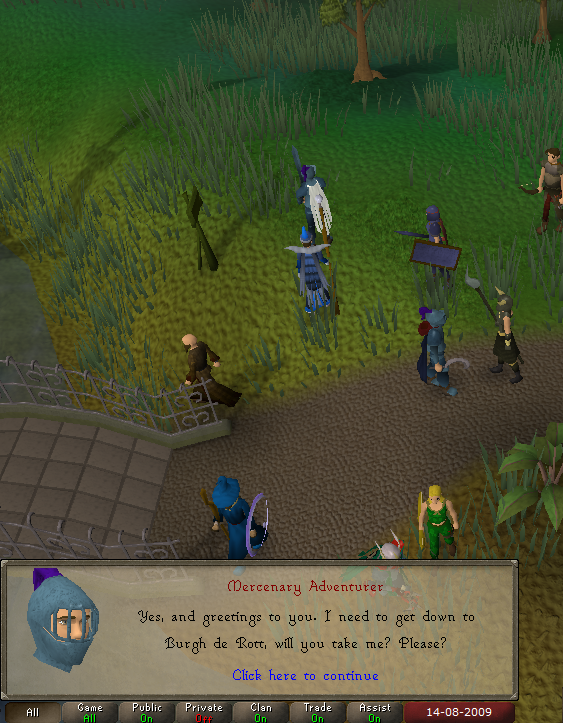
Talk to the Mercenary Adventurer at the Burgh de Rott Ramble start point, east of Paterdomus. He asks if the player can take him to Burgh de Rott. Before leaving, though, he makes a comment about some strange characters he has seen. Question him about the characters. He advises talking to Drezel.
An evil conspiracy
Go down the trapdoor to the mausoleum and talk to the monk. Drezel hasn't noticed anything suspicious about the temple, due to the fact that he has been too busy restoring the mausoleum. During the restoration process, he has discovered a secret room, a columbarium (burial chamber). He asks that the player searches both the burial chamber and the outside of the temple.
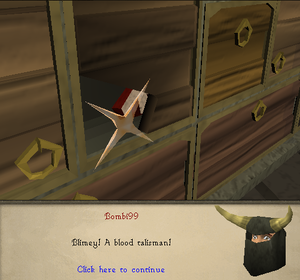
Searching the columbarium is optional. Go west from the monk through the gate. There is a new stairway on the north wall of the main hall. Go down the stairs to the columbarium. Search a broken wall storage unit just east from the stairs. There is a shiny object inside that appears to sparkle. Upon closer examination, the object seems to be a Blood talisman, but a key is required to open the storage unit.
Exit the mausoleum to the west and enter the upper temple. Go up the stairs to the first floor, then up the ladder to the second floor. A cutscene of the suspicious characters plays.
Players must fight two level 80 guards, Fistandantilus and Zaromark Sliver. The guards can use Protection prayers and all combat styles. Players must fight using multiple combat styles to work around the guards' prayers. It is possible to leave and return, but players must defeat the guards to proceed past this point. Since the guards don't use prayer at first, players have an opportunity to use whatever special attacks are available to them.
Only two combat styles are required. Players may start with their first attack style and switch styles when the guards pray to protect from it. When they begin praying against that, switch back to the first attack style, and so on. The guards can be poisoned. If poisoned, they yell, "Gack! Poison!"
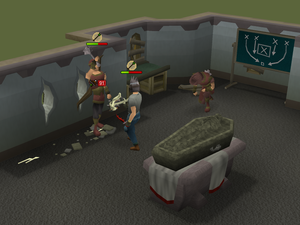
The special effect of a full Verac armour, the Dragon scimitar special attack and the Ancient mace special attack are ineffective against both guards. However, the mace does restore prayer points equal to damage that would have been dealt if they didn't pray. The guards do not do much damage or hit often for their level, but due to their ability to change attack styles to hit around prayer, they are more difficult than they may seem at first.
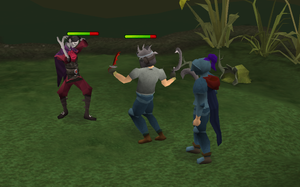
When both guards are almost dead, they'll teleport away. Once they have left, search the crude table in the northwest alcove for clues to find a torn book page and a glove. Return to Drezel, who will ask you to escort the Mercenary Adventurer to Burgh de Rott. This escort is the same as any Burgh De Rott trip. Players should take a silver weapon to deal with potential Juvinates, and may wish to take food for the Mercenary Adventurer.
If players are disinclined to engage in extra combat, they may simply take the easy route and run from all combat.
The Myreque's Task
The adventurer reveals himself to be a fellow Myreque member, and the person you helped, Ivan Strom.
Follow him back to the Myreque base under the old inn and talk to Veliaf Hurtz. Tell him about the plans to take out the Guthixian Edicts. Afterwards, ask him about the next job, at which point he gives the player a crate destined for Safalaan who needs provisions. Veliaf also mentions a new weapon meant to take out the Vyrewatch.
Go to the boat to the southeast and take it to Meiyerditch. Go to Safalaan in the Myreque base. Refer to the Meiyerditch shortcut guide for help. Talk to Safalaan. He asks you to talk to fellow member, Flaygian Screwte, in the same room.
Talk to Flaygian. Ask him about the research he's doing. He tells players that the book of Haemalchemy (found in Darkness of Hallowvale) hints that the vyrewatch have a "sixth sense." They can predict a person's moves, easily evading them. The best way to beat them is to create a new, completely unpredictable weapon. Players should ask him if they can help. He tells them to talk to the local fighters.
In Search of the Weapon
Talk to Andiess Juip or Kael Forshaw. They advise players to use a flail, described in a book about the weaponry. Search the middle bunk bed on the north wall of the eastern room and you'll find a book. Read it, then give it to Flaygian. He is annoyed by the fact that he would need to read a whole book, so he asks which part he needs to read instead.
Answer with the page number where the book begins to describe flails. This number is different for each player. He reads it, then tells players of a furnace he wants them to investigate. He provides a hammer and ten nails to construct a makeshift ladder.
Exit the base and head to the northernmost part of Meiyerditch. Look for a house with the mass of debris due east of the mine exit or north of the lab. This is the house with the furnace, but the door is locked. To make getting there easier, you may get sent to the mines and when you exit you will be right next to the houses.
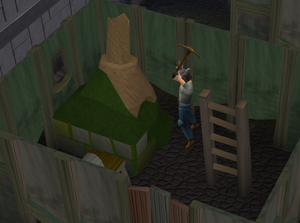
Enter the house directly south. Use the hammer on the centre post and you will construct a climbeable wooden post with the nails you received. Climb up the post. Jump across the floorboards to the east, then to the north. Jump west through the damaged wall, which caves in.
Climb up the ladder. Search the trough to see the furnace below. Take the pickaxe (unless you brought your own), tinderbox, and coal from the coal barrel. Go to the bottom floor and use the pickaxe on the mass of debris. Once the furnace is clear, use the coal on the furnace and light it with the tinderbox. Do not drop the tinderbox unless you have another because it is used again later in the quest. A Dwarven Army Axe counts as a tinderbox.
Return to Flaygian. He tells players to make the flail.
- In the same room as Flaygian, take two silver and two mithril bars from the barrel on the northern wall.
- Take a blessed sickle from the shelf on the south-western wall.
- Go to the room to the east of the entrance ladder and search the crate for a chain link mould. Note: This can be added to your toolbelt.
Return to the furnace. Use one of each bar to make the Silvthril chain (47 crafting needed). There is one spare bar of each type. Although it is not required for the quest, players may make another chain if they want to get a start on making a second flail.
Return to Flaygian and talk to him, then use the blessed sickle on him. He takes the chain and sickle, then tells players to talk to Safalaan.
Return to the Lab
Safalaan introduces the player to Andiess Juip and Kael Forshaw. He then asks the player to meet them at the laboratory and to help them search it. Take a saw from the tool rack on the west wall before departing for the lab (toolbelt does work), then proceed to the laboratory, which is south-east of the furnace (recall from Darkness of Hallowvale that the laboratory is downstairs from the building with the slashed tapestry. Players must "walk through" the tapestry).
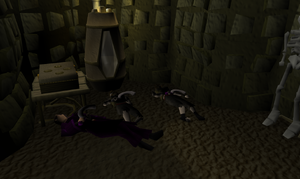
Upon entering the laboratory, a short cutscene plays, where you see Safalaan, Andriess, and Kael dead. Examine the body of Safalaan, Andiess Juip, and Kael Forshaw lying next to the broken rune case just west of the staircase. They will reveal that playing dead was just a joke.
Use the saw on the western side of the door to the south-west to make a hole in it (which gives 200 construction exp). Another cutscene plays. Go down the long and winding tunnel beyond the door to a chamber with Skeletal hands (level 80) and Mutated bloodvelds (level 126, 146). The skeletal hands are aggressive, unlike those in the Slayer Tower. The Mutated bloodvelds are also aggressive and have a magic-based melee attack. Go through another long passage to the north-west to reach a large room.
Vyrewatch and The Ivandis Flail
Enter the room to see a cutscene with Safalaan and the bodyguards. After the cutscene search the corpse next to the large rocks to receive a few runes (including enough for Enchant Level 2 Jewellery). Safalaan tells the player to search the rocks in the northern part of the cavern.
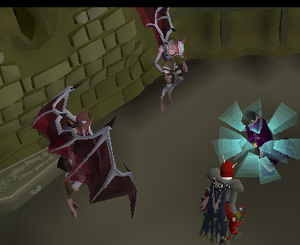
When you search the rocks, they will feel familiar somehow. Report that to Safalaan. A cutscene plays in which Vyrewatch attack Safalaan and the bodyguards. Do not attempt to help them even though they appear to be losing. Safalaan will then tap into a new power, scaring off the Vyrewatches. Eventually Safalaan and the player return to the Myreque base.
Talk to Safalaan. He wants to keep what happened quiet. He gives the player the materials for the Ivandis flail: the chain, the sickle, the Rod of Ivandis, and a cut emerald.
Get a chisel from the tool rack (toobelt works). Follow these steps carefully, as you cannot get some items back from Safalaan.
- Use the emerald on the sickle.
- Then, use Enchant Level 2 Jewellery on the emerald sickle (You can return to the caverns to search the corpse if they still need the runes).
- Afterward, use the chain on the enchanted emerald sickle or the Rod of Ivandis to create the Ivandis flail.
Return to Safalaan. He asks you to test the new flail by killing a Vyrewatch. The Vyrewatch are strong (up to level 140), but their attacks are very inaccurate, though protection prayers or food are advised. Make sure that you kill the Vyrewatch within the Meiyerditch area, since if you kill one in Burgh de Rott, it will not count and you won't get the corpse. The first fight with the Ivandis flail is somewhat slow, so a few prayer potions may be useful.
Go outside and kill a Vyrewatch. When it dies, it drops a Vyre corpse. Take it and return to Safalaan. He then orders the player to return to Veliaf in Burgh de Rott.
Back to the Columbarium
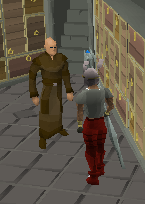
Return to Burgh de Rott and tell Veliaf the good news. (It is advised to just teleport out and then return by any means. Home Teleporting to Yanille, then running north to the fairy ring, then using the fairy ring to teleport to Mort Myre, then boarding the swamp boat to Burgh de Rott may be the fastest way.) He advises players to go to Drezel to find a way to dispose of the corpse. Ask Veliaf what to do next or Drezel will not examine the corpse. Get teak or higher pyre logs and a tinderbox at the bank before leaving the area.
Return to Drezel at the Paterdomus temple. He examines the corpse and is surprised that there's a tormented soul in the body. The player remembers something similar (Shades of Mort'ton), but can't quite pin it down. Ask Drezel what to do next and he suggests going to the columbarium (just out the door to the north) to meditate.
Go to the columbarium. Use the pyre logs on a funeral pyre, followed by the corpse, then light it. Players get an Ornate tomb key. If you leave the logs on a funeral pyre for too long without adding the corpse, they disappear, so don't delay. Any logs or corpses placed on the pyre, but not lit, cannot be picked up again and disappear upon exiting the Columbarium. Players who place the corpse on the pyre, but forget a tinderbox, need to kill another vyrewatch and return with its corpse, more pyre logs, and a tinderbox.
Go to the locker with the Blood talisman optionally noticed earlier. It's in the unit east of the ladder. Players notice something shining when they come across it. Search it to open the storage and to get the object. The key vanishes, but players obtain the Blood talisman. Drezel comes in to congratulate and bless the player, then leaves.
Go back upstairs and ask him what to do now. Drezel advises going back to Veliaf. Return to Burgh de Rott and tell Veliaf what happened at Paterdomus.
Congratulations, quest complete.
Reward
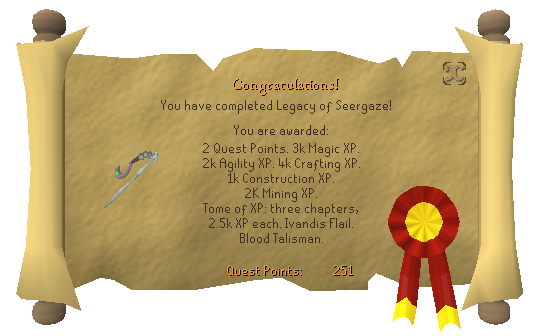
- 2 Quest points
- 3,000
 Experience
 - 2,000
 Experience
 - 4,000
 Experience
 - 2,000
 Experience
 - 1,000
 Experience
 - 2,000
 Experience
 - Tome of xp 2nd ed, a tome of experience with three chapters, giving 2,500 xp each (the skills chosen must be at least Level 35)
- Ivandis flail
- Blood talisman
- 2 extra spins on the Squeal of Fortune
- Ability to craft Blood runes at the Blood altar with 77 Runecrafting
- Access to Meiyerditch Dungeon including Skeletal hands, Zombie hands, Bloodvelds and Mutated bloodvelds, as well as a shortcut to the original Myreque Hideout tunnels.
- Access to a furnace in Meiyerditch.
- Access to the columbarium beneath Paterdomus and the ability to cremate the Vyre corpse for rewards.
- Access to Vyrewatch event in Temple Trekking
Music unlocked
- Conspiracy: Part 1 - during the Paterdomus temple cut scene
- Conspiracy: Part 2 - during the same cut scene
- The Terrible Tunnels - in the Meiyerditch secret laboratory
- The Terrible Caverns - in the long tunnel before entering Mutated Bloodveld's lair
- The Columbarium - during burning the Vyre corpse
Required for Completing
Legacy of Seergaze is required for completing the following:
Trivia
- On the first day of release if players clicked to see the spoilers they received the message: The reward scroll is currently covered in horrific bloodstains, so it's quite illegible. We should have a replacement ready tomorrow.
- On the first day of release, when you right click on the smoke that the furnace in Meiyerditch is creating when you fixed it, it would say null.
- The music played when Safalaan scares you is the opening to Surok's Theme .
- The picture for the quest on the Knowledge Base article was animated until the website update.
- After fighting Fistandantilus and Zaromark Sliver at Paterdomus, Zaromark Sliver will teleport away with the new teleport animation just like the rest of the people in the room, but Fistandantilus's teleport has the old teleport animation, with a shrinking purple ball of magic imploding towards his chest.
- There is a typo after you bring the book page and glove to Drezel and he tells you to escort the Mercenary Adventurer. You get the option to say you have 'forgetten where Veliaf is!'.
- When talking to Veliaf about Safalaan using his power, you make a reference to Monty Python and The Holy Grail, specifically the "Brave Sir Robin" song.
- When Safalaan scares you, or destroys the vyrewatch, he temporarily goes back to his old look, then turns back into the new version of him, which was released after Branches of Darkmeyer.
Template:MyrequeQuests es:Legacy of seergace nl:Legacy of Seergaze fi:Legacy of Seergaze