Another Slice of H.A.M.
| File:Another Slice of H.A.M.png | |
| Release date | 24 April 2007 (Update) |
|---|---|
| Members only? | Yes |
| Quest series | Dorgeshuun (#3) |
| Official difficulty | Intermediate |
| Official length | Medium |
| Developer | John A |
Official description
| “ | The dwarves are building a new underground rail link between their city of Keldagrim and the cave goblins' Dorgesh-Kaan, but work is being held up by the discovery of ancient goblin artefacts, and they need the help of a qualified archaeologist. Helping them out should be simple enough - unless you stumble upon another H.A.M. plot against the city. | ” |
Development team
- Developer: John A
- Graphics: Matthew M, Paul V, Kavi M, Giuseppe G
- Quality Assurance: Francis B, Christopher E
- QuestHelp: Stephen R
- Audio: Adam B, Dan A
Walkthrough
| Start point: | ||
| Members only: | Yes | |
| Official difficulty: | ||
| Description: | None | |
| Length: | Medium | |
| Requirements: |
| |
| Items required: |
Recommended:
Note: It is possible to hide just before the archer or mage shoots, therefore making the battle very easy. | |
| Enemies to defeat: |
|
Excavation


Speak to Ur-Tag or Ambassador Alvijar to start the quest. They can be found by going to the northern part of Dorgesh-Kaan. If you don't know how to get there go directly south from Mistag and you will see a door that you can open which leads to the city. When in the city climb up the stairs, then head east to the house with a Quest start icon. They will explain they are making a train route between Keldagrim and Dorgesh-Kaan.
Go South-west of the city on the same floor until you find a transportation sign on the minimap.
WARNING:If you have bloom lighting turned on, turn it off until after this part of the quest.
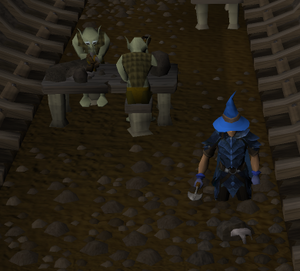
Go through the doorway and you will end up in a train station. Walk south down the track and talk to Tegdak, who will give you a trowel and a specimen brush. Dig up the artefacts hidden in the floor by using the trowel on them. There are two north of the specimen table and four south of the southernmost sample table. Clean all six artefacts by using an artefact on the specimen table—you will then end up with an armour shard, a hatchet head, a helmet shard, an ancient mace (Just called 'Mace' at the time), a shield fragment and a sword fragment. After cleaning those, talk to Tegdak again.
Now take Zanik with you and go to the goblin scribe in the house west of Ambassador Alvijar's house (the quest start point). (Note, the mace will not show up in your inventory) Talk to him about the symbols that are covering the mace that you found. The scribe will not be able to tell you anything about the symbols but he suggests that you go talk to the goblin generals in Goblin Village.
To the Village

Talk to Oldak. To get to him, go west from the scribe's house, into the house and then down the stairs in that house. He will teleport you to Goblin Village and will give you a sphere to teleport back to the city. If you mess up or leave the city you can go back to the tracks and get Zanik again.
Once you're in the village, talk to one of the generals and a cut scene will begin. At the end, you discover that Zanik is most likely the goblins' "chosen one" to lead them. The mace is also found to have the power of the Goblin God.
The Hambush

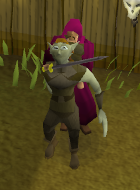
At the end of the cut scene, two H.A.M. members show up and start attacking the goblins with Magic and Ranged. Take the path around the back (west side) of the buildings, but stay out of the attack range. When you get to the tower, climb up the ladder and kill the H.A.M. mage and H.A.M. ranger with either mage or range. Note: The Magic-Using H.A.M. member NEVER splashes, no matter what armour you wear.

You can simply fight the two foes, or take time by clicking Hide-behind Crate. Hiding will make players unable to be attacked, but unable to attack as well. The mage and ranger will hit at the same time, so using protection prayers can only reduce damage. For this part, it is recommended that you wear dragonhide or other armour with good magic and ranged defence bonuses. Please note that Ava's accumulator/ attractor will not work for your expended arrows, and since you cannot retrieve them after the battle, it is not recommended to use expensive arrows. Note that there are 50 bronze bolts as well as a crossbow by the crates which you could pick up and use.
Note: If for any reason you have to leave during the fight, you can go back to Goblin Village again without having to go back to Dorgesh-kaan and you will be brought back to the H.A.M attack.
When you have done this, there will be another short cut scene where Zanik is kidnapped by Sigmund. The goblin generals will tell you they are sending two sergeants to help you and that you should meet them at the Lumbridge Swamp Caves. They will also give you the ancient goblin mace. If you lose the mace, you can buy it from the Generals Bentnoze and Wartface for 1,000 coins.
Getting Past the Guards
Sigmund plans to kill Zanik on the train tracks between Keldagrim and Dorgesh-Kaan, making it look like an accident so that war will break out between the dwarves and the goblins. You cannot enter through the Dorgesh-Kaan entrance this time, so you must go to the swamp cave entrance and meet the goblin warriors who will be helping you.
Now go to the Lumbridge swamp (You will need your rope for this step) and talk to the goblin sergeants, Sergeant Slimetoes and Sergeant Mossfists. They should be near the entrance to the Lumbridge Swamp Caves (make sure you have your light source for this part).
Climb down the "Dark hole under tree" into the caves, and next to the rope should be a ladder. Go down it and you will briefly see a H.A.M. guard before he runs away to get reinforcements. Now quickly run down the hallway and hide in the storeroom while the first two guards pass. Then walk out and hide behind the first set of crates, and wait for one more guard to come out. (By this point, at least one of the guards will have noticed you- Don't worry, as long as you hide behind the crates before he arrives, you will be safe.) Once the next guard stops moving, start walking toward the final guard, and immediately double back to the goblins. He will head toward the goblins, leaving you free to proceed to the ladder.
Note: If a guard does see you, quickly run to the goblins before he gets near you, as you will be forced to restart from the entrance to the caves should he get too near.
Another Sigmund Showdown

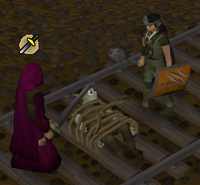
At the bottom you find that Sigmund has Zanik tied to the tracks of the new train station. Use any attack on Sigmund, and he will set his prayer on (according to your choice of attack). Now wield the ancient mace and use Special attack to drain his prayer (requires full power). After that resume the fight. Now he will get hit, but he also seems to have a high defence. Low levels be warned. If you attempt to untie Zanik whilst the fight is in progress, you will be hit for around 100 life points of damage.

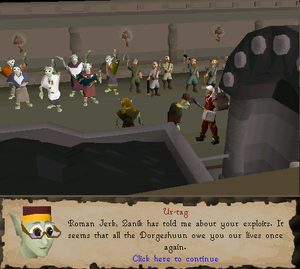
When he is defeated, he will teleport away. Untie Zanik, and watch the final cut scene to finish the quest.
Reward

- 1 Quest point
- 3000
 Experience
 - 3000
 Experience
 - 1 Dorgesh-kaan sphere
- Ancient goblin mace
- Ability to buy Goblin Village teleport orbs
- Free access to the Dorgesh-Kaan - Keldagrim Train System
- 2 extra spins on the Squeal of Fortune
Music unlocked
Transcript
Required for completing
Completion of Another Slice of H.A.M. is required for the following:
Trivia
- The quest name is a play on words; Another slice of H.A.M, literally a slice of a ham and the second meaning is about another chapter in the H.A.M's plot to destroy the Goblins and other monsters.

- Sigmund ties Zanik to a railway track. This is a classic scenario from old silent films, such as The Perils of Pauline and Charlie Chaplin films from the 1920s (hence the music in this scene: Slice of Silent Movie), and some cartoons, such as Dudley Do-Right and several others
- The quest page had a different spoiler message on the first day of release. Instead of the usual message it said: Stop! H.A.M. time! No spoilers for you, this day. This refers to "Stop! (one-beat pause) Hammertime!" from the song "U Can't Touch This" by MC Hammer.
- During the H.A.M. ambush if a player uses the nearby crossbow and takes cover to dodge attacks the battle becomes similar to light gun games, particularly, the Time Crisis Series.
- Upon the completion of this quest, one's Adventurer's Log will read: "Sigmund tied Zanik to a railway track, but I rescued her in the nick of time! The goblin Grubfoot believes Zanik is the 'Chosen Commander'."
- When Sigmund takes Zanik hostage he is using the classic iron longsword animation, But when you fight him at the end of the quest he is using an updated version. Jagex has not yet fixed this.
- From the excavation site, interesting things can be seen to the west using an orb of oculus: the finished station and a number of occult Daemonheim rooms.
- At the end of the H.A.M. attack cutscene, Zanik can be seen standing near a general during the fade-out.
- There is a glitch during the cutscene where Sigmund blinds and kidnaps Zanik; the flare-like spell he uses to disable her will keep flashing on-screen every few seconds, even after they're gone.
- During the sergeants' fight with the ham guards, you will gain constitution experience for their hits.
See also
Template:Dorgeshuun Series nl:Another Slice of H.A.M. fi:Another Slice of H.A.M. es:Another Slice of H.A.M.
