Smoking Kills
| File:Smoking Kills.jpg | |
| Release date | 5 June 2008 (Update) |
|---|---|
| Members only? | Yes |
| Quest series | Desert |
| Official difficulty | Intermediate |
| Official length | Short |
| Developer | Matt H |
Official description
| “ | Pollnivneach has a new inhabitant whose name is not Ali (or any variant of Ali, curiously enough). Who could this mysterious stranger be, and how did her sister end up trapped in a dungeon filled with Slayer monsters?
Do you dare to venture into the depths beneath Pollnivneach, where unknown dangers await amid smoke and screaming? The perils will be great, but, when rescuing a damsel in distress, the act should be reward enough... |
” |
Walkthrough
| Start point: | ||
| Members only: | Yes | |
| Official difficulty: | ||
| Description: | None | |
| Length: | Short-Medium | |
| Requirements: |
| |
| Items required: |
Note: Sacred clay armour may be useful for this quest, as all three forms of combat are used and sacred clay armour can transform itself to each of the forms. Recommended
| |
| Enemies to defeat: |
|
The missing twin sister


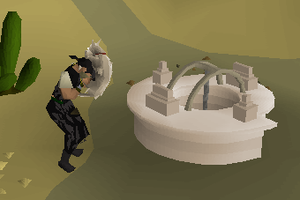
Speak to Sumona in the house marked by the Quest icon in north Pollnivneach, south-east of the Rug Merchant. She tells you that her sister, Jesmona, has been caught by a monster and trapped under the well in the centre of the town. She asks for your help; accept. Equip a Catspeak Amulet and attempt to enter the well. When you try to climb down the well, a cat called "Ali Cat" stops you in a cutscene.
Ali Cat warns you about the dangers of the well, which require wearing earmuffs and face mask at the same time. Ali Cat tells you to find a dead Slayer master called Catolax and have a talk with him to learn how to combine these items. The cat gives you hints that he is buried at the ruins of Ullek, east of the Agility Pyramid.
Over the desert and through the swamp
Note: Before this next step, make sure you have the following items: Amulet of Ghostspeak, Amulet of Catspeak, cat (or kitten), and equipment for long-range combat (runes to cast attack spells and/or ranging equipment). Food is optional for lower levels (85 to 95 combat). If you have not done Dealing with Scabaras, bring a rope to set up a handy shortcut. If you cannot deal fast damage with ranged or mage, it may be helpful to bring a Dragon Dagger(p++) for its special attack. It may help in maintaining the simultaneous death of four monsters.
Either take the magic-carpet ride to Sophanem (or Nardah), or walk to the Agility Pyramid, or if you have one; use your Pharaoh's Sceptre to teleport directly to the pyramid (Jaleustrophos). Go southmost from the Pyramid (reaching the sea), and you find an entrance of a swamp. Open the world map in advance and make sure you know where you're going.

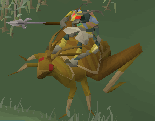
Be aware of the locust, scabarites, and crocodiles here. Turn on the Protect from Melee prayer, if necessary.
Make your way to the north-west part of the swamp by pushing through the reeds (it's not far, but the swamp is distinctly maze-like), go up the pillar and stairs, and arrive at a plateau with the lead and assistant archaeologists and a water source.
If you haven't before, optionally go west, climb over a small rock wall, and use your rope on a piece of rock jutting out over the edge (watch out for the level 125 mummies). This will make getting here in the future much easier. (Climbing the rope requires level 40 agility, so if you do not have 40 or higher, don't bother with the rope part.)
Walk through the pass north of the archaeologists. Be careful of the level 115 skeletons (you can refill your waterskins here if you wish). Enter the first dungeon you see to the west and search the sealed door.
Catolax in the tombs

You are in a tomb with a few doors and traps. Search the tomb near the entrance for a Steel pickaxe: You see it in the wall. If you have less than 6 mining, the Steel pickaxe will not work. If this is the case, bring a Bronze or Iron pickaxe. It is untested whether higher metals break the door you will encounter faster. A pickaxe in your toolbelt will work, so don't feel the need to drop anything.
Note: If you log out while in the tombs, you will be back on the plateau, just outside the entrance to the dungeon, when you log back in. If you leave or die while in the tomb, your progress will be saved. However, if you log out AFTER defeating the skeletons (and after destroying the walls) but before disabling the traps, when you climb back in the tomb, you will need to defeat them again.
Talk to your cat, and it has "some special advice from special sources." With your cat out, search the one of "A Holey Wall" on either side of the room; one leads to the skeleton ranger side, the other the skeleton magers. (refer to map) After a short conversation with your cat, you enter the room.
Turn off auto-retaliate, and run to break down the broken door. Protect range/mage is suggested to stop the damage from the skeletons. Once you have broken down the door, run behind it, but do not run any further- there are traps!
After you've destroyed the door, do not walk into the room yet. Traps on the walls can hit up to 190 life points, so disarming the traps first would be a great idea. On the wall on one side of the corridor before each set of traps is a rectangular switch. Searching the wall (not the odd markings) temporarily disables the traps. The message in the chat box is "With a subtle grinding sound, a hidden mechanism operates just ahead of you. You'd best make your move now."


Once you have passed two sets of traps, open the door at the end of the hall and enter the room. The room has two zombies and two skeletons. They have varied combat levels, and none is a serious threat. They have about 200 hp, so a single dragon dagger spec or a good hit from a dragon scimitar can take them out. They don't hit very high, but protect mage or range helps if you have the prayer points to use it.
Once you've killed the zombies and skeletons, wait a moment, and a level 54 Mummy Warrior climbs out of the central tomb. The zombies and skeletons respawn fairly quickly. It may be difficult to keep the zombies and skeletons dead simultaneously if you cannot deal fast enough damage, so it may be helpful to have a Dragon Dagger(p++) for its special attack, or a fast melee weapon. The best strategy is to hit them one or two times and leave them with only a few hp so that you can kill them off closer together. The Mummy warrior does not awaken unless all four are dead simultaneously and unless you turn off all protection prayers. Even though he's not much of a threat to those with 95 and higher combat, he's got decent defence and can still hit up to 80, so many turn on Protect from Melee once he is out of his tomb. Crumble undead, though effective on the 4 "minions," doesn't work on the mummy warrior.
Kill the Mummy warrior and pick up the key—it will either be a Magic path key or a Ranged path key, depending on which path was chosen. Now, use the key to open the door, and once inside, pull the lever. Walk back out to the centre again. You will not set off traps on this side any more after you have pulled the lever, and the skeletons will not rise and attack you.
If you did the ranged side, now it's time to do the mage side! Or vice-versa. Don't forget to disarm the traps in the second room! Once you've pulled the levers on both sides, the traps in the centre pathway are disabled too. Go back to the centre and walk over the disabled traps. With the traps, clicking "Pass" or "Search" should tell you that they're disabled. Walking over them is all you need to do.
After you pass the traps, you reach the dead slayer master Catolax. Equip your Ghostspeak Amulet, and talk to him. You have a "momentary insight, from a source that is completely unknown" and then know how to combine a Facemask with a pair of Earmuffs.
The banshees in the well
Go to the bank, get your supplies, and make your way back to the well in Pollnivneach. If you have not made it already, take your Earmuffs and use them with your Facemask to get a new item, the masked earmuffs. Put on your masked earmuffs, and go down the well.
Warning: Make sure to put on your masked earmuffs before you enter the well, or else you will *cough* and receive 200 damage quite often.
Head north, and kill a level 90 Mighty banshee to get a Banshee voice. If you don't get it the first time, keep trying as it is not a rare drop. The Mighty Banshees appear to use a magic-based melee attack, fighting them in black dragonhide seems more successful than, for example, dragon armour. They are easily safespotted if you attack one, then run back south along the corridor, as they will not go the full length along it. Use Protect from Melee prayer if required. Use the Banshee voice on the glowing red, wavering mystic barrier directly to the north.
The Banshee Mistress
NOTICE! DO NOT CLICK ON ANYTHING ELSE WHILST THE CUTSCENE IS IN MOTION OR YOU GO BACK OUTSIDE THE BARRIER AND WILL NEED TO ACQUIRE ANOTHER BANSHEE HEAD! However, after you kill the Banshee mistress, there will be another cutscene. If you click on anything else, you will go outside the barrier, BUT will not have to fight again; you can easily go back inside the barrier to continue the last cutscene.

You see a cutscene showing the level 141 Insectoid Assassins and a level 111 Banshee Mistress. Shortly after, the Banshee Mistress attacks you. The Banshee Mistress will attack you as soon as the cutscene ends, so be sure to heal and wear good d'hide if you have it. If you die your equipment will spawn outside of the well.
Switch on the Protect from Range prayer slightly before the Banshee Mistress reaches half health, or you may be hit by up to 200 damage repeatedly from each of the four powerful Insectoid Assassins she calls to her aid. At some point, the Banshee Mistress will say 'Minions, aid me!'. This is your sign to turn on the Protect from Range prayer.
The mistress mainly uses melee, but she also casts Water Blast at a distance, so using the Protect from Melee prayer for the first half of the fight with good magic defence armour such as Dragonhide armour is suggested. She is relatively easy at the beginning, but she calls the assassins to help her with rapid ranged attacks when she has less than half health.
The Banshee Mistress will occasionally sound an acoustic attack, which may deal up to 130 damage and knock you down. Good food, preferably sharks or above, is suggested. It is still possible for a level 85 to kill the Banshee Mistress with monkfish, but sharks are recommended if you want to be safer. You can also bring a familiar here: A bronze minotaur or higher should do the trick.
If you die when fighting the mistress, you will be able to go back to your gravestone and retrieve your items. Your gravestone will spawn outside of the well, so getting to your lost items isn't such a big problem, however, you will have to kill another Mighty Banshee to obtain the Banshee Voice again.

A Dragon dagger(p++) is useful against the Banshee Mistress for its special attack. Although the room has few safe spots, if you have a high range or mage level, don't be put off ranging or maging as it is quite possible. You can use a Dragon halberd to kill her as well, using Protect from Magic at the same time to minimise damage.
After you kill the mistress, you see a short cutsene, and Catolax then speaks to you.
Return and report your victory to Sumona.
Congratulations! Quest Complete!
Rewards

- 1 Quest Point
- New Slayer Master in Pollnivneach
- Ability to earn slayer points that can be exchanged for slayer rewards
- Ability to construct slayer items
- Access to the Desert Slayer Dungeon and Tomb of Catolax
- 5,000
 experience
 - 2 extra spins on the Squeal of Fortune
Slayer rewards
After this quest, a player earns slayer reward points for each slayer assignment completed. More for assignments from higher level masters. Points add up until used, or until a task is changed. Slayer reward points may be exchanged for:
The ability to purchase:
- Slayer experience
- Slayer ring
- Runes used to cast Magic Dart (250 Death runes and 1000 Mind runes)
- Broad-tipped bolts
- Broad arrows
The ability to craft:
Miniquest: Desert Slayer Dungeon
After the quest, it is possible to navigate the Desert Slayer Dungeon, an extension to the Smoke dungeon, that is located below the area of the Mighty banshees.
Music unlocked
- Cool for Ali Cats - when approaching the well in Pollnivneach
- Under the Sand - after entering the sealed door in the desert tombs
- Desert Smoke - when descending into Pollnivneach well
- Slain to Waste - facing the Banshee Mistress
- Simian Scuffle - facing the Banshee Mistress
Required for completing
Completion of Smoking Kills is required for the following:
Trivia
- On the day of release, the spoilers said, "We're having to cut a deal with Sumona in order to access the rewards scroll. Please check back tomorrow."
- The title of the quest seems to come from the warning that "smoking cigarettes kills." However, the developer later posted on the forums that this was merely a pun and had no intentional meaning. This was also confirmed by Mod Emilee.
- When you spoke with or contacted your slayer master with your Enchanted gem during a task you were assigned prior to this update, the master would tell you "We seem to have lost your records in our recent reshuffle", and you are unable to determine your progress in your task.
- This was the second quest that had a required minimum Combat level (level 85) to complete (after Dream Mentor was released on 15 May 2007).
- Once you defeat the Banshee Mistress and view the cutscene, the slayer master whom you found in the tombs does not require a ghostspeak amulet to talk to (when he talks to you just after the defeat of the mistress). You still need a Ghostspeak amulet if you wish to communicate with him afterward.
- If you run into the sarcophagus while it is opening, you get stuck in the middle and are not able to move.
- The song title of "Cool for Ali Cats" may be a takeoff of the song "Cool for Cats" by Squeeze.
- There is a glitch where, when the player uses the Banshee voice on the barrier, you see a loading screen, then, with a glimpse of the Banshee mistress, the player is teleported back without fighting, and has to obtain another banshee voice. If this occurs, simply go up the well and climb back in.
- Upon the completion of this quest, one's Adventurer's Log will read: "Forget about smoking doing the killing, what about giant banshees? I've managed to make my way out of the smokey Slayer dungeon and gained a new Slayer master."