In Aid of the Myreque
| File:In Aid of the Myreque.png | |
| Release date | 22 March 2006 (Update) |
|---|---|
| Members only? | Yes |
| Quest series | Myreque |
| Official difficulty | Intermediate |
| Official length | Medium |
| Developer | Tytn H |
In Aid of the Myreque is the second quest in the Myreque quest series. After discovering the secret group called the Myreque, the player must now help them move to a new location in Burgh de Rott, where they would be closer to the heart of their vampyre oppressors.
Official description
| “ | After the attack on the Myreque by Vanstrom Klause and with the deaths of both Sani and Harold, Veliaf is counting on you to help. Now that the Myreque freedom fighters' base camp has been revealed, they'll need to move on and set up base somewhere else.
Veliaf has heard of a little known village south of Mort'ton, referred to as 'Burgh de Rott'. This could be just the place to set up operations to strike back against the evil of Lowerniel Vergidiyad Drakan and his Vampyric overlordship in Morytania. And who knows what other secrets about Morytania and its dark past will be revealed? |
” |
Walkthrough
| Start point: | ||
| Members only: | Yes | |
| Official difficulty: | ||
| Description: | None | |
| Length: | Long | |
| Requirements: |
| |
| Items required: |
For building the pub: For building the general store and bank:
For building the furnace:
For making the rod of Ivandis:
Recommended items:
| |
| Enemies to defeat: |
|

Drakan 101
To begin, go behind the pub in Canifis, and down the trapdoor. Go through the secret wall and squeeze past the stalagmite on the east side of the cave. Speak to Veliaf Hurtz inside and ask to join the organisation. Before joining the Myreque though, he needs you to be fully aware of their situation.
He recounts the story of the Seven Priestly Warriors of Saradomin, who fought the vampyric hordes of Lord Drakan a long time ago, defending Misthalin and the rest of the world from an invasion by Morytania forces. They managed to successfully repel Drakan, but feared another such inspired event, thus they blessed the River Salve creating a shield between the lands. The warriors' bodies are said to be buried under the Paterdomus temple, but Veliaf believes one of them, Ivandis Seergaze, who was renowned to somehow effortlessly control Drakan's minions, is buried somewhere inside Morytania.
Shifting Base
Items needed: Atleast 1 piece of food (more if you don't have sufficient druid pouch charges), a charged druid pouch, 5 buckets, pickaxe, spade and 7 - 9 free inventory spaces.
Veliaf suggests that Ivandis may have had indirect aid from the gods in the form of a weapon which can damage Vampyres and asks you to keep an eye open for said weapon. Moving on to your job, he tells you that the faction wants to move its base of operations to Burgh de Rott, a ghastly town inhabited by the refugees from the Sanguinesti region, the home of the vampyres, and since Vanstrom Klause discovered their hideout in the previous quest. Veliaf also requests you to help build back the town, using the help of the escapees.
Travel to Mort'ton any way you can. The quickest way is to use the trapdoor behind the pub in Canifis, exit through the large wooden doors, and use the swamp boat in Mort Myre, which will bring you right to Mort'ton. If you do not bring a druid pouch, your food is at risk from ghasts.
Once in Mort'ton, head south and over the bridge. As you try to enter Burgh de Rott through the gate, a tomato-throwing villager named Florin denies you entry. Talk to him and he'll complain that protecting themselves from the vampyres and the ghasts has left them tired and hungry, thinking you are a vampyre in disguise, come to steal their food and blood. He cannot be convinced to trust you in any way, so you will have to look around. There is a chest just outside the gate - examining it yields the message that it was once stocked with food. Put any piece of food in and the townsfolk will let you enter, accepting your offering.
Myreque HQ

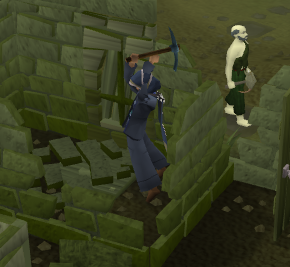
Talk to any villager about setting up shop in town, and they direct you to the basement of the dilapidated pub, just south of the gate. Talk to Razvan near the pub, who tells you that the inn basement could be operable if you cleared out the rubble in it. Climb over the small wall in the pub to get to the trapdoor, and then mine the rubble there to clear it, by using a pickaxe on it.
Climb down the trapdoor and enter the basement. The entire room is filled with piles of rubble; you must mine each heap and use a spade on what is left to fill your buckets. If you forgot a bucket, there is one by the water pump at the town entrance. There are 15 piles of rubble to remove in total and you may find that you need to make several trips.

One bucket holds 3 shovels of rubble, but you may also get broken glass, rocks, and various nails (bronze to mithril). You also find a plaster fragment that describes the Seven Warriors, one holding silvthrill rod and the Guthix balance potion that was used to fight some dark creatures. You also uncover a dusty scroll, with a letter on it. It is addressed to Lantania and was written by Sialathin, both citizens of Hallowvale preparing an escape. Once all piles are cleared, your attention will be directed to a plaque on the wall. Read it - it mentions a Queen Efaritay and her hollowed children. Keep the nails, since you'll need them later, and discard the rest. When the buckets are filled, you can empty them on the pile of rubble upstairs, next to the pub.
After clearing the basement, go and talk to Razvan again. He accepts your help to patch up the town, and mentions that you might want to start with the town's general store.
Basic Amenities
Items needed: 11 planks, 44 nails, 10 bronze hatchets, 2 Steel bars , 10 raw mackerels or 10 snails (depends on what the store owner wants), 4 tinderboxes and 1 swamp paste.

Speak with Aurel in the general store to the east and he tells you that you first need to repair the roof and the walls of the shop. If you have completed Shades of Mort'ton, you can go to Mort'ton shop and buy a few planks and a hammer. There is a hammer spawn upstairs of the first house when you enter the town too.
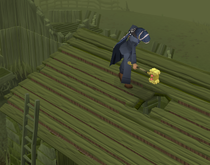
You'll need six normal planks to repair the shop, as well as some nails and a hammer. Climb the ladder outside the store, and repair the roof by using a plank on the damaged part; repeat on the damaged wall next to the store door. When you've repaired the shop, talk to Aurel again - he wants the store stocked before he can open it. He gives you a crate in which to put the resources he requires; note that all items must be un-noted to be put in the crate. Aurel requires:
- 10 bronze hatchets
- 3 tinderboxes
- 10 raw mackerel or raw snails of any kind - Aurel lets you know which ones to collect
The snails can be found near the north-western entrance to Mort'ton and there are big net fishing spots south of the Burgh de Rott bank. If you didn't bring these with you, you'll have to go to a bank now - the Mort'ton general store sells tinderboxes if you need any. Once you're done, go back to Aurel and return the stocked crate. The town general store is now up for business. He suggests you help fix the bank, since it's been broken for a long time.
Incense

Talk to Cornelius near the bank to the south. He asks you to repair it. You need 5 planks and 1 piece of swamp paste, as well as 20 nails - you can buy the planks and paste at Razmire Builders' Merchants if you need them. First, repair the teller window, and then the wall at the back of the bank, and speak to Cornelius again. When he tells you that the bank requires a manager, ask him if he would fancy the job, which he gladly accepts. From this point, the bank is available even if you don't complete the quest.
Talk to anyone in the village and they'll request you to fix the furnace. Take 2 steel bars and 1 coal and head to the furnace in the south-east side of the town. Examining the broken furnace leads you to the conclusion that it is made of steel, so use the steel bars on it, fuelling it with the coal and finally, use your tinderbox to light the furnace.
A cutscene then plays, showing a man named Gadderanks and two bodyguards conversing with Vanstrom Klause about blood tithes and how they are becoming insufficient for the vampyres. Apparently, he cannot reach the required quota as Canifis is already paying more than they originally agreed to and Mort'ton is just full of zombies. At that point, Vanstrom smells the smoke from the furnace you just lit. The vampyres have discovered the location of Burgh de Rott - the last free settlement in Morytania! He threatens Gadderanks, saying that a new source for tithes has appeared and that he must meet up with his blood quota, before flying off.
Last Words

After the cut scene, you will need to prepare for a fight with your silver sickle (b) or another silver weapon like the Silverlight (or Darklight), Wolfbane dagger or the blessed hatchet from Animal Magnetism, as they all have higher attack bonuses than the sickle.

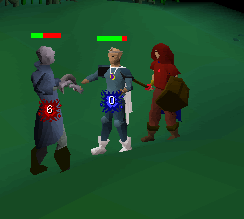
Go to the general store and speak with Gadderanks who has set up shop in the store, and is about to have Wiskit tithed. Talk to the latter and Gadderanks will try to kill you for interfering! He is level 35 and attacks by whacking you with his warhammer; defeat him and his lackeys. Mid-way through the battle, Veliaf will appear to help you.
After gaining victory over them, you find that Gadderanks still has some breath in him; talk to him. He will tell you of the vampyres' weaknesses, referring to the Guthix balance potion that you read about in the fragment, and asks you to find his family, the reason why he had been supporting the vampyres, then finally dies. You will get his hammer from Aurel, which is similar to a granite maul but stronger against shades. Talk to Veliaf and he will tell you to meet him back at the hideout in The Hollows.
The Vanguard

Go back to Veliaf at the hideout below the Canifis pub and talk to him again. He will have you talk to Radigad and Polmafi to have them head to the Burgh de Rott hideout, but wants you to escort Ivan Strom to the Paterdomus temple because the mission is becoming too dangerous for the young, aspiring priest. Use the Canifis bank or the now-accessible Burgh de Rott bank to stock up for the upcoming fight if you are not prepared already. Followers such as summoning familiars and pets are not allowed during this portion of the quest.

Bring armour and a silver weapon. You may also take some armour, food, and weapon for Ivan, but remember that you will not get any of them back. "Use" a steel chainbody, steel platelegs, steel helm and a silver sickle on Ivan, who will accept your gifts and wear it under his robes. You may also provide food to him before you start; Ivan only likes "Cooked snails, salmon, Cooked slimy eel or stew" and he can carry up to 15 food items. Once the trip is underway, you cannot give Ivan any additional food or armour.
Speak to Ivan, who has already been informed by Veliaf and is ready to go. You get to choose between two routes, long and short, through Mort Myre swamp. You will be attacked on both routes. On the short route, you will fight 2 level 75 juvinates, while on the long route you will be attacked by four level 50 ones. The short route is probably easier than the long route because the juvinates do not attack Ivan. For the most part, Ivan is fairly safe, so just focus on killing the juvinates. When almost dead, they turn into mist and disappear.
Priestly Warrior
Items needed: A piece of Soft clay, a silver bar, a mithril bar, a cut sapphire, cosmic rune, water rune (runes unnecessary if using an Enchant Level 1 Jewellery tablet), rope.

Once you escort Ivan to safety, you will part ways in front of the entrance to the temple. Go down the ladder into the temple and talk to Drezel. You need to talk about Ivandis and his enchanted rod, but you will make him upset by asking for proof of the burial. He, as a devout follower of Saradomin, is convinced that Ivandis Seergaze was buried with his six companions and believes Veliaf to be erring on the matter. Work on his sympathy for Morytania victims to allow you to investigate. If you are successful, you will get the temple library key from him.

The secret library is under the same room as Drezel. There is a keyhole in the east wall, which will open a trapdoor in the floor. Go to the library and get the ancient tome, a battered tome and a leather book. Study them all carefully.
The leather book is called Modern Day Morytania and describes Morytania geographically, mentioning Canifis, the Castle of the Northern Lords, Port Phasmatys, Mort Myre Swamp, The Hollows, the Mort Ridge Mines, Mort'ton, the Haunted Woods, Burgh de Rott, even Meiyerditch, Darkmeyer and finally Castle Drakan. The battered tome, named Histories of the Hallowland, describes the history of Hallowland, the former name for Morytania. The one you want is the ancient tome, called The Sleeping Seven, which speaks of the tomb of Ivandis, along with his possessions.
Go to the basement south of the bar in Canifis, and go through the secret wall. Near the wall, on the east side wall of the long cavern, there should be some boarded up area. Use a hammer on it to break the boards up and reveal a secret entrance. You must read the three books or you wont be able to break the board. Go in the cave to find Ivandis' final resting place.
The Rod of Ivandis

Use a piece soft clay on the top of the tomb to get a rod clay mould. Go to a furnace (the nearest ones are in Zanaris, Edgeville if you have gotten Varrock Armour 1, Burgh de Rott and Port Phasmatys) and use a silver bar, mithril bar, and sapphire on it to make a Silvthrill rod. Enchant it using Enchant Level 1 Jewellery.
Take the enchanted Silvthrill rod and a rope back to Paterdomus. Inside the temple, use the rod with the well at the center to create the Rod of Ivandis. Be sure not to use the Rod of Ivandis or you will need to make another, as Veliaf will only accept one that is fully charged. Take the Rod of Ivandis to the cellar of the Burgh de Rott pub, and give it to Veliaf.
Congratulations, quest complete!
Reward

- 2 Quest Points
- 2,000
 Experience
 - 2,000
 Experience
 - 2,000
 Experience
 - 2,000
 Experience
 - Access to Burgh de Rott
- You can now play Temple Trekking activity.
- Ability to use a Gadderhammer, which is strong against shades.
- Ability to make and use Rod of Ivandis and Guthix balance potion to fight and defeat Vampyre Juveniles and Juvinates.
- Talk to Historian Minas to receive 5 kudos in the Varrock Museum.
- 2 extra spins on the Squeal of Fortune
Transcript
Music unlocked
- Distant Land - when you first enter Burgh De Rott
- Fangs For the Memory - when you are ambushed while escorting Ivan
Required for completing
Completion of In Aid of the Myreque is required for the following:
Trivia
- The name "Burgh de Rott" is a pastiche of several European languages, and seems to mean "City of Rot". The name is also a reference to "Rotten Boroughs" in English politics.
- The names of all the people in Burgh de Rott are Romanian names.
- In the fight with Gadderranks, Veliaf will attack the Juvinates without any weapon equipped. Despite this, he still deals damage and use a weapon animation.
- When you complete the quest, the Adventurer's Log will read: "Burgh de Rott almost resembles a functioning town and, with the silvthrill rod, the Myreque may even have a chance."
Template:MyrequeQuests nl:In Aid of the Myreque fi:In Aid of the Myreque